|
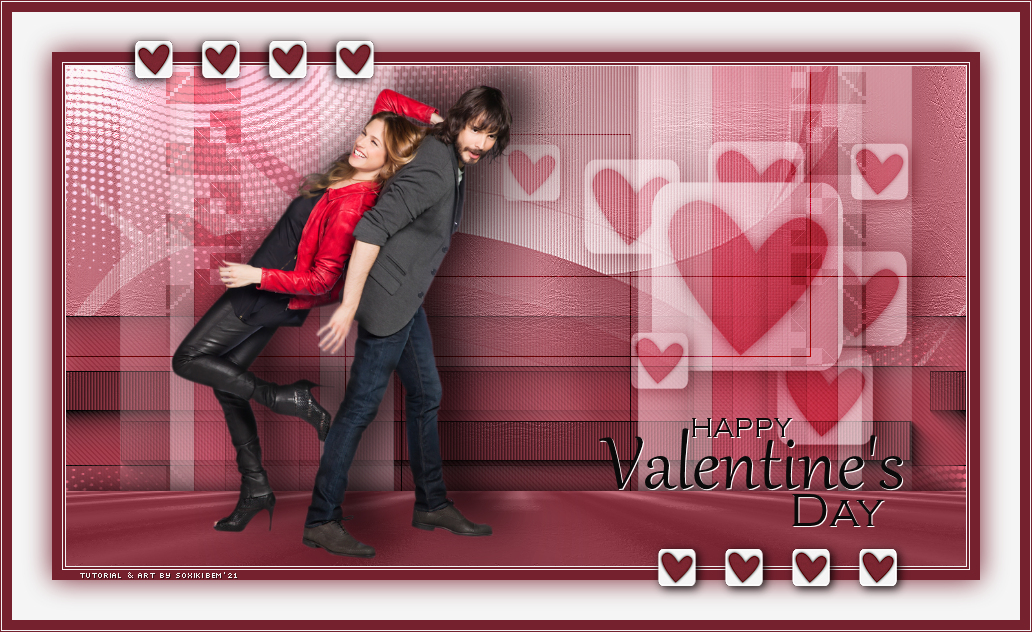
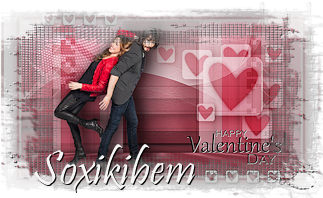
Tutorial criado para o Desafio 05 SimPsp Este desafio foi proposto por Marcinha com o Tema: Valentine"s
TRADUÇÕES:
Obrigada aos nossos tradutores!
MATERIAL 1 Tube Principal à sua escolha Decor2ValentineBySoxikibem linesBySoxikibem tituloBySoxikibem NarahsMasks_1549 NarahsMasks_1569 NarahsMasks_1537 DecorFValentineBySoxikibem valentines.PspScript (Salvar na pasta Scripts-Restricted do seu Psp)
Pluguins AAA Frames Funhouse Mura's Meister
Tutorial
1 - Abrir o material no PSP, duplique e feche os originais. Escolher duas para trabalhar, aqui usei as cores: Foreground: #75222e Background: #f5f5f5
2 - Abra uma imagem transparente de 900x500px. Pintar com a cor do foreground.
3 - Layers > New Raster Layer. Pintar com a cor do Background. Layers > New Mask Layer > From Image: NarahsMasks_1549. Effects > Edge Effects > Enhance. Effects > Art Media Effects > Brush Strokes.
Layers > Merge > Merge Group.
4 - Image > Free Rotate: Right, 90, all layers desmarcado. Effects > Image Effects > Seamless Tiling: Stutter diagonal.
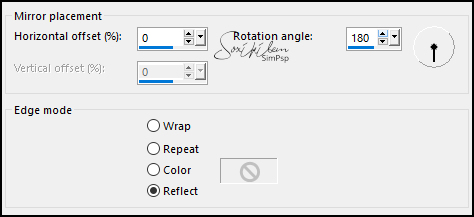
5 - Effects > Reflection Effects > Rotating Mirror.
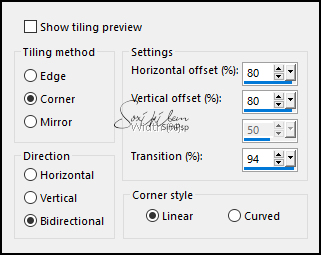
6 - Effects > Image Effects > Seamless Tiling: Side by Side.
Layers > Properties > Blend Mode: Luminence (L). Layers > Merge > Merge All (Flatten).
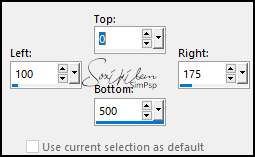
7 - Ative a Selection Tool > Custom Selection
Layers > Promote Selection to Layer. Selections > Select None.
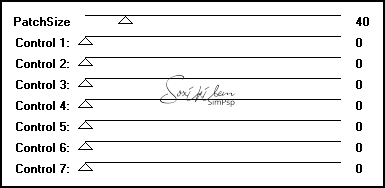
8 - Effects > Plugin Funhouse > PatchWork
Layers > Properties > Blend Mode: Multiply. Layers > Duplicate. Image > Mirror > Mirror Horizontal. Layers > Merge > Merge Down.
9 - Layers > New Raster Layer. Pintar com a cor do Background. Layers > New Mask Layer > From Image: NarahsMasks_1569. Layers > Merge > Merge Group. Layers > Properties > Blend Mode: Overlay.
10 - Layers > New Raster Layer. Pintar com a cor do Background. Layers > New Mask Layer > From Image: NarahsMasks_1537. Effects > Edge Effects > Enhance. Layers > Merge > Merge Group. Layers > Properties > Blend Mode: Screen. Image > Mirror > Mirror Horizontal.
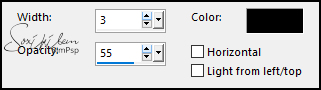
11 - Effects > Texture Effects > Blinds. Com a cor preta.
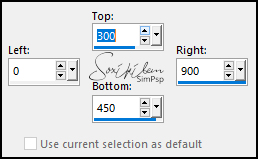
12 - Ative a Layer Background. Selection Tool > Custom Selection.
Layers > Promote Selection To Layer. Layers > Arrange > Bring To Top. Mantenha a seleção.
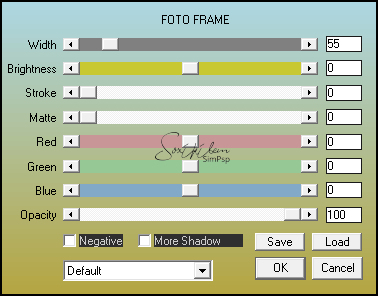
13 - Effects > Plugin AAA Frames > Foto Frame.
14 - Selections > Modify > Contract: 55. Effects > Texture Effects > Blinds.
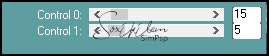
15 - Selections > Invert. Effects > Plugin Carolaine and Sensibility > CS-DLines.
Selections > Select None.
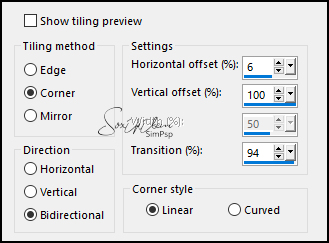
16 - Effects > Image Effects > Seamless Tiling.
17 - Layers > Duplicate. Image > Free Rotate: Right, 90, all layers desmarcado. Effects > Plugin Italian Editors Effect > Effetto Fantasma: 21, 72. Pick Tool: Position X 572, Position Y -200. Layers > Properties > Blend Mode: Screen.
18 - Layers > Duplicate. Image > Mirror > Mirror Horizontal.
19 - Edit > Copy no linesBySoxikibem. Edit > Paste a New Layer. Layers > Properties > Blend Mode: Overlay.
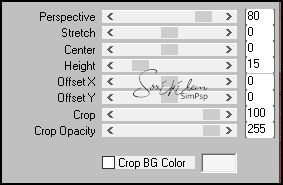
20 - Ative a layer Background. Layers > Duplicate. Layers > Arrange > Bring to Top. Effects > Plugin Mura's Meister > Perspective Tiling.
Effects > 3D Effects > Drop Shadow: 0, 0, 100, 40, cor preta.
21 - Edit > Copy no Decor2ValentineBySoxikibem. Edit > paste a New Layer. Pick Tool: Position x 423, Position Y 52. Layers > Properties > Blend Mode: Soft Light.
22 - Edit > Copy no seu tube. Edit > Paste a New Layer. Posicione à esquerda Effects > 3D Effects > Drop Shadow como preferir.
23 - Edit > Copy no tituloBySoxikibem. Edit > Paste a new Layer. Image > Negative Image. Pick Tool: Position X 533, Position Y 352.
Para as bordas você tem duas opções: o item 24 usando o Script ou o item 25 para fazer manualmente.
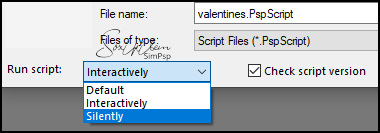
24 - File > Script > Run: valentines.PspScript. Escolha a opção Silently se estiver usando as cores do tutorial. Se estiver usando outras cores escolha a opção Interactively.
25 - Image > Add Borders: 1px cor background 2px cor foreground 1px cor background 10px cor foreground 40px cor background Selections > Select All. Selections > Modify > Contract: 40. Effects > 3D Effects > Drop Shadow: 0, 0, 100, 40, cor foreground. Selections > Select None. 40px cor background 1px cor background 1px cor foreground
26 - Edit > Copy no DecorFValentineBySoxikibem. Edit > Paste a New Layer.
27 - Aplicar sua marca d'água ou assinatura. File > Export > JPEG Optimizer.
CREDITOS Tube by L&B Tubes - Masks by Narah
Sinta-se à vontade para enviar suas versões. Terei todo o prazer em publicá-las em nosso site.
|