|
Tutorial by Ana Maria
English Translation by Soxikibem
Original Tutorial
MATERIAL Main Tube of your choice Misted Landscape of your choice Word Art
PLUGINS
Mehdi > Wavy Lab 1.1 WM Stylize > Square Blur > importado pelo Unlimited 2.0
ALF's Power Grad > Abs Linear Grads.
Flaming Pear > Flexify 2. PSP effects
TUTORIAL
1- Duplicate the materials and close the originals. Open a 900 x 500 px transparent image. Choose 4 colors that match the material to be used: Foreground #9b8362 Background #ede5d5 Cor 3: #6b5736 Cor 4: #f2eba5
Effects > Plugins Mehdi > Wavy Lab 1.1
2-
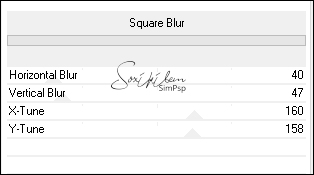
Effects > Plugins Unlimited 2.0 > VM Stylize > Square Blur.
Layers > Layer > Duplicate.
Adjust > Sharpness > Sharpen More.
3-
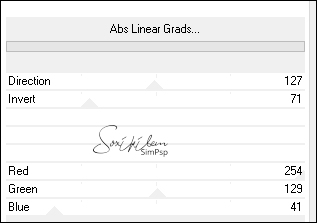
Effects > ALF's Power Grad > Abs Linear Grads.
4- Layers > New Mask Layer > From image: mask_01
Layers > Layer > Merge Group. Repeat: Layers > New Mask Layer > From image: mask_01 Layers > Layer > Merge Group.
5-
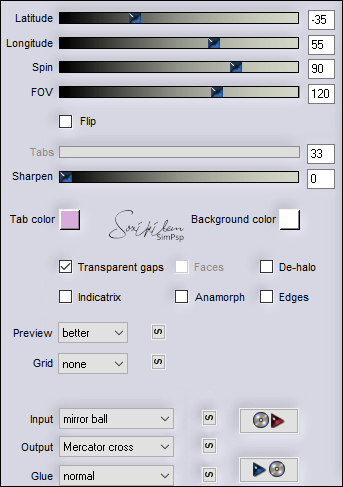
Effects/ Flaming Pear> Flexify 2.
6-
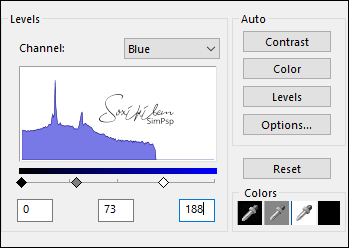
Adjust > Brightness and Contraste > Levels.
7- Activate the raster layer 1 .
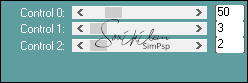
Effects > Plugins > Carolaine And Sensibility > CS-LDots.
8-
Layers > Merge > Merge visible
Layers > Duplicate.
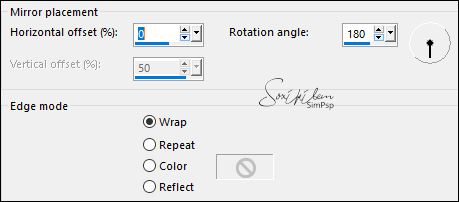
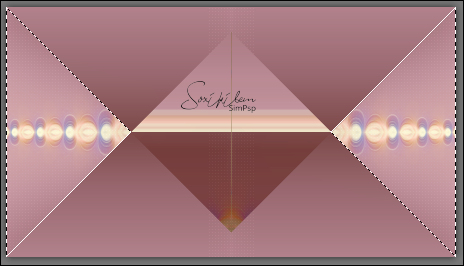
Effects > Plugins > Simple > Pizza Slice Mirror. Effects > Reflections Effects > Rotating Mirror.
9-
Activate the Freechand Selection tool and select as in the
print.
Selections > Invert. Press the Delete key on the keyboard. Selections > Select None. Effects > 3D Effects > Drop Shadow : 1, 1, 100, 30, color 3.
Effects > 3D Effects > Drop Shadow > (-1,-1,100,30)
10- Activate Layer Merged .
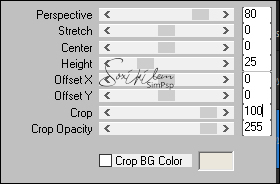
Layers > Duplicate. Efeects > Plugins > MuRa’s Meister > Perspective Tiling.
Effects > 3D Effects > Drop Shadow > 0,0,100,30, color #000000
11-
Enable Layer Merged. Edit > Copy in the misted
Edit > Paste As New Layer and position. Adjust > Sharpens > Sharpen.
12 -Enable Layer Copy of Merged.
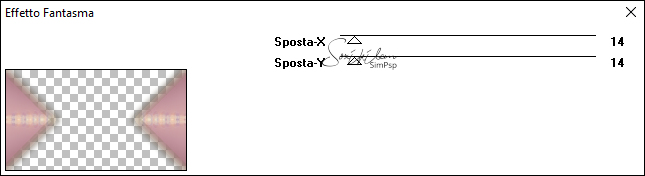
Effectios > Plugins It@lian Editors Effect > Effetto
Fantasma.
Effects > Edge Effect> Enhance.
13-
Layers > Layer > Merge All.
Selections > Select all.
Selections > Modify
> Contract > 20 px.
Selections > Modify
> Select selection borders.
14-
Effects > Plugins Tramages > Glass.
Effects > 3D Effects > Drop Shadow > 0,0,100,30, color #000000
Selections > Select > None.
15-
Selections > Select all.
Selections > Modify
> Contract > 20 px.
Selections > Select > Invert. Adjust > Gaussian Blur > Radius > 10,00. Selections > Select None.
Image > Add Bordes > 1px with a color that matches the
work.
16-
Selections > Select All.
Image > Add Bordes > 20 px with a color that matches
the work.
Selections > Select> Invert. Effects > Plugins > Tramages > Glass.
Selections > Select > None.
Image > Add Bordes > 1px with a color that matches the
work.
17-
Edit > Copy in the Main Tube. Edit > Past New layer Position .Effects > 3D Effects > Drop Shadow: as you wish.
18-
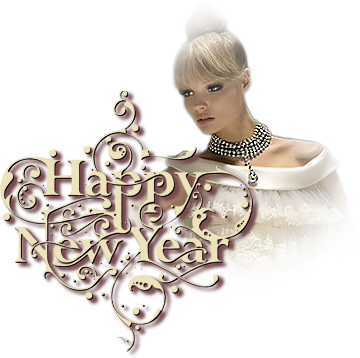
Edit > Copy in the word art WO0012_by_Isa. Edit > Past New layer Position and colorize to your liking .Effects > 3D Effects > Drop Shadow: as you wish.
19- Apply your watermark or signature. File > Export > JPEG Optimizer.
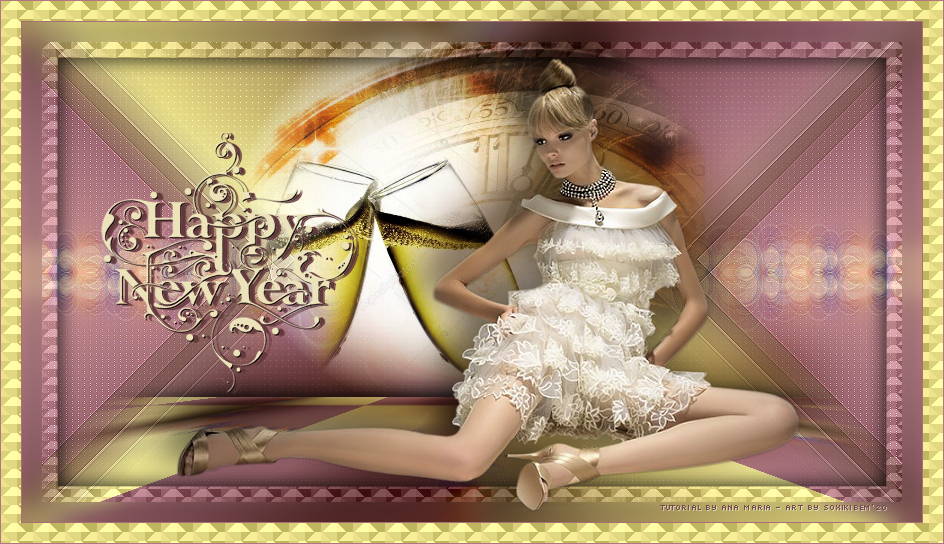
Credits Tubed principal by L&B Tubes - Misted by Soxikibem Título by Isa
Feel free to submit your versions. I will be happy to publish them on our website.   
|