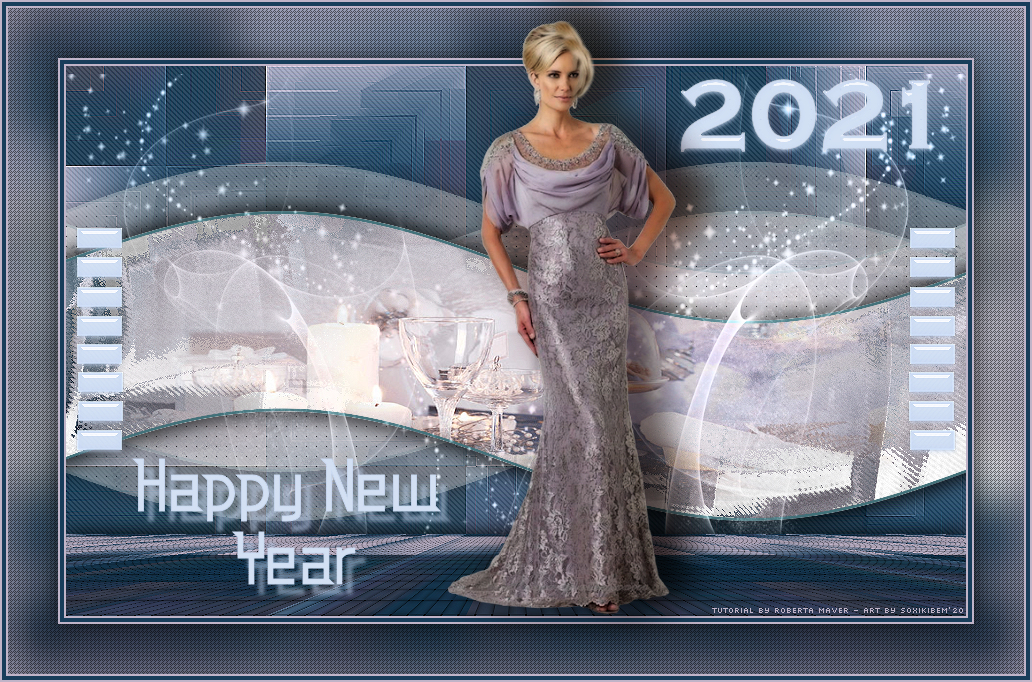
Tutorial by Roberta Maver
English Translation by Soxikibem
Original Tutorial
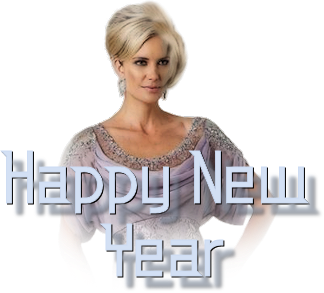
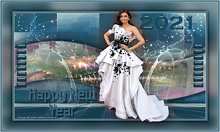
MATERIAL 1 Main Tube of your choice 1 Misted Landscape of your choice Decor1_by Roberta Decor_2_by Roberta Titulo_HappyNewYear_by Roberta
PLUGINS Carolaine and Sensibility DBS FLUX Mehdi MuRa's Meister VM Extravaganza
TUTORIAL 1 - Open the material on the PSP, duplicate and close the original. Choose two colors to work with. Foreground #5d4d58 Background #c0b4c8 Extra Color: #183d5a 2 - Open a 900 x 550 px transparent image.
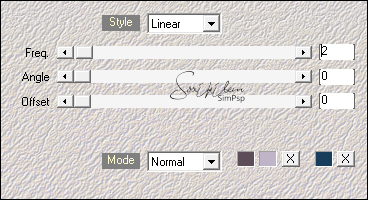
3 - Effects > Plugins Mehdi > Wavy Lab.
4- Effects > Plugins > DBS Flux > Linear Transmissíon
Effects > Plugins > DBS Flux > Linear Transmissíon
Effects > Edge Effects > Enhance.
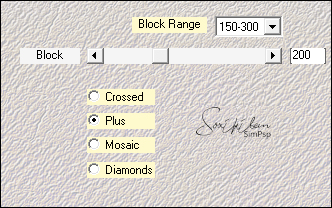
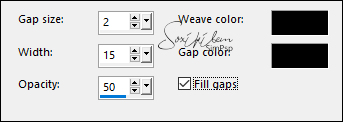
5- Effects > Plugins Mehdi > Sorting Tiles.
Layers > Duplicate.
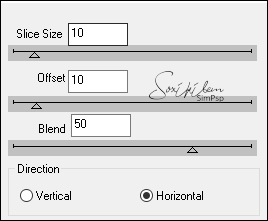
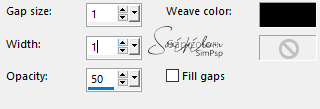
6- Effects > Texture Effects > Weave.
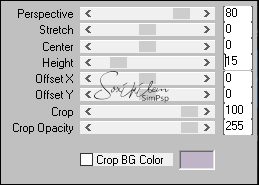
7- Effects > Plugins > Murra's Meister > Perspective Tiling
Adjust > Sharpness > Sharpen
8- Effects > 3D Effects > Drop Shadow: 0, 0, 100, 30, black color.
9- Enable Layer Raster 1 . Effects > Edge Effects > Enhance.
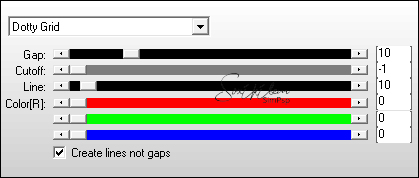
10- Effects > Plugins Carolaine and Sensibility > CS-DLines.
11- With Layer Raster 1 activated select as the Selection Tool as indicated in the print.
Selections > Promote Selection to Layer. Selections > Select None.
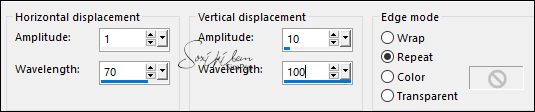
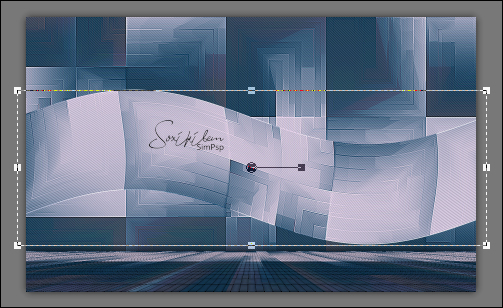
12- Effects > Distortion Effects > Wave.
With the pick tool pull a little to the sides as shown.
13- Plugins VM Extravaganza - Plastic Surgery ( Twice)
14- Selections > Select All.Selections > Float. Selections > Defloat.
15-
Edit> Copy in the misted landscape.
Edit > Paste Into Selection. Adjust > Sharpness > Sharpen 16 - Selection > modify > select selection bords
Still selected
17 - Layers > New Raster Layer Paint the Selection with the extra color Layer > Merge > Merge Down. Selections > Select None. Rename effect 1
18- Layers > Duplicate. Rename effect 2 Image > Mirror > Mirror Horizontal.
19 - Effects > Plugin > Filter Unlimetd 2.0 > Bkg Designer sf 10I > 4 Way Average Layers > Duplicate. Layer > Merge > Merge Down.
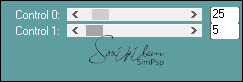
20- Effects > Plugin > AP (Lines) > SilverLining
Layers > Arrange > Move Down
21- (Layer Efeito 2) Effects > 3D Effects > Drop Shadow: 0, 0, 70, 30, black color. (1 time)
22- (Layer Efeito1) Effects > 3D Effects > Drop Shadow: 0, 0, 70, 30, black color. (2 times)
Activate the top raster (Copy of Raster 1)
23 - Edit > Copy in the decor1_happynewyear_byroberta. Edit > Paste a New Layer.
24- Layers > Properties > General > Blend Mode: Luminance L
25- Image > Add Borders: 2px Background color 4 px extra color 2px Background color Edit > Copy
26- Selections > Select All. Image > Add Borders: 50 px with any color. Selections > Invert. Edit > Paste Into Selection.
27- Adjust > Blur > Gaussian Blur: 20.
28- Effects > Texture Effects > Weave.
Selections > Invert.
28- Effects > 3D Effects > Drop Shadow: 0, 0, 70, 30, black color. ( 2 Times) Selections > Select None
30- Image > Add Borders: 2px Background color 4 px extra color 2px Background color
31 - Edit > Copy in the decor2_2021_byroberta. Edit > Paste a New Layer. P ick Tool: Position X 675, Position Y 75
32- Edit > Copy in the decor3_ decoração_byroberta. Edit > Paste a New Layer. Adjust > Sharpness > Sharpen.
33- Edit > Copy in the titulo_HappyNewYear_byRoberta. Edit > Paste a New Layer. Pick Tool: Position X 132, Position Y 458 34- Edit > Copy in the Main Tube. Edit > Paste a New Layer. Resize if necessary. Adjust > Sharpness > Sharpen. Position to your choice. Effects> 3D Effect> Drop Shadow as you prefer. 35- If desired, resize your work. Apply your watermark or signature. File > Export > JPEG Optimizer. Credits
Tube by Nena Silva - Misted by Soxikibem
Other materials provided by Roberta Maver
Feel free to send your versions. I will be happy to publish them on our website.   
|