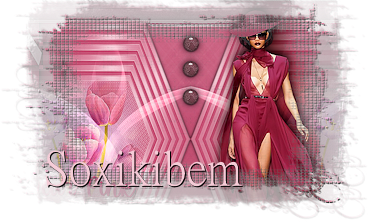
  Tutorial By Roberta Maver English Translation by Soxikibem Original Tutorial
Material: 1 Main tube of your choice. 1 Misted of your choice. Masks: MaskSuiza_0009- Narah_mask_0789 Decor_wear_pink_ByRobertaMaver Decor_PDS_StB- ribbon1 titulo_wear_pink_ByRobertaMaver 
Plugins: AAA Frames Alien Skin Eye Candy 5 >Impact MuRa's Meister > Perspective Tiling
Tutorial: 1 - Open the material on the PSP, duplicate and close the original.Choose two colors to work with. Foreground: #ba375fBackground: #f5ccd7 Extra color: #ffffff
2 - Open a transparent 900x600px image.Paint with the Foreground color.
3- Layers > New Raster Layer. Paint with the background color Layers > New Mask Layer > From Image: MaskSuiza_0009. Layers > Merge > Merge Group. Layers > Duplicate. Layers > Merge > Merge Down.
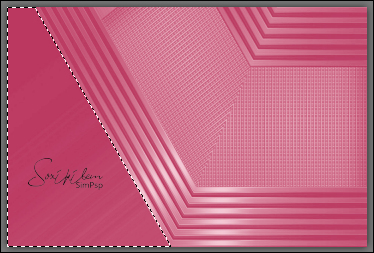
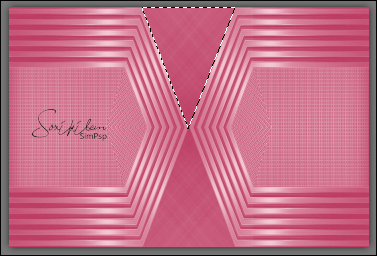
4 - Activate the Raster 1 layer. With the Freehand Tool select as in the print below.
Selections > Promote Selection to Layer.
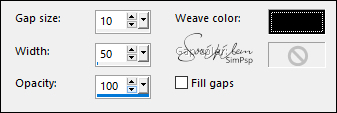
5 - Effects >Texture> Weave.
Selections > Select None.
6-Effects > 3D Effect > Drop Shadow: 0, 0, 60, 25: black color
7 - Layers > Duplicate Image > Mirror > Mirror horizontal Layers > Merge > Merge Down. Close the visibility of the Promoted Selection layer for better visualization.
8- Activate the top layer.
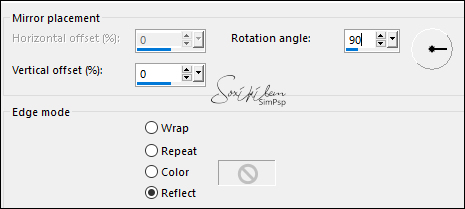
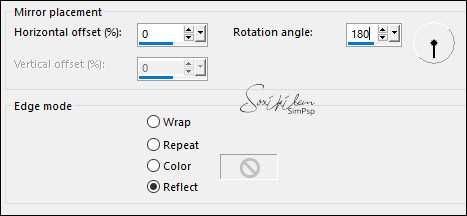
9- Effects > Reflections Effects > Rotating Mirror.
With the pick tool pull the central knot slightly to the right as shown in the print, the Position X setting being +or- (289).
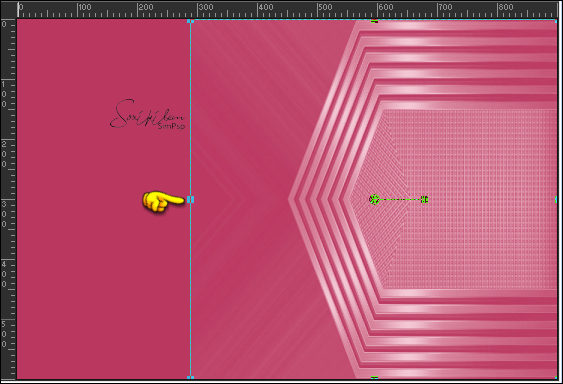
10 - Layers > Duplicate Image > Mirror > Mirror horizontal Getting the positions as indicated in the print :
Layers > Merge > Merge Down.
11- Layers > New Raster Layer.With the Freehand Tool select as in the print below.
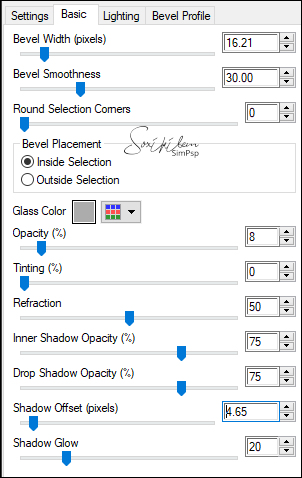
12- Effects >Alien Skin Eye Candy 5 >Impact> Glass:
Selections > Select None.
13- Layers > Duplicate Image > Mirror > Mirror Vertical Layers > Merge > Merge Down
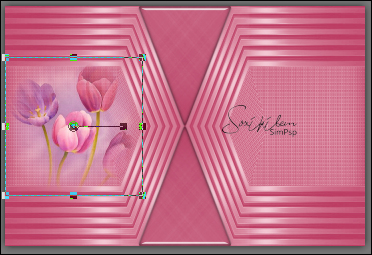
14- Edit > Copy on the Tube misted.Edit > Paste New Layer. Position to the left side. Rezise if necessary .
15- Layers > Duplicate Image > Mirror > Mirror horizontal Layers > Merge > Merge Down. Adjust > Sharpness > Sharpen.
16- Layers > New Raster Layer. Paint with Foreground color .Effects > Texture > Weave.
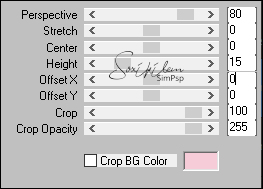
17 - Plugins > Mura's Meister > Perspective Tiling.
With the Magic Wand click on the transparent part with the Feather set to 15
Press the Delete key on the keyboard 4 times Selections > Select None.
18- Effects > 3D Effect > Drop Shadow: 0, 0, 80, 30: black color.
19- Layers > New Raster Layer. Paint with white color.
20 - Layers > New Mask Layer > From Image: Narah_mask_0789 . Layers > Merge > Merge Group.
21- Effects > Reflections Effects > Rotatin Mirror.
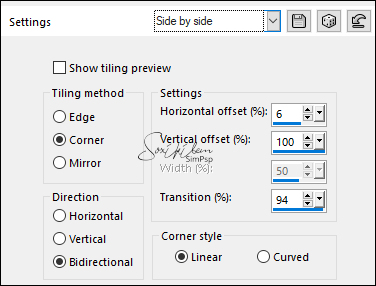
22 - Effects > Image Effects > Seamless Tiling: Side by Side.
Layers > Properties > General > Blend Mode: Luminance (L).
23- Edit > Copy on the Deco_Wear_PinkEdit > Paste a New Layer. With the Pick Tool, position: Position X 409, Position Y 13 .Activate the visibility of the Promoted layer Layers > Merge > Merge Visible Edit > Copy.
24- Image > Add Borders > 2px, Background color Image > Add Borders > 2px, Foreground color Image > Add Borders > 2px, Background color
25- Selections > Select All. Image > Add Borders > 50px with any color. Selections > Invert. Edit > Paste Into Selection.
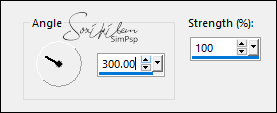
26- Adjust > Blur > Motion Blur. (2 times)
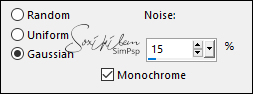
27- Adjust > Add/Remove Noise > Add Noise.
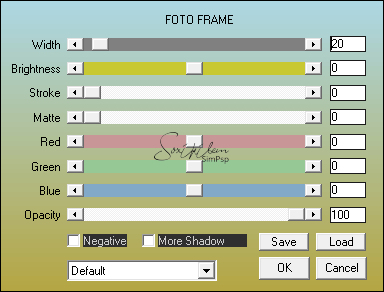
28- Effects > Plugin AAA Frames > Foto Frame.
Selections > Invert. 29- Effects > 3D Effect > Drop Shadow: 0, 0, 80, 30, black color Selections > Select None.
30- Edit > Copy on the Main tube.Edit > Paste as New Layer. Resize the tube as you prefer .Adjust > Sharpness > Sharpen. Position right. Effects > 3D Effect > Drop Shadow as you prefer.
31- Edit > Copy on the titulo_Wear_Pink_byRoberta.Edit > Paste as New Layer. Position as you prefer.
32- Edit > Copy on the PDS_StB- ribbon1.Edit > Paste as New Layer. Image > Resize: 45% - Rezise all layers unchecked. With the Pick Tool, position: Position X 8, Position Y 5 .Adjust > Sharpness > Sharpen. Effects > 3D Effect > Drop Shadow: 0, 0, 60, 25: black color.
33- Image > Add Borders: 1px, black color.
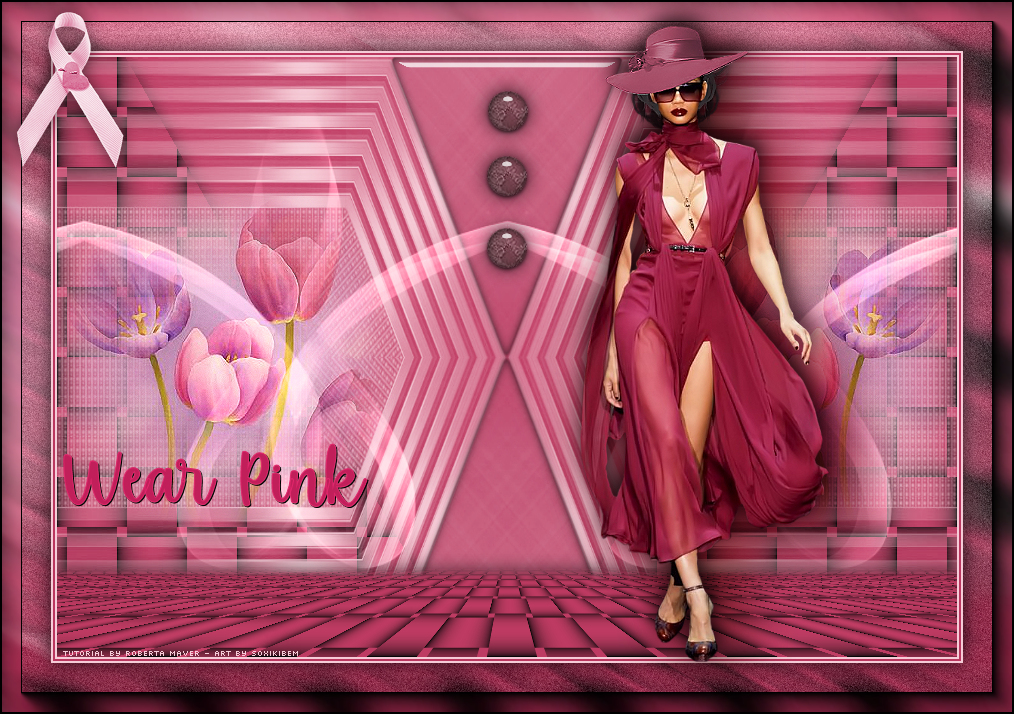
34 - If you wish, resize your work. Apply your watermark or signature. File> Export> JPEG Optimizer.
CREDITS
Tutorial Wear Pink by Roberta Maver - Art by Soxikibem Tube by Ana Ridzi - Misted by Isa Masksuiza--0009 - Narah_mask_0789 PDS_StB- ribbon1 - Deco_Wear_Pink Deco_Wear_Pink_2
Tutorial by Roberta
Maver
Feel free to submit your versions. I will be happy to publish them on our website.
|