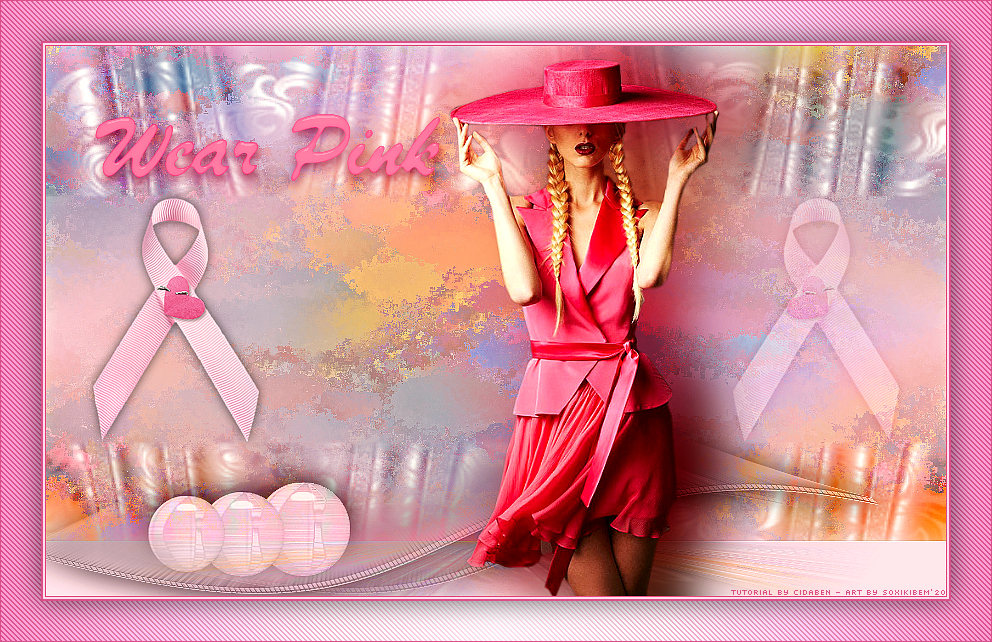
  MATERIAL 1 Main Tube of your choice SuizaBella_Ref_AG-001361 Mask: masque_bande_tissu_chatoyant Dercor: PDS_StB_ribbon1
Decor: decobellefemme
PLUGINS Brush Strokes Mura's Meister Simple AAA Filters Carolaine and Sensibility
TUTORIAL
1 - Open the material on the
PSP, duplicate and close the original.
Foreground #dd4e85 Background #ffe2ef
2 - Open a transparent 900 X 550px image. Selection > Select All.
3 - Edit > Copy on the misted SuizaBella_Ref_AG-001361. Edit > Paste Into Selection. Select None.
4 - Effects > Image Effects > Seamless Tiling > Default
5 - Layers > New Raster Layer. Paint with the background color
6 - Layers > Arrange > Move Down. Layers > Merge > Merge Visible.
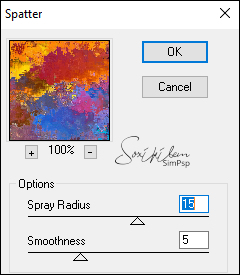
7 - Effects > Plugins > Brush Strokes > Spatter
8 - Adjust > Sharpness > Sharpen.
9 - Layers > New Raster Layer. Paint with the color White
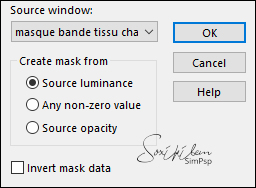
10 - Layer > New Mask Layer > From Image: masque_bande_tissu_chatoyant
Layers > Merge > Merge Group
11 - Effects > 3D Effects > Drop shadow:
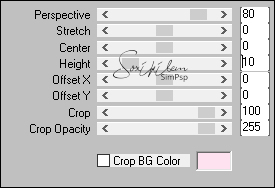
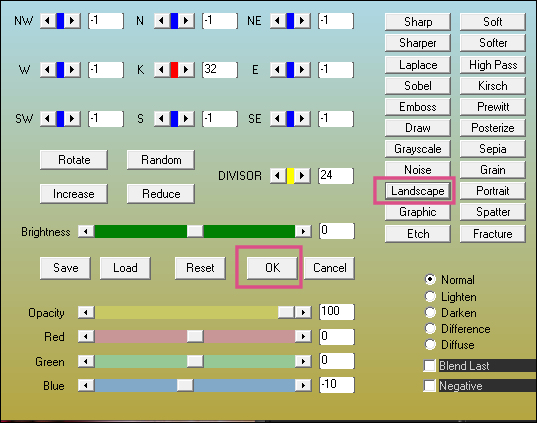
1, 1, 50, 20, with Foreground color Edit > Repeat Drop Shadow. 12 - Layers > Merge > Merge Visible. Layers > Duplicate. 13 - Effects > Plugins > MuRa's Meister >
Perpective Tiling.
14 -
Effects > 3D Effects > Drop Shadow: 0, 0, 100, 50 - Foreground
color 15 -
Effects > Plugins > Simple > Quick Tile 16 -
Adjust > Sharpness > Sharpen. 17 -
Edit > Copy > PDS_StB_ribbon1. Edit > Paste As New Layer Image
> Resize > 70% > Resize all layers unchecked Pick Tool: Position X 35, Position Y 143 Adjust > Sharpness > Sharpen Effects > 3D Effects > DropShadow: 0, 0, 60, 15,
Black color 18 - Layers > Duplicate. Layers > Propeties
> General: Blende Mode > Soft
Light. Image > Mirror Mirror Horizontal. Layers > Merge > Merge All
(Flatten).
19 -
Edit > Copy on the decobellefemme. Edit >
Paste As New Layer. Image > Mirror > Mirror Horizontal.
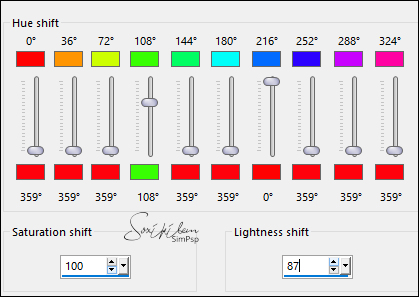
(colorize according to your work) I
used: Adjust > > Hue and Saturation > Hue Map
como no print:
20- Pick Tool: Position
X (- 30) > Position Y 380 Adjust > sharpness > sharpen. Effects > 3D Effects > Drop
shadow: 0, 0, 60, 40, Black color
21 - Edit > Copy on the Main Tube. Edit Paste New
Layer.
Position the Tube on the right. Effects > 3D Effects > Drop Shadow
as you like.
22 - Edit > Copy on the titulo_wear_pink_bycidaben. Edit
> Paste New
Layer.
Position as you prefer. 23 - Image > Add Borders
> 1px, Foreground color 24 -
Effects > Plugins > AAA Filters >
Custom
25 -
Image > Add Borders: 2 px Background
color 2px Foreground
color 26 -
Selections > Select All. Image > Add Borders > 40px
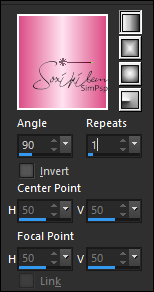
White color Selections > Invert. 27 -
Paint the selection with a gradient formed with the colors in use:
Linear > Angle 90
> Repeats 1
28 -
Effects > Plugins > Carolaine and
Sensibility > CS-DLines: 40, 5. Edit > Repeat > Carolaine and Sensibility >
CS-DLines Selections > Invert Effects > 3d Effects > Drop Shadow 0, 0, 60, 40,
Black color Selections
> Select None 29 -
Image > Add Borders > 1px, Foreground color 30
- If you prefer, resize your work. Feel free to send your versions. I will be happy to publish them on our
website.
Tutorial created by
CidaBen- October / 2020 for the SIM-PSP Challenge. It
cannot be copied, removed from its place, translated or
used in learning lists or groups without the author's
prior consent. |