|
Tutorial by Ana
Maria
English
Translation by Soxikibem
Original Tutorial
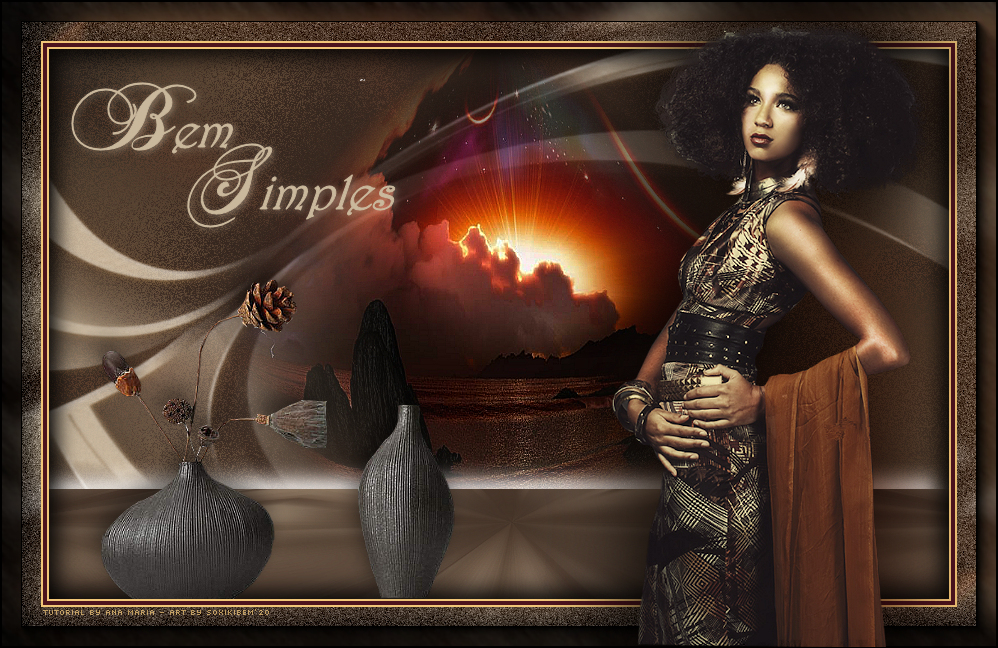
MATERIAL 1 Main tube of your choice 1 tube misted landscape of your choice 1 decorative tube of your choice. NarahsMasks_1522
PLUGINS
Simple > Pizza
Mirror and
4 Way Average
Mara’s
Meiste > Perpective Tiles
I-Decay > Radial
Diffuse
1-
Open the material on the psp, duplicate and close the originals Foreground: #4e141eBackgroud: #f1c678
Extra color: #FFFFFF
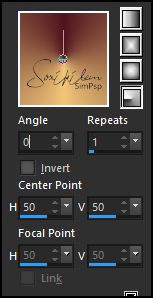
2- Form a gradient with the chosen colors:
Stile
Radial> Anglo:(0) - Repeats:(1)
Inverte
desmarcado
Open a new
900x550px transparent image.
3- Adjust > Blur > Gaussian Blur: 15
4- Sections > Select All. Edit > Copy on the main tube. Edit > Past Into Selection
Adjust >
Sharpness > Sharpen
Selections >
Select None
Effects >
Image > Effects Seamless Tiling: Default
Adjust >
Blur > Gaussian Blur
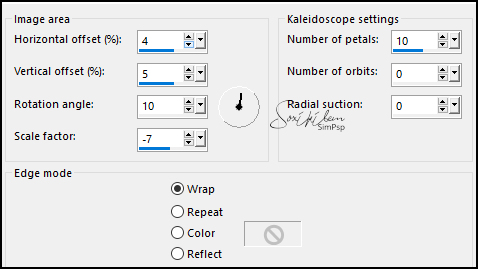
5- Effects >
Reflections > Kaleidoscope
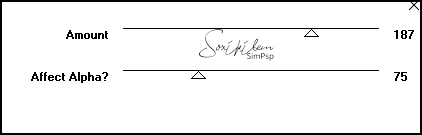
6- Effects > I-Decay > Radial Diffuse
7- Layers
> New Raster Layer
Paint with color: #FFFFFF
Layers >
New Mask Layer > from image Layers > Merge > Merge Group
8- Layers>
Duplicate
Effects>
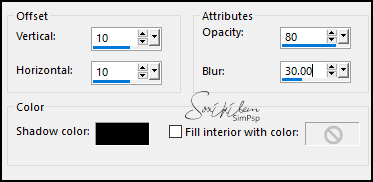
3D> Drop Shadow background
Layers > Layer Merge > Merge Visible
9- Layers >
Duplicate
Effects > Plugin Simple > Pizza Slice Mirror
Effects > Plugin Simple > 4 Way Average
Adjust > Blur >
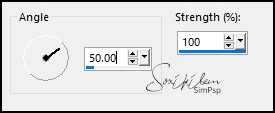
Radial Blur 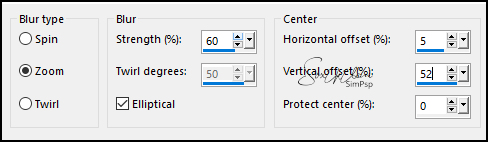
Adjust >
Sharpness > Sharpen More Edit > Repeat Sharpen More
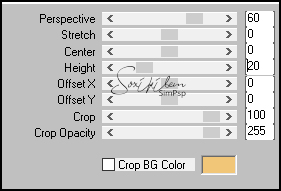
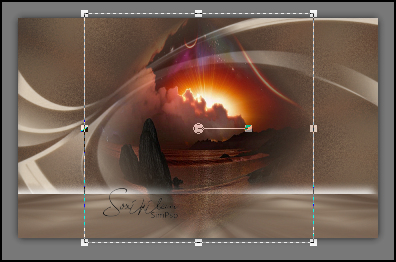
10- Effects >
Plug-in MuR’as Meister > Perspective Tiling
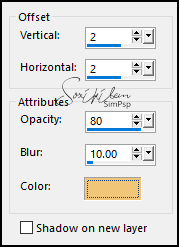
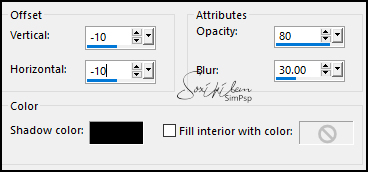
11- Effects > 3D > Drop Shadow: 10, 10, 100, 30, color: #FFFFFF
Effects > 3D > Drop Shadow: -10, -10, 100, 30, color: #FFFFFF
12- Activate the misted landscape:
Effects > Geometric > Circle
Adjust >
Sharpness > Sharpen More
Edit >
Copy
Edit >
Paste As New Layer
Resize this misted layer so that it is aligned to the center
Obs .: For the used misted I gave a resize of 80%. Adjust > Sharpens > Sharpen
13- Layers > Arrange > Move Down.
Layers >
Layer Merge All (flatten)
Selections >
Select All Effects > 3D Effects > Cutout.
Effects > 3D Effects > Cutout changing to negative V / H:
Selections > Select
None
Edit >
Copy
14- Image > Add Borders:
2px
Background
4px
Foreground
2px
Background
40px Selections > Select All.
Selections
> Modify > Contract
Selections >
Invert Edit > Past Into Selection
15- Adjust >
Blur > Motion Blur
16- Adjust >
Add/ Remove Noise > Add Noise 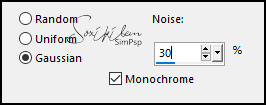
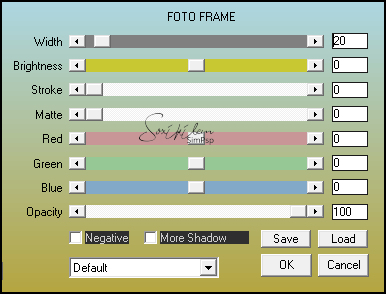
17- Effects > Plugin > AAA Frame > Foto Frame
Selections > Select None
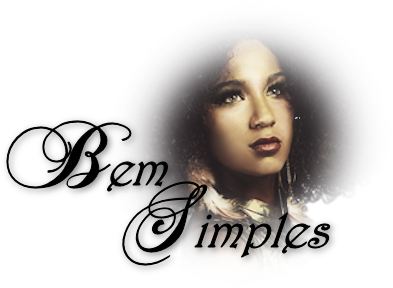
18- Edit > Copy on the main tube. Edit > Paste as New Layer. Resize the tube to your liking. Adjust > Sharpness > Sharpen. Position right. Effects > 3D Effects > Drop Shadow as you wish.
19- Edit > Copy on the decorative tube. Edit > Paste as New Layer. Resize the tube to your liking. Adjust > Sharpness > Sharpen. Position Left. Effects > 3D Effects > Drop Shadow as you wish.
20- Edit > Copy on the titulo_bemsimples_byAnaMarciaC.Edit > Paste as New Layer. Position as you prefer. Image > Add Borders > 1px, color #000000
21- Apply your watermark or signature. File > Export > JPEG Optimizer.
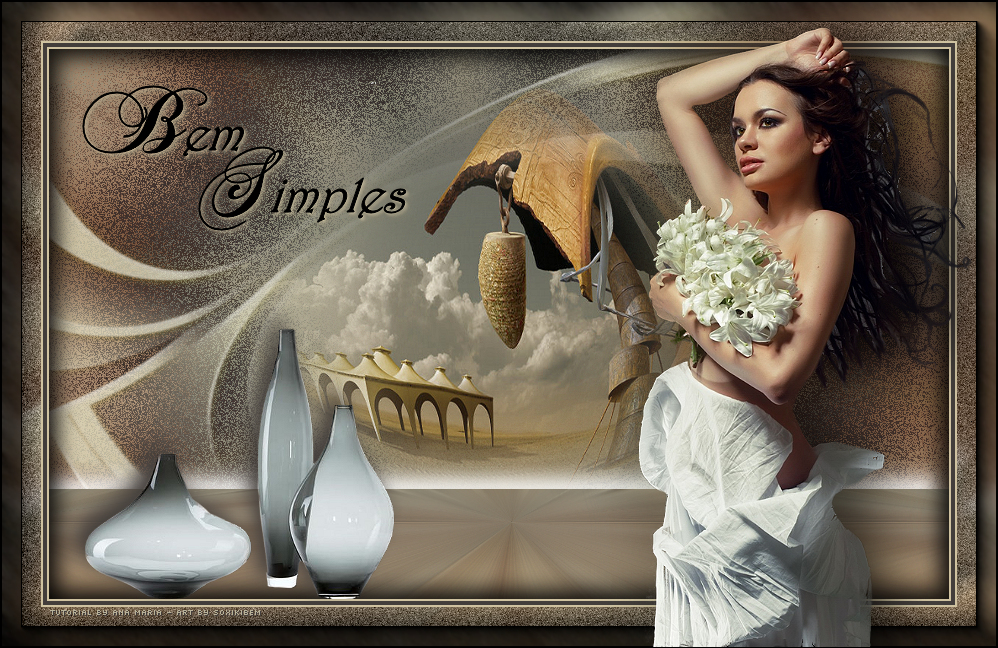
CREDITS - Version 1 & 2 Tutorial by AnaMriaC'20 - Art by Soxikibem Tube & Misted Landscape by Ana Ridzi WordArt by Ana Maria - Tube Décor by Nena Silva
Feel free to send your versions.
|