|
MATERIAL 1 Main Tube of your choice Butterfly Mask Net 1 Landscape Tube of your choice
PLUGINS Filter Factory Gallery C > Evanescence Fantastic Machine > Paint Engine FMTile Tools > Blend Emboss Flaming Pear > Flexify 2 Mura's Meister > Copies Flaming Pear > Flood
Effects of PSP 2020
TUTORIAL
1- Open the material on the PSP, duplicate and close the original. 2- take two colors out of the main tube. I chose the colors: #43403e and #a7a58f Form a gradient Style: Linear - Angle: 0 - Repeats: 0 (Dark color at the top of the gradient)
3- Open a 1000 x 500 px transparency Paint is transparent with the gradient. Layers > New Raster Layer. Selections > Select All
4- Edit > Copy in the Landscape tube Edit > Paste Into Selection Selections > Select None
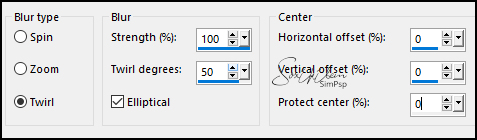
5- Effects > Image Effects > Seamless Tilling > Default Adjust > Blur > Radial Blur.
6- Effects > Filter Factory Gallery C > Evanescence: 198.
7- Effects > Plugin Fantastic Machine > Paint Engine.
8- Effects > Plugin FMTile Tools > Blend Emboss, in the settings that open and apply 2 times
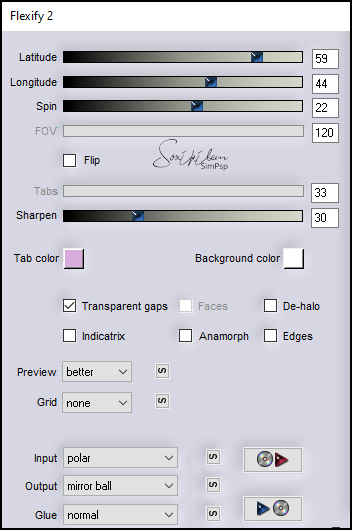
9- Layers > New Raster Layer. Paint with light color. Layers > New Mask Layer > From Image: Butterfly Mask Net... Duplicate the Mask layer Layers < Merge > Merge Group Effects > User Defined Filter > Settings: Emboss 3 Effects > Plugin Flaming Pear > Flexify 2.
10- Edit > Copy in the Misted Landscape Edit > Paste as New Layer With the Pick tool, adjust the tube misted so that it is in the center of the effect Layers > Arrange > Move Down
11- Enable layer Group Raster 3 Effects > 3D > Drop Shadow.
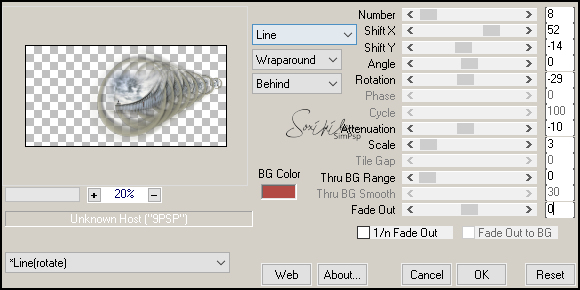
12- Layers > Merge > Merge Down Effects > Plugin > Mura's Meister > Copies.
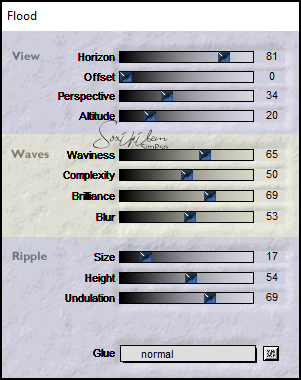
Effects > Plugin Flaming Pear > Flood.
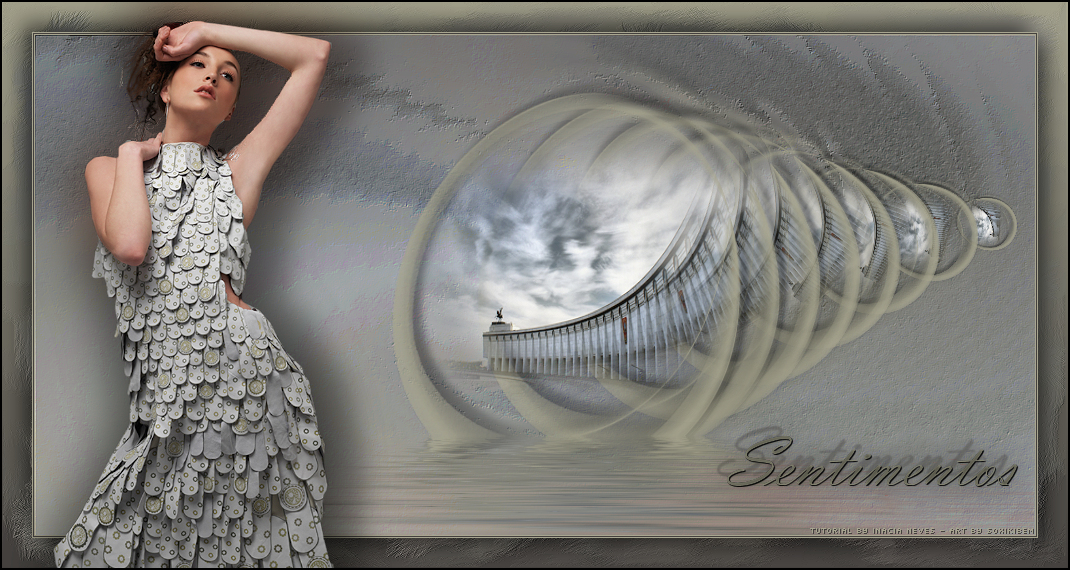
13- Layers > Merge > Merge All Image > Add Borders: 1px - light color 1 px - dark color 1 px - light color
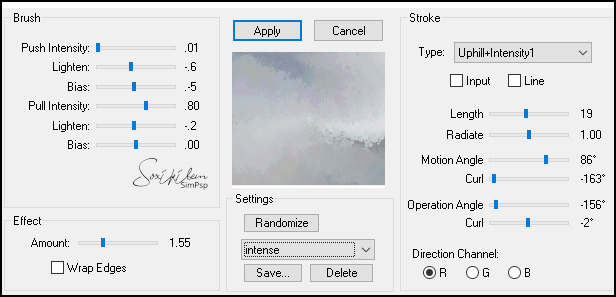
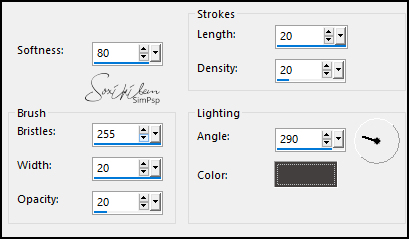
14 - Image > Add Borders > 30px > contrasting color With the Magic Wand tool, select this border Invert colors in the gradient (light color at the top) Paint the selected border Effects > Art Media Effects > Brush Strokes, with the dark color.
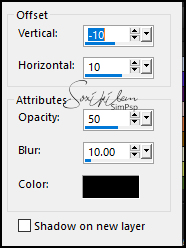
Selections > Invert Effects > 3D > Drop Shadow: 10/10/50/30 Black color Effects > 3D > Drop Shadow: -10/-10/50/30 Black color Selections > Select None
15- Edit > Copy in the Main tube Edit > Paste as New Layer Resize the tube as you prefer Adjust > Sharpness > Sharpen Position and apply a drop shadow as you prefer
16- Image > Add Borders: 2 px, black color
17- Sign and save in jpg.
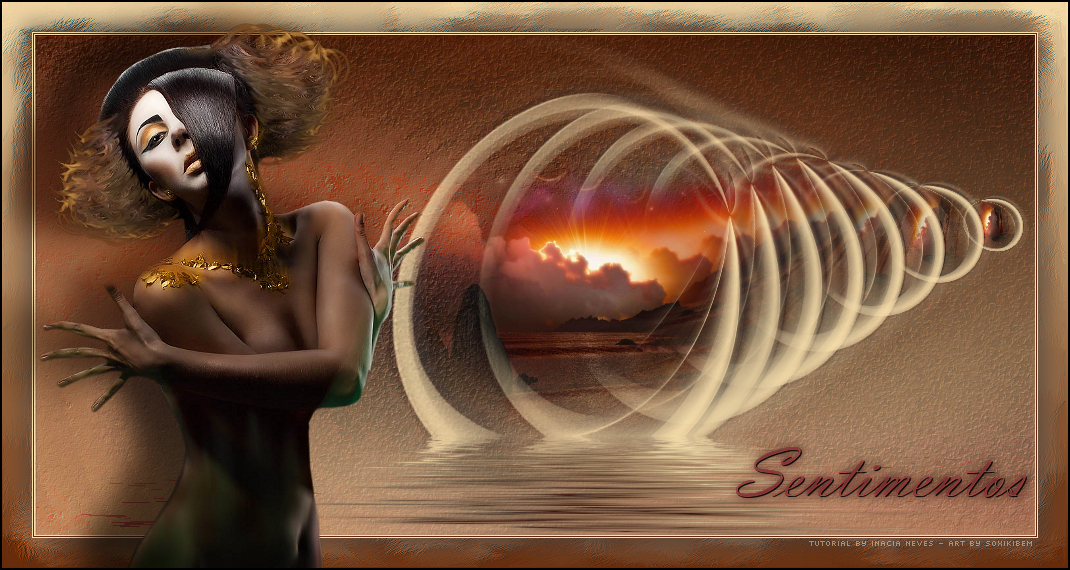
CREDITS VERSION 1&2 Tutorial de Inácia Neves - Art by Soxikibem Main Tube & Landscape by Ana Ridzi Mask: Butterfly Mask Net
Tutorial by InaciaNeves'2020
Feel free to send your versions. I will be happy to publish them on our website.
|