|
TRADUÇÕES:
MATERIAL: 1 Tube Personagem à sua
escolha 1 Tube Decorativo à sua escolha AlphaChannel_OneMoreTry_ByCidaBen titulo_one_more_try_byCidaBen
PLUGINS Filters Unlimited 2.0 > &<BKg Designer sf10 II> Diagonal Mirror MuRa's Seamless > Emboss at Alpha. MuRa's Meister > Perspectove Tiling Graphics Plus > Cross Shadow Flaming Pear > Flexify 2
*******
Este Tutorial foi elaborado por CidaBen, qualquer semelhança é mera coincidência.
1 - Abrir o material no PSP, duplique e feche o original. Foreground: #605230 Background: #d6cdb7
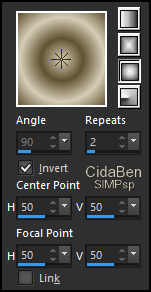
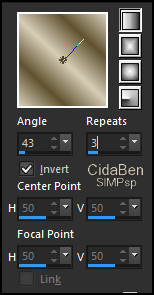
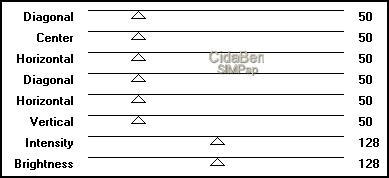
2 - Formar um gradiente com as cores escolhidas: Sunburst > Repeats: 2 > Invert marcado. Center Point: H 50 > V 50 Focal Point: H 50 > V 50
3 - Abra o AlphaChannel_OneMoreTry_ByCidaBen. Pintar com o gradiente Sunburst.
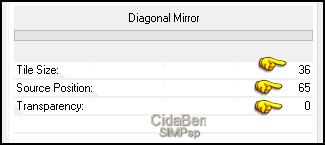
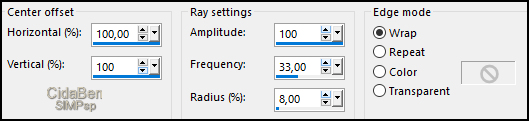
4 - Effects > Plugins > Filters Unlimited 2.0 > &<BKg Designer sf10 II> Diagonal Mirror:
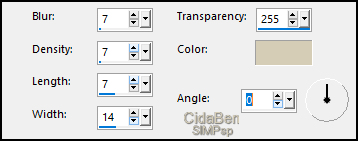
5 - Selections > Load/Save Selections > Load Selection From Alpha Channel: Selection #1. Selections > Promote Selection to Layer. 6 - Effects > Texture Effects > Sandstone: com a cor do Foreground (cor Escura).
Effects > 3D Effects > Drop Shadow: 1, 1, 60, 20, Color: #000000 (preto). Selections > Select None. Ativar a Raster 1.
7 - Selections > Load/Save Selections > Load Selection From Alpha Channel: Selection #2. Selections > Promote Selection to Layer. Effects > Texture Effects > Straw Wall: Color: Cor do Background (cor clara).
Effects > 3D Effects > Drop Shadow: 1, 1, 60, 20, Color: #000000 (preto). Selections > Select None. Ativar a Raster 1.
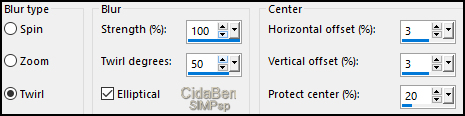
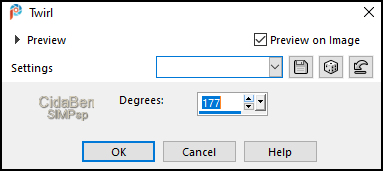
8 - Layers > Duplicate. Effects > Distortion Effects > Twirl:
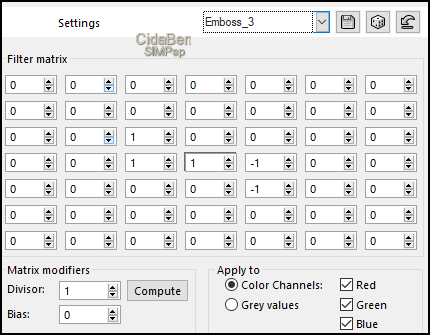
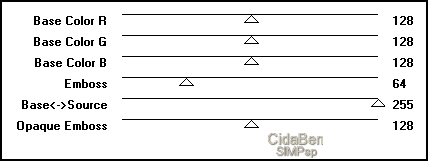
Effects > User Defined Filter: Emboss_3:
9 - Selections > Load/Save Selections > Load Selection From Alpha Channel: Selection #3. Fechar a visibilidade da Layer Raster 1 e deixar ativada a Raster Copy of Raster 1. Pressionar a tecla Delete do teclado. Layers > New Raster Layer. Pintar com o gradiente Sunburst:
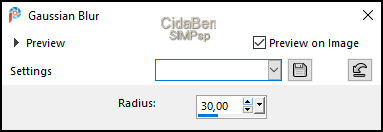
10 - Adjust > Blur > Gaussian Blur: Radius 30.
Ainda selecionado: Layers > New Raster Layer.
11 - Selections > Modify > Select Selections Borders:
Pintar com o gradiente Linear, formado com as cores em uso: Angle 43 > Repeats 3 > Inver marcado
Effects > 3D Effects > Drop Shadow: 1, 1, 60, 20, Color: #000000 (preto). Selections > Select None.
12 - Layers > Duplicate. Effects > Distortion Effects > Spiky Halo:
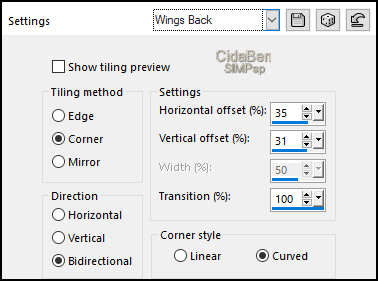
13 - Effects > Image Effects > Seamless Tiling > Wings Back.
14 - Effects > Plugins > MuRa's Seamless > Emboss at Alpha.
Edit > Repeat Emboss at Alpha. Layer > Arrange > Move Down. Edit > Repeat Move Down. Ativar e tornar visível a Layer Raster 1.
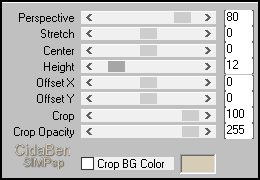
15 - Layers > Duplicate. Layers > Arrange > Brig to Top. Effects > Plugins > MuRa's Meister > Perspective Tiling:
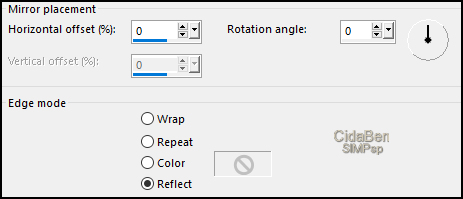
16 - Effects > Reflection Effects > Rotating Mirror: Default
Effects > 3D Effects > Drop Shadow: 1, 1, 100, 50, Color: #000000 (preto).
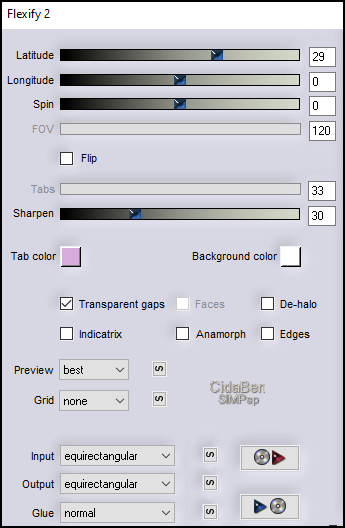
17 - Layers > Duplicate. Effects > Plugins > Flaming Pear > Flexify 2.
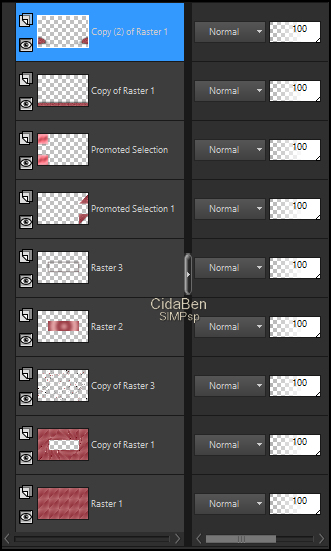
18 - Adjust > Sharpness > Sharpen. Conferir a posição das layers:
Layers > Merge > Merg All (Flatten).
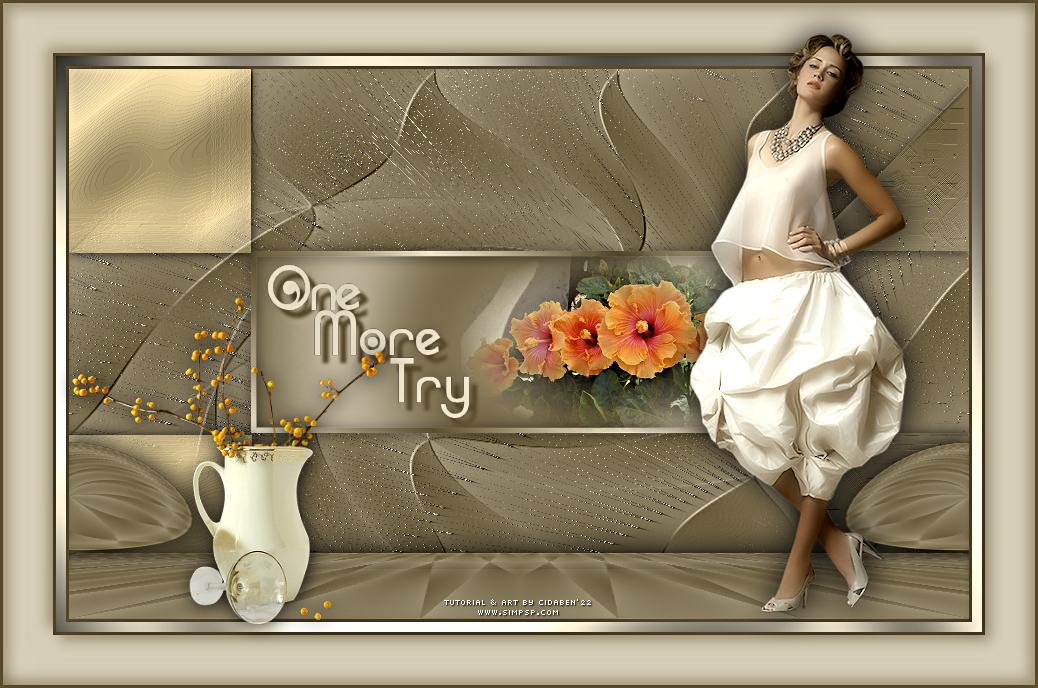
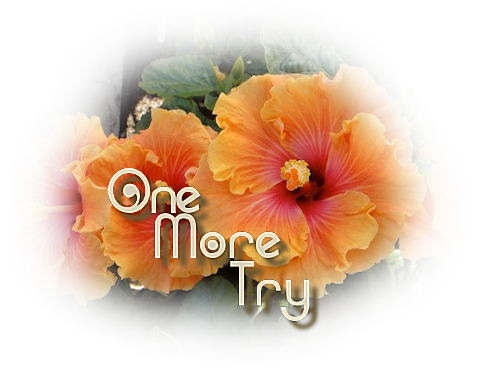
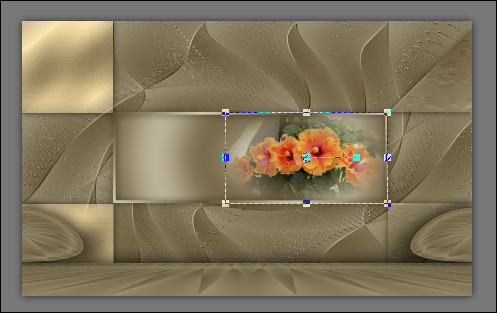
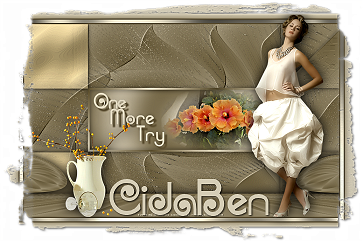
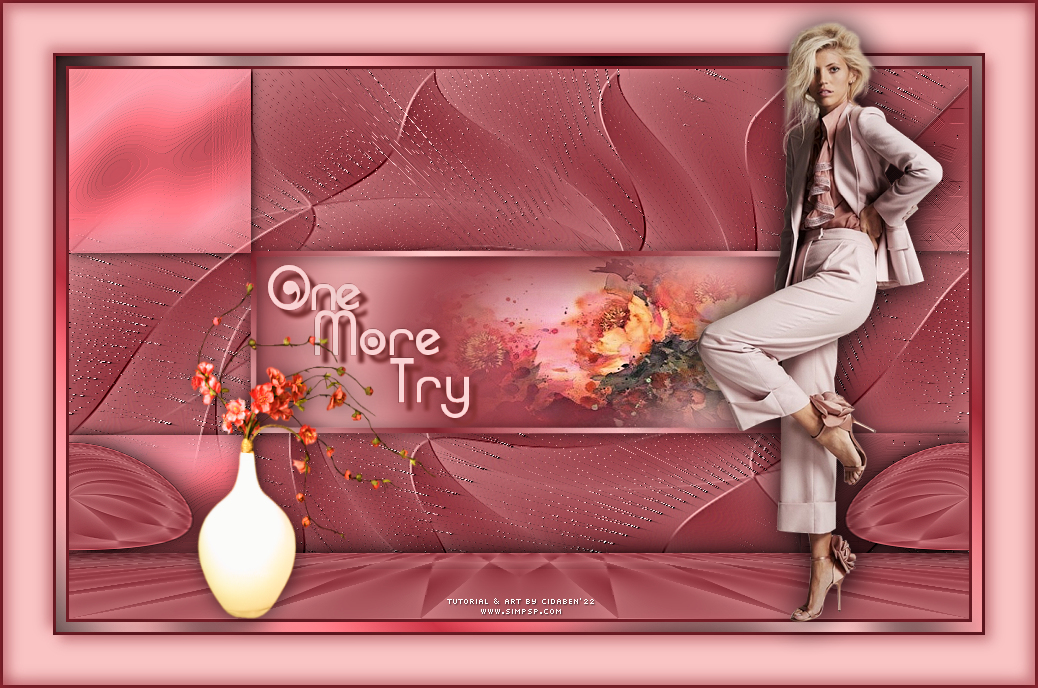
19 - Edit > Copy > Misted Flor. Edit > Paste As New Layer. Resize se for necessário, se estiver usando a do tutorial, resize em 42%. Adjust > Sharpness > Sharpen. Com a ferramenta Move Tool > Posicionar à direita, dentro do retângulo:
20 - Edit > Copy > titulo_one_more_try_byCidaBen. Edit > Paste As New Layer. Pick Tool: Position X 199, Position Y 196.
21 - Image > Add Borders > Symmetric:
3px > cor do Foreground (Cor Escura). Pintar com o gradiente Linear, formado com as cores em uso: Angle 43 > Repeats 3 > Invert marcado.
Selections > Select None.
3px > Cor do Foreground (Cor Escura).
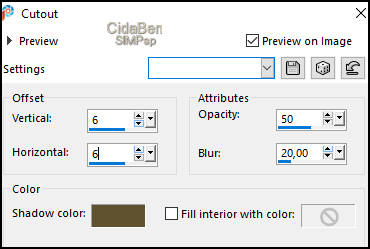
24 - Layers > New Raster Layer. Effects > 3D Effects > Cutout: Shadow color: Cor do Foreground (Cor Escura).
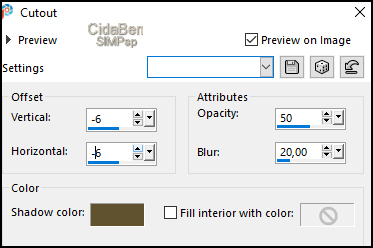
25 - Layers > New Raster Layer.Effects - 3D Effects - Cutout: Shadow color: Cor do Foreground (Cor Escura). Vertical e Horizontal (negativo)
Selections > Select None. Layers > Merge > Merge All (Flatten)
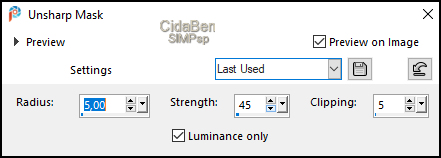
26 - Adjust > Sharpness > Unsharp Mask.
27 - Edit > Copy no Tube Personagem. Edit > Paste As New Layer. Posicionar à direta. Adjust > Sharpness > Sharpen. Effects > 3D Effects > Drop Shadow à sua escolha.
28 - Edit > Copy no Tube Decorativo. Edit > Pas As New Layer. Posicionar à esquerda. Adjust > Sharpness > Sharpen. Effects > 3D Effects > Drop Shadow à sua escolha.
29 - Layers > Merge > Merge All (Flatten).
30 - Aplicar sua marca d'água ou assinatura. File > Export > JPEG Optimizer.
VERSÃO:
Créditos: Versão 1 Criação - Formatação & Art Final by CidaBen Tube Principal: Tubed by Sylvie Erwan Misted Floral: by Ana Ridzi Decor: Tubed by Nikita Versão 2 Tube: Tubed by Lana Misted Floral: by Callitubes Decor: by Tubed Animabelle
Sinta-se à vontade para enviar suas versões. Terei todo o prazer em publicá-las em nosso site.
|