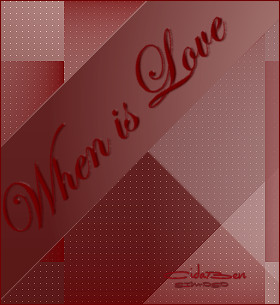
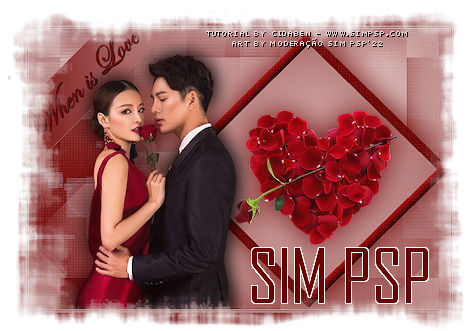
|
Tutorial By
CidaBen
MATERIAL
decor_coracao_ByCidaBen
PLUGINS Simple > Blintz
Note: Feel free to change the Blends according to the material and colors chosen for your work.
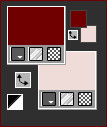
1 - Open the material in PSP, duplicate and close the original. Choose two colors to work with: Color 1 - Foreground: #700103 Color 2 - Background: #efdcd8
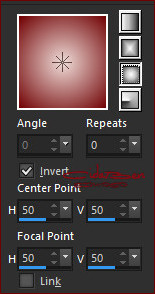
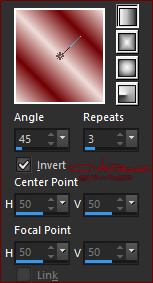
2 - Open a 900x600px transparent image. Paint the transparency with a gradient formed with the chosen colors: Style: Sunburst - Angle: 0 - Repeats: 0 - Invert: checked.
3 - Effects > Plugins > Simple > Blintz. Repeat Simple Blintz.
4 -
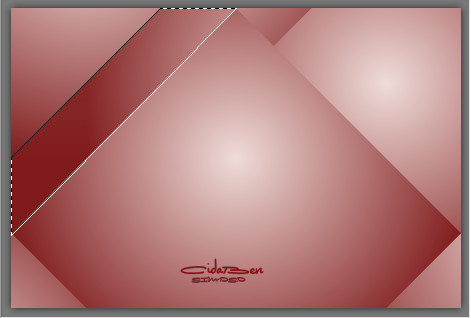
With the Freehand Selection Tool: Feather at 0,
Selections > Promote Selection Layer. Selections > Select None. Activate the layer Raster 1
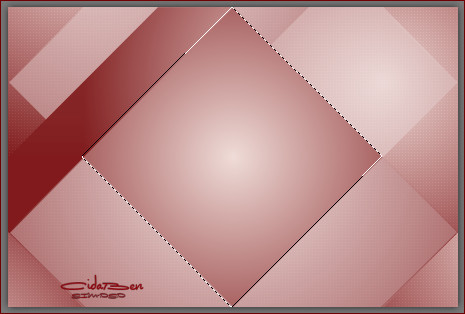
5 - With the
Freehand Selection Tool: Feather at 0,
Selections > Promote Selection Layer. Selections > Select None. Activate the layer Raster 1
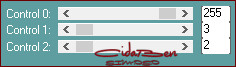
6 - Effects > Plugins > Carolaine Sensibility > CS-LDots:
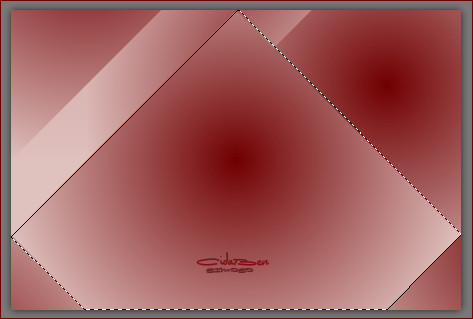
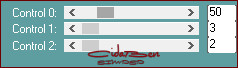
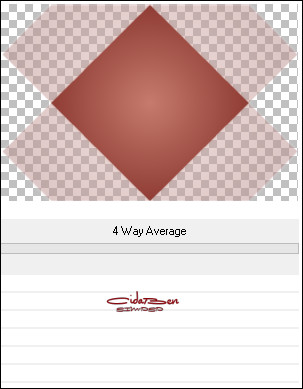
7 - Activate the Layer Promoted Selection 1 Effects > Plugins > Filters Unlimited 2.0 > Bkg Designer sf10 l > 4 Way Average:
8 - With Layer Promoted Selection 1 enabled: With the Freehand
Selection Tool: Feather at 0,
9 - Effects > 3D Effects > Drop Shadow: Color: Foreground
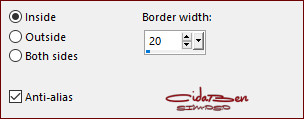
10 - Selections > Modify > Select Selections Borders:
Paint selection with Color 1 - Foreground #700103
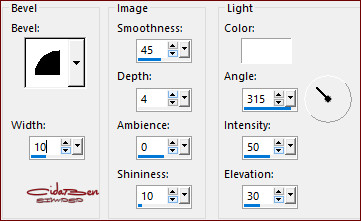
11 - Effects > 3D Effects > Inner Bevel:
12 - Effects > Plugins > Carolaine Sensibility > CS-LDots:
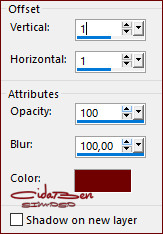
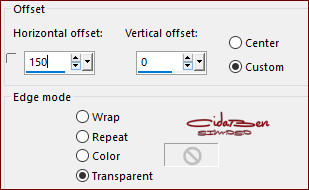
13 - Selections > Select None. Effects > Image Effects > Offest:
14 - Edity > Copy in 2018-3-Nadege. Edity > Paste As New Layer. Image > Resize > 65% > All Layers unchecked. Position inside the triangle. Effecs > 3D Effects > Drop Shadow: your choice. Adjust > Sharpness > Sharpen More. Layers > Merge > Merge Down. Activate the Raster 1
15 - Effects > Texture Effects > Weave:
Adjust > Sharpness > Sharpen.
16 - Activate the Layer Promoted Selection (top) With the Pick Tool position: Position X: -98 > Position Y: -49.
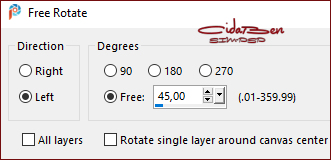
17 - Edit > Copy the título_when_is_love_ByCidaBen. Edit > Paste As New Layer. Image > Free Rotate:
With the Pick Tool position: Position X: 8 - Position Y: 6.
Colorize as you wish or use Tool > Color Changer tool.
Use Effect of your choice. Adjust > Sharpness > Sharpen. Layers > Merge > Merge Dow.
18 - Edit > Copy the Main Tube. Edit > Paste as New Layer. Image > Resize if necessary.
Position of your choice. Effects > 3D Effects > Drop Shadow: your choice.
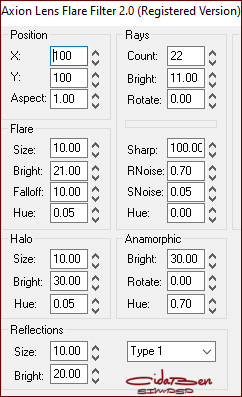
19 - Activate the Layer Raster 1 Effects > Plugins > Axion > Lens Flare: Default
20 - Image > Add Borders > Symmetric: 1px - Color 2: Background #efdcd8 3 px - Color 1: Foreground #700103 1 px - Color 2: Background #efdcd8
21 - Selections >
Select All.
22 - Effects > Plugins > Carolaine Sensibility > CS-LDots:
23 - Selections > Invert. Effects > 3D Effects > Drop Shadow: 0 / 0/ 100 /100, Color 1: Foreground #700103 Edit >
Repeat Drop Shadow
24 - Edit > Copy the decor_coracao_ByCidaBen Edit > Paste as New Layer. With the Pick Tool position: Position X 675 - Position Y 659. Adjust > Sharpness > Sharpen More.
25 - Image > Add Borders > Symmetric: 1px Color 2 - Background #efdcd8 3 px - Color 1: Foreground #700103 1 px - Color 2: Background #efdcd8
26
-
Feel free to send your versions.
CREDITS:
English Translation by
Moderation SIM-PSP Decorative Tube: Tubed by Nadege
Feel free to send your versions.
|