  TRADUÇÕES:
Obrigada aos nossos tradutores! MATERIAL 1 Tube principal à sua escolha 1 Misted À sua escolha 1 Tube Decoração à escolha Decor_retangulos_ByCidaBen título_begin_again_ByCidaBen  Plugins Mehdi Carolaine and Sensibility Mura's Meister Graphics Plus Efeitos e Ferramentas do PSP Execução
Cores:
Foreground
#34e1114
Background
#e0d0c5
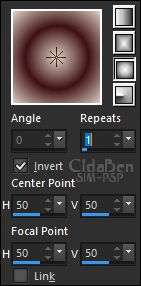
 01 - Abrir o material no PSP, duplique e feche os originais. Abra uma imagem transparente de 650 X 500 px. 02 - Pintar essa imagem com o gradiente: Sunburst > Angle 0 > Repeats 1 > Invert marcado, com as cores escolhidas.
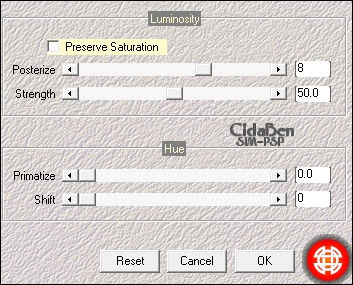
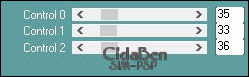
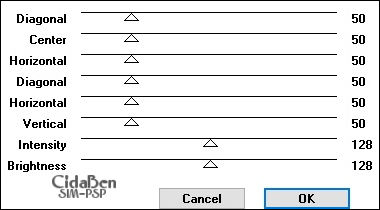
03 - Effects > Plugins > Mehdi > Posterizer.
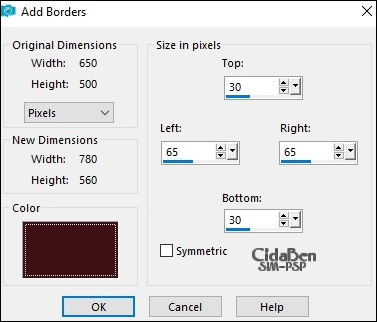
04 - Image > Add Borders > Simmetric desmarcado... Color > Foreground #3e1114.
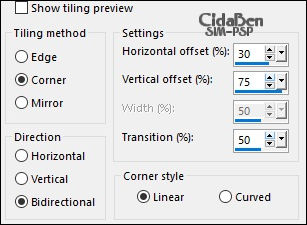
05 - Effects > Image Effects > Seanless Tiling...
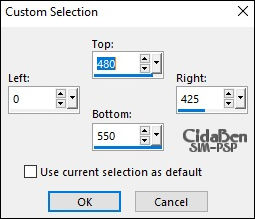
06 - Selection Tool > Custom Selection.
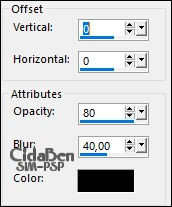
07 - Effects > 3D Effects > Drop Shadow.
08 - Selections > Promoter Selection to Layer. Effects > Plugins > Caroline and Sensibility > CS-HLines.
09 - Selections > Select None. Layers > Duplicate. Poscione com a ferramenta Pick Tool: Position X 0 > Position Y 80. Image > Mirror > Mirror Horizontal.
10 - Feche a Raster 1. Ative a Copy of Promoter Selection. Layers > Merge > Merge Visible.
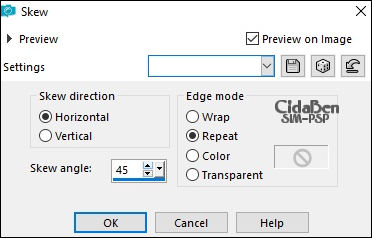
11 - Effects > Geometric Effects > Skew.
12 - Layers > Duplicate. Image > Mirror > Mirror Horizontal.
13- Abrir a visibilidade e ativar a Raster 1. Layers > Duplicate.
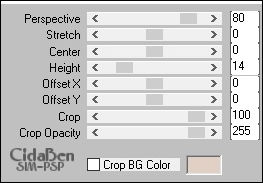
14 - Effects > Plugins > MuRa's Meister > Perspective Tiling...
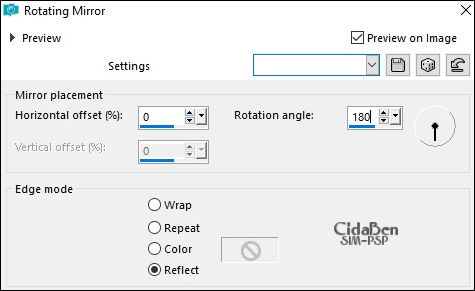
15 - Effects > Reflection Effects > Rotating Mirror...
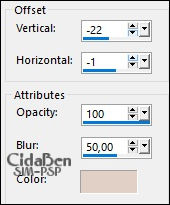
16 - Effects > 3D Effects > Drop Shadow: -22 > -1 > 100 > 50 > cor Background(#e0d0c5).
17 - Layers > Merge > Merge All. 18 - Edit > Copy > no Misted Paisagem. Edit > Past As New Layer. Dê Resize se necessário. Adjust > Sharpness > Sharpen. Posicione à esquerda, como no exemplo.
19 - Edit > Copy > no Tube principal. Edit > Past As New Layer. Posicione à seu gosto. Effects > 3D Effects > Drop Shapow como desejar.
20 - Layers > Merge > Merge All. Selections > Select All. Image > Add Borders > 30 px na cor do Forreground (#34e1114).
21 - Effects > 3D Effects > Drop Shadow: 0 > 0 > 100 > 80 na cor do Background (#e0d0c5).
Selections > Select None.
22- Selections > Select All Image > Add Borders > 30 px > qualquer cor. Selections > Invert.
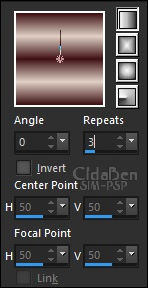
23- Pintar a seleção com um gradiente: Linear > Angle 0 > Repeats 3 > invert desmarcado.
24- Selections > Invert. Effects > 3D Effects > Drop Shadow: 0 > 0 > 100 > 40 cor preto (#000000). Sections > Invert.
25- Effects > Plugins > Graphcis Plus > Cross Shadow > Default.
Selections > Select None.
26- Edit > Copy no Decor_retangulos_ByCidaBen. Edit > Paste as new layer (Para colorir na cor do seu trabalho use a ferramenta do PSP > Color Changer Tool.) Posicione com a ferramenta Pick Tool: Position X 61 > Position Y 110.
27- Edit > Copy no título_begin_again_ByCidaBen. Edit > Paste as new layer Posicione com a ferramenta Pick Tool: Position X 530 > Position Y 220. 28- Edit > Copy no tube Decoração. Edit > Paste As new Layer. Adjust > Sharpness > Sharpen. Effects > 3D Effects > Drop Shadow como desejar.
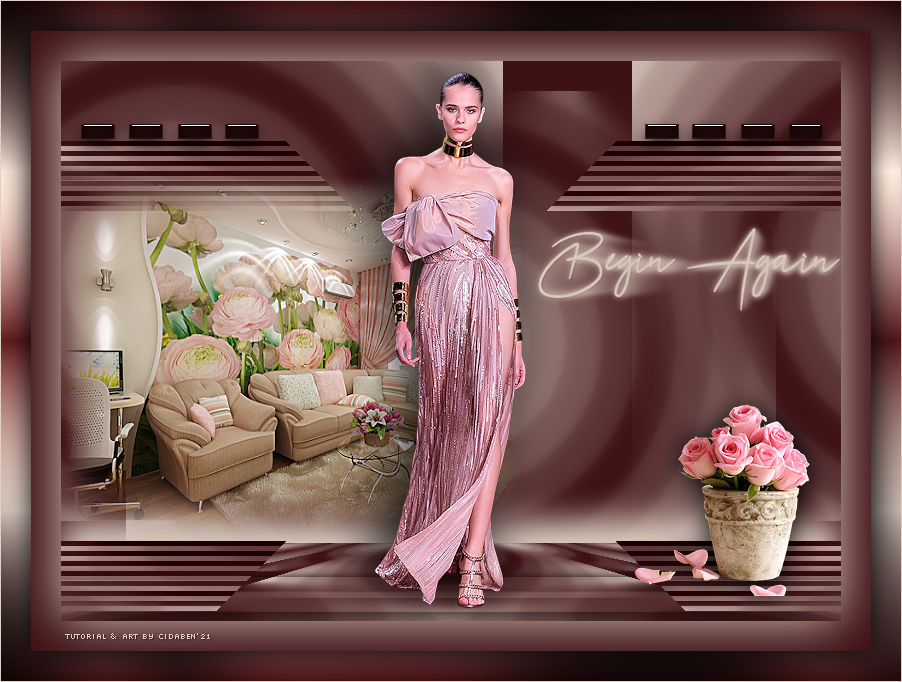
29- Image > Add Borders > 1px na cor do Background (#e0d0c5) 30- Se desejar, redimensione seu trabalho. Aplicar sua marca d'água ou assinnatura. File > Export > JPEG Optimizer. 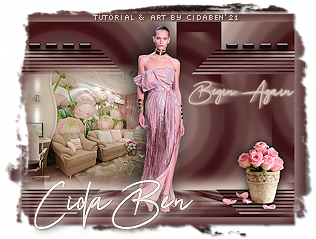 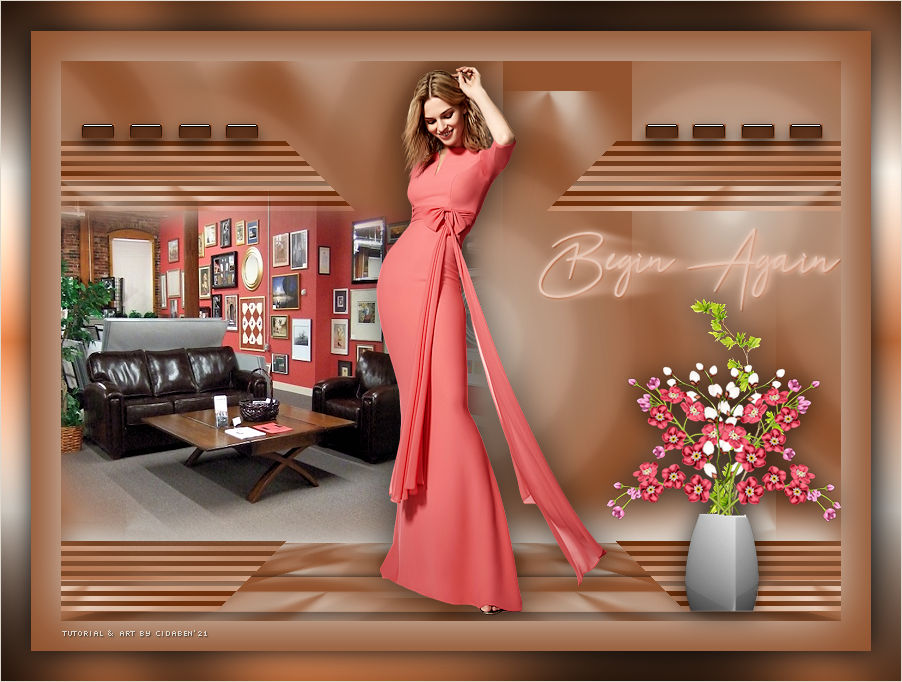 Tutorial by CidaBen '21
Créditos:
Versão 1
Tube: by Lady
Valella
Misted: by Mina@
Decor vaso flor: by
Animabelle
Versão 2
Tube: by Suizabella
Misted: by Anna_br
Decor vaso flor: by Ana Ridzi
Sinta-se à vontade para enviar suas versões. Terei todo o prazer em publicá-las em nosso site.
|