Tutorial by Cuqui Alonso Design and Tati Designs
Translated into English by SIM PSP Moderation
Original Tutorial:


Author's Note: The files with initials "CAD" (Cuqui Alonso Design) and "TD" (Tati Designs) are material created by
us exclusively for our tutorials. DO NOT use them to create your own tutorials.
Please read our Terms of Use (TOU). Thank you."

Thank you for putting a link to this tutorial when showing your achievement on a website, forum or in an email!
With your result, you can make signatures, websets, incredimail letters, etc.
Please, credit to Design Cuqui Alonso and Tati Designs , thanks.


MATERIAL:

Download the material used here:


PLUGINS

Render > Smoke **
Factory Gallery A > Holidays in Egypt and Zoom In
Simple > Quick Tile
VanDerLee > Unplugged-X > Transition
Alien Skin Eye Candy 5: Impact
Eye Candy 4000 > Gradient Glow
** Import this filter into Unlimited 2.0.


IMPORTANT
It is forbidden to modify or rename files or remove the watermark.
Please do not use the material we have created for this tutorial on another site.


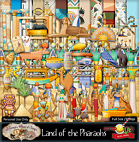
The FTU scrap "Land Of the Pharaohs" is from "Marniejo's House of Scrap".
The tube deco and the misted landscape are from Tati Designs .


PREPARATION:

* Duplicate the tubes. Close the originals.
* Install the filters in the "plugins" folder of your PSP.

* In the "Preset" folder there is 1 file, double click to install it with the EC5 Impact filter.

Colors
Choose colors in harmony with your tube.
This is the tutorial palette:

If using other colors, you should change the Blend Mode and the Opacity of the layers.


STAGE 1: CREATING THE FUND


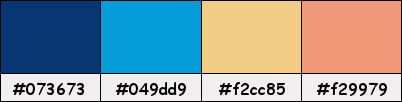
 01- In your Materials palette:

Foreground Color: (1) #073673
Background Color: (2) #049dd9


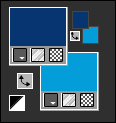
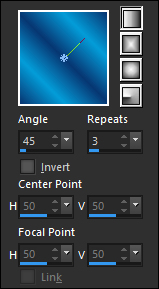
02- In your material palette, form a Linear Gradient with the colors:


03- Open a new 900 x 600 pixel transparent image.


04- Fill the transparent image with the Gradient.


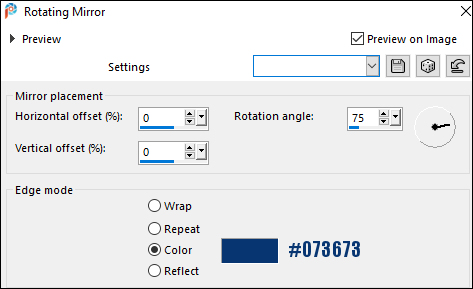
05- Effects > Reflection Effects > Rotating Mirror:


06- Effects > Edge Effects > Enhance More.


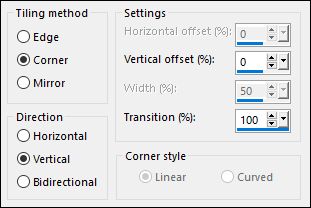
07- Effects > Image Effects > Seamless Tiling:


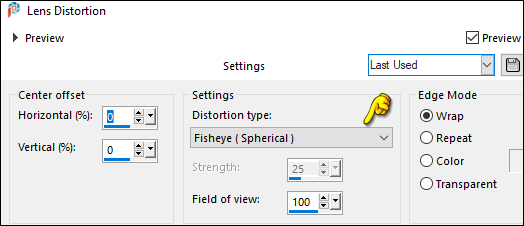
08- Effects > Distortion Effects > Lens Distortion:


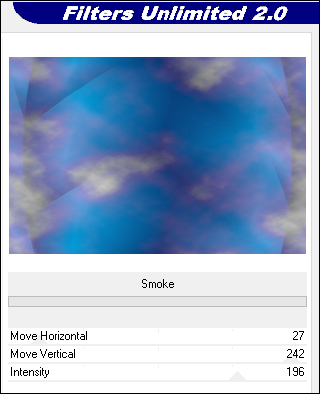
09- Effects > Plugins  > Filters Unlimited 2.0 > Render > Smoke:


10- Layers > New Raster Layer.


11- Selections > Select All.


12- From the scrap/papers folder, open the ipaper "mhos_SEPT22_STBT_paper7".

Edit > Copy.
Activate the working image.

 Edit > Paste Into Selection.


13- Selections > Select None.


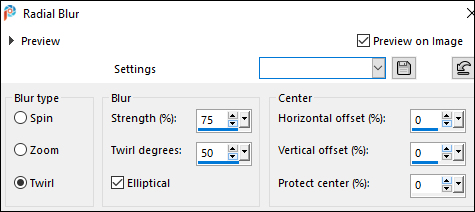
14- Adjust > Blur > Radial Blur:


15- Effects > Plugins  > Factory Gallery A > Holidays in Egypt:


16-  Layers > Duplicate.

Image > Mirror > Mirror Horizontal.


17-  Layers > Properties > General > Opacity: 60


18- Layers > Merge > Merge Down.


19-  Effects > Plugins  > Simple > Quick Tile:


20- Effects > Edge effects > Enhance.


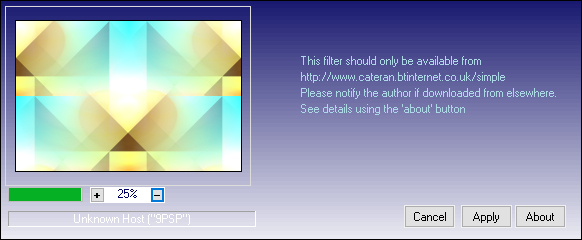
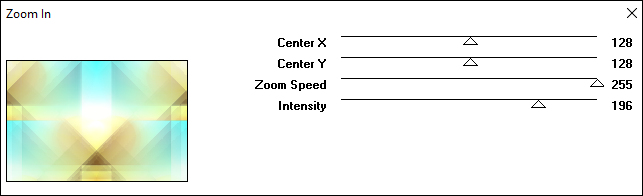
21- Effects > Plugins  > Factory Gallery A >  Zoom In: Default


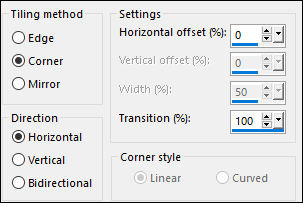
22- Effects > Plugin > VanDerLee > Unplugged-X: Transition (default)


STAGE 2: ADDING THE SCRAP


01- Put your work aside for a moment.


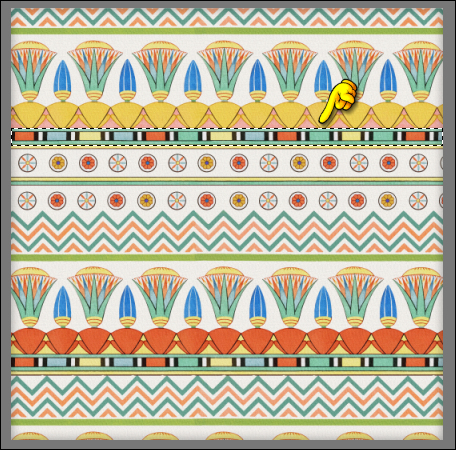
02- From the scrap/papers folder, open the ipaper "mhos_SEPT22_STBT_paper4".


03- Image > Resize: 15% (Unchecked "Resize All Layers")


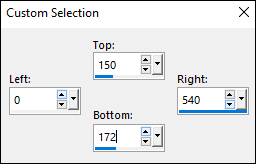
04- Activate the "Selection/Rectangle" Tool (S) and click on "Custom Selection":


05- Edit > Copy.


06- Opens a new transparent image that is 462 x 310 pixels.


07- Edit > Paste as New Layer.


08- Objects > Align > Top.


09- Layers > Duplicate.


10- Objects > Align > Bottom.


11- Layers > Duplicate.


12- Image > Free rotation > 90º to the left.


13- Objects > Align > Top.


14- Objects > Align > Left.


15-  Layers > Duplicate.


16- Image > Mirror > Mirror Horizontal.


17- Layers > Merge > Merge visible.


18- Edit > Copy.

Activate the working image.

 Edit > Paste as New Layer.


19- Effects > 3D Effects > Drop Shadow: 5 / -5 / 30 / 3 / Color: #000000 (Black)


20- We started adding elements from the "Land Of The Pharaohs" scrapkit.
Apply Shadow to each element with the values ​​from step 19.


21- Open the file "mhos_SEPT22_STBT_sand.png".

22- Image > Resize: 27% ( Checked "Resize all layers").

23- Edit > Copy.
Go back to your work and paste as a new layer.

24- Activate the "Selection" Tool (K) and modify the positions of X (0.00) and Y (403.00).
Press the "M" key to deactivate the "Selection" Tool.

25- Open the file "mhos_SEPT22_STBT_palm_trees.png".

26- Image > Resize: 20% ( Checked "Resize all layers").

27- Edit > Copy.
Go back to your work and paste as a new layer.

28- Activate the "Selection" Tool (K) and modify the positions of X (615.00) and Y (0.00).
Press the "M" key to deactivate the "Selection" Tool.

29- Layers > Duplicate.

30- Image > Mirror > Mirror Horizontal.

31- Open the file "mhos_SEPT22_STBT_eye_of_Ra.png".

32- Image > Resize: 12% ( Checked "Resize all layers").

33- Edit > Copy.
Go back to your work and paste as new layer.

34- Activate the "Selection" Tool (K) and modify the positions of X (217.00) and Y (41.00).
Press the "M" key to deactivate the "Selection" Tool.

35- Layers > Duplicate.

36- Image > Mirror > Mirror Horizontal.

37- Open the file "mhos_SEPT22_STBT_falcon.png".


38- Image > Resize: 10% ( Checked "Resize all layers").

39- Edit > Copy.
Go back to your work and paste as new layer.

40- Image > Mirror > Mirror Horizontal.


41- Activate the "Selection" Tool (K) and modify the positions of X (328.00) and Y (29.00).
Press the "M" key to deactivate the "Selection" Tool.

42- Open the file "mhos_SEPT22_STBT_crook_and_flail.png".

43- Image > Resize: 10% ( Checked "Resize all layers").

44- Edit > Copy.
Go back to your work and paste as new layer.


45- Activate the "Selection" Tool (K) and modify the positions of X (448.00) and Y (33.00).
Press the "M" key to deactivate the "Selection" Tool.

46- Open the file "mhos_SEPT22_STBT_pyramids.png".

47- Image > Resize: 20% ( Checked "Resize all layers").

48- Edit > Copy.
Go back to your work and paste as new layer.

49- Activate the "Selection" Tool (K) and modify the positions of X (-66.00) and Y (245.00).
Press the "M" key to deactivate the "Selection" Tool.

50- Open the file "mhos_SEPT22_STBT_sphinx.png".

51- Image > Resize: 15% ( Checked "Resize all layers").

52- Edit > Copy.
Go back to your work and paste as new layer.

53- Activate the "Selection" Tool (K) and modify the positions of X (224.00) and Y (327.00).
Press the "M" key to deactivate the "Selection" Tool.


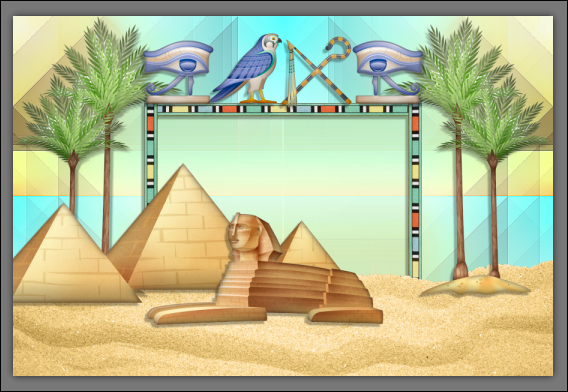
54- You will have the following scrap composition:


STAGE 3: COMPLETING THE FUND

01- Go to the "Frame 2" layer.

02- Layers > New Raster Layer.

03- Foreground the color [4] #f29979

04- Activate the "Brush" Tool (B), choose "Corel_01_001":

and configure as follows:


05- Apply the brush in the center of your work, as shown in the screenshot:


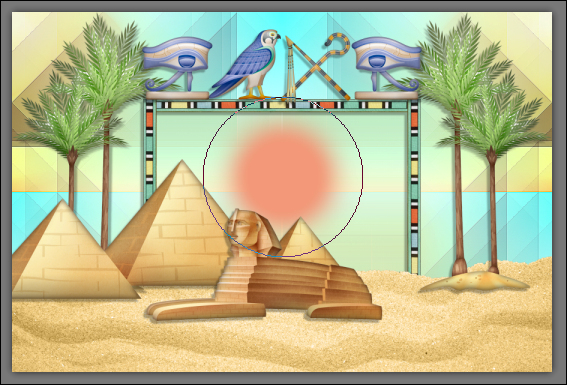
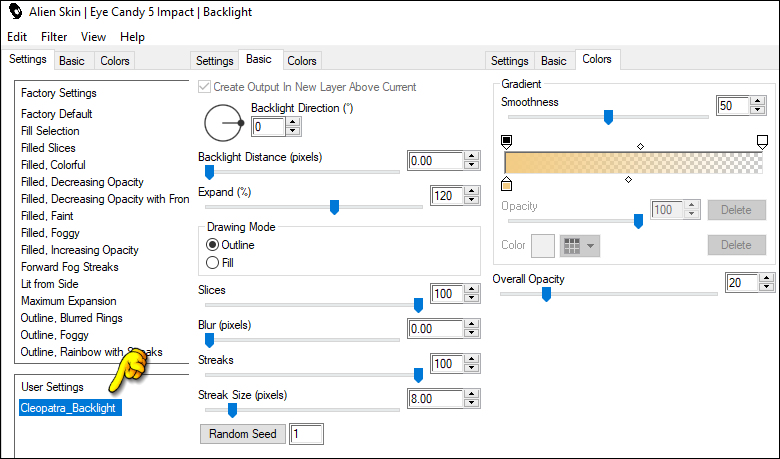
06- Effects > Plugins > Alien Skin Eye Candy 5: Impact > Backlight:

In "Settings", select the preset "Cleopatra_Backlight"

Note: Note: If the preset has not been installed, in the "Basic" tab you have the settings.


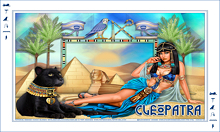
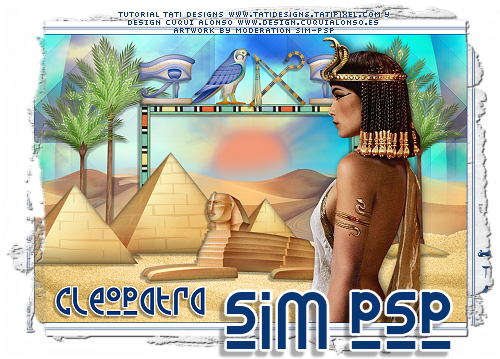
07- Open the tube "TD_Misted_Tuto_Cleopatra".

Edit > Copy.

Activate the working image.

 Edit > Paste as New Layer.

Don't move it, it's in its place.


08- Effects > Image Effects > Seamless Tiling:


09- Activate the layer Raster 2.


10- Layers > Properties > General > Blend Mode: Overlay
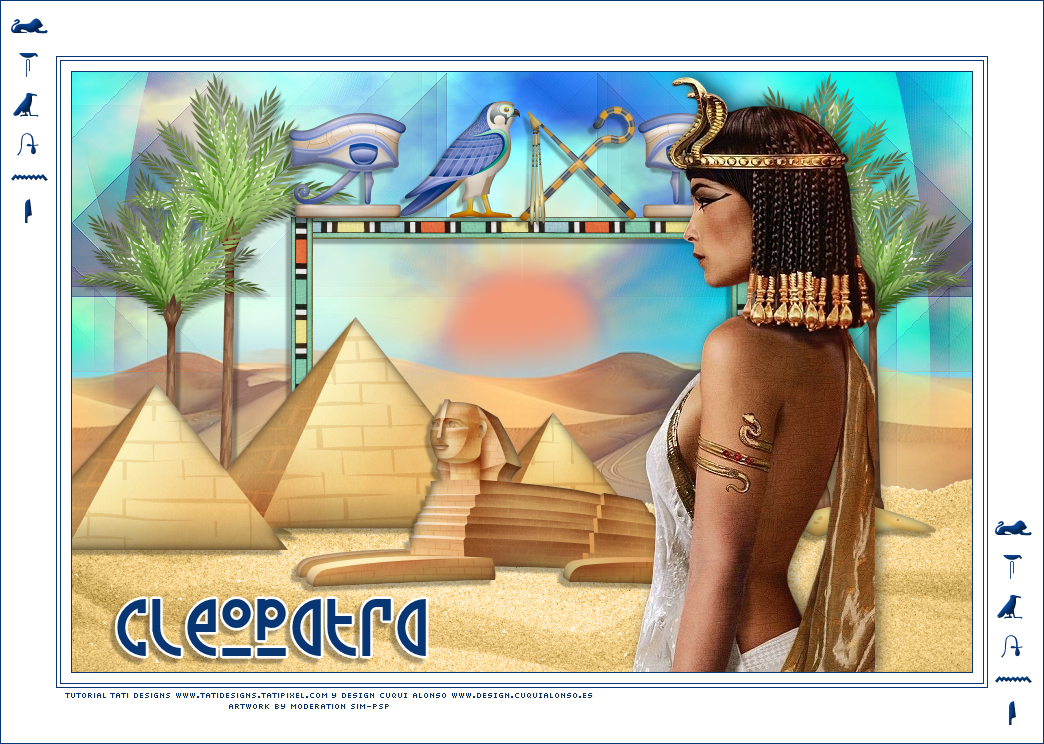
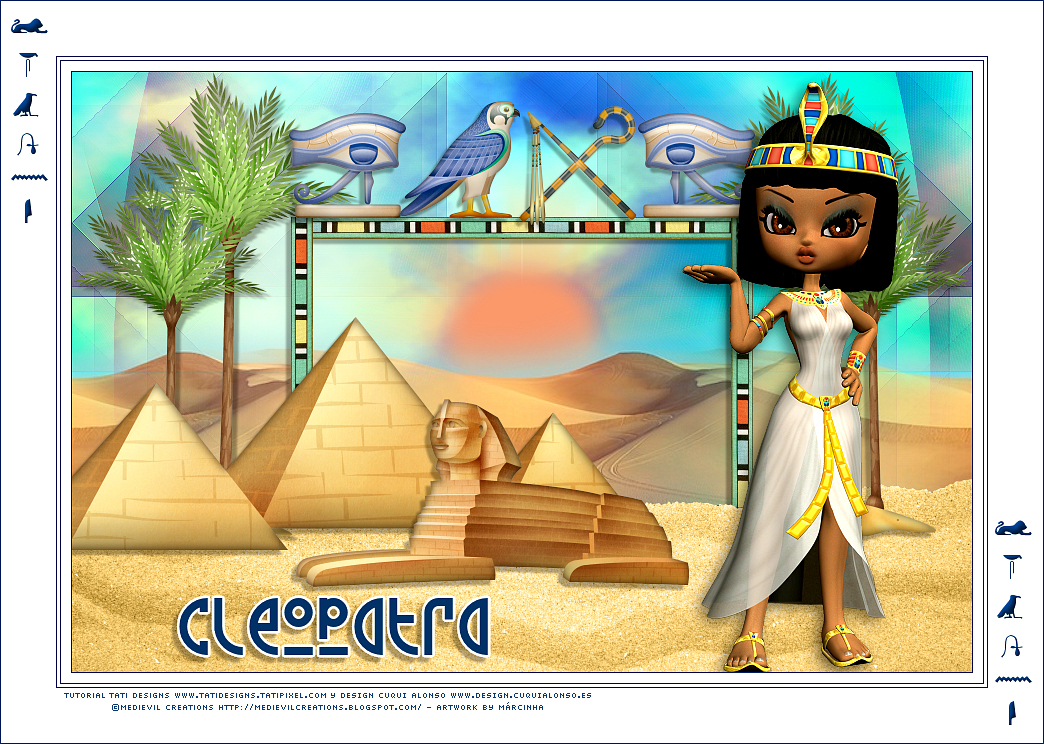


STAGE 4: THE MAIN TUBE

01- Activate the layer Raster 10. (Top Layer)

02- Open the character tube you have chosen.
Edit > Copy.

Activate the working image.

 Edit > Paste as New Layer.


03- Effects > 3D Effects > Drop Shadow: -5 / 5 / 50 / 20 / Color: #000000 (Black)

04- Arrange it to the right of your work.

Note: You can add other elements of the ScrapKit, resizing and
positioning them in your work in any way you like.

05- In your Materials palette:
Close the foreground.
Background color: [1] #073673


06- Activate the "Text" Tool (T) with the "Mythology of Egypt" font, which you can download here .
Size: 72 pixels > Anti-alias: Sharp > Create as: Vector.
Type the name: "Cleopatra."

07- Layers > Convert to Raster Layer.

08- Effects > Plugins > Eye Candy4000 > Gradient Glow:


09- Place at the bottom right.


10- Effects > 3D Effects > Drop Shadow: 5 / -5 / 30 / 3 / Color: #000000 (Black)


STAGE 5: THE BORDERS


01- Image > Add Borders > Symmetric: 1 px - color (1) #073673

Image > Add Borders > Symmetric: 10 px - color #ffffff (White)

Image > Add Borders > Symmetric: 1 px - color (1) #073673

Image > Add Borders > Symmetric: 3 px - color #ffffff (White)

Image > Add Borders > Symmetric: 1 px - color (1) #073673

Image > Add Borders > Symmetric: 55 px - color #ffffff (White)


02- Open the tube "TD_Deco_Tuto_Cleopatra"

Edit > Copy.

Activate the working image.

 Edit > Paste as New Layer.


03- Activate the "Selection" Tool (K) and modify the positions of X (12.00) and Y (20.00).
Press the "M" key to deactivate the "Selection" Tool.
 

04- Image > Add Borders > Symmetric: 1 px - color (1) #073673


05- Edit > Copy the "©Tutorial_TatiDesigns"


Edit > Paste as new layer.

*If you need to change the color, you can use the "Color Changer" tool

Position of your choice.

Add tube © if necessary.


06 - Apply your watermark or signature.

File > Export > JPEG Optimizer.

CREDITS:
Tutorial Cleopatra  by Tati Designs
and Cuqui Alonso Design
English Translation by Moderation SIM-PSP
Main Tube:
Cuqui Alonso Design

Landscape Misted: by Tati Designs

FTU scrap "Land Of the Pharaohs" is from "Marniejo's House of Scrap".


Versão by Márcinha - Owner SIM PSP


CREDITS: Tutorial Cleopatra by Tati Designs and Cuqui Alonso Design - Art by Márcinha - Main Tube: Tubed by ©MediEvil Creations - FTU scrap "Land Of the Pharaohs" is from "Marniejo's House of Scrap".


Feel free to send your versions.


I will be happy to publish them on our website.


Tutorial created by Tati Designs and Cuqui Alonso Design, in April 2023. Translated into English in April/23, by the Moderation of SIM-PSP. It cannot be copied, removed from its place, translated or used in learning lists or groups without the author's prior consent.