|
Tutorial by
Tati Designs
Author's Note: "Files with initials "TD" (Tati
Designs) are material created by me exclusively for my
tutorials.
MATERIAL: Download the material used here:
PLUGINS Mehdi > Wavy Lab 1.1
Mehdi > Sorting Tiles Simple > Left Right Wrap
Simple > Quick Tile
IMPORTANT
PREPARATION:
*
Duplicate the tubes. Close the originals.
Colors
If using other colors, you should change the Blend Mode and the Opacity of the layers.
TUTORIAL
01- In your Materials palette:
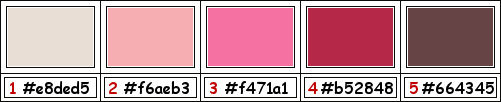
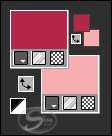
Foreground color (4) #b52848
02- Open the "TD_Canal_Alfa_Bunny_Love.pspimage" file.
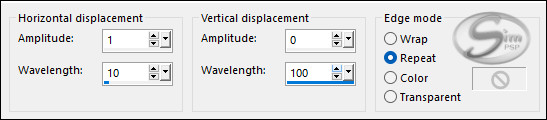
(This will be the basis for our work, which contains
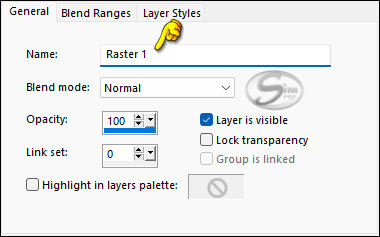
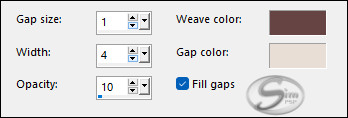
selections recorded on the alpha channel.) Layers > Properties > General > Name: Raster 1
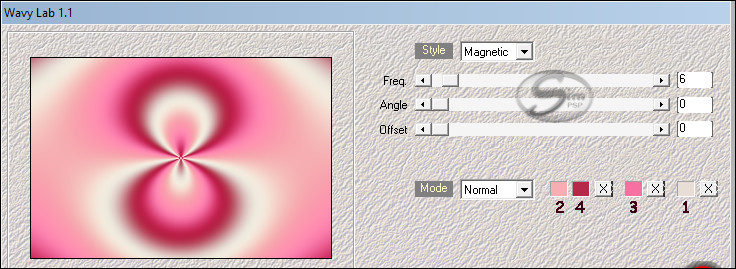
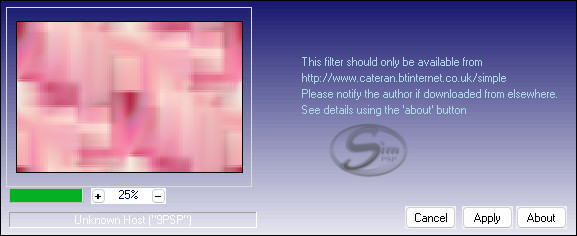
03- Effects > Plugin > Mehdi > Wavy Lab 1.1:
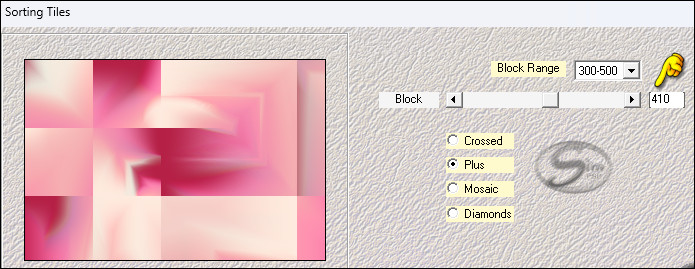
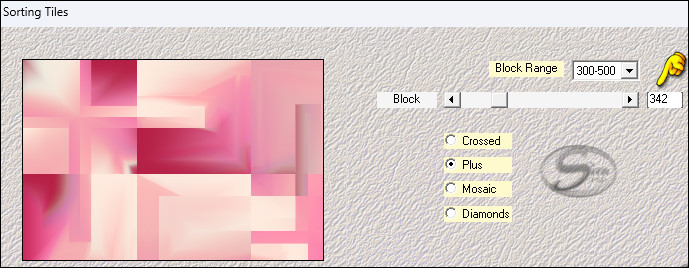
04- Effects > Plugin > Mehdi > Sorting Tiles:
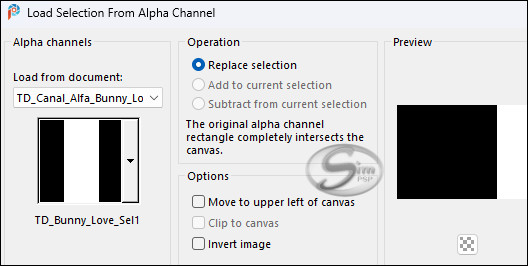
05- Selections > Load/Save Selections > Load Selection from Alpha Channel: "TD_Bunny_Love_Sel1"
06- Selections > Promote Selection to layer.
07- Selections > Select None.
08- Close the visibility of this layer.
09- Activate the layer Raster 1.
10- Effects > Plugin > Mehdi > Sorting Tiles:
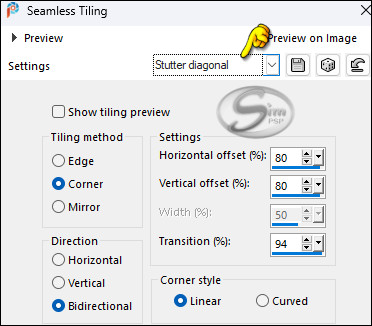
11- Effects > Image Effects > Seamless Tiling: "Stutter diagonal"
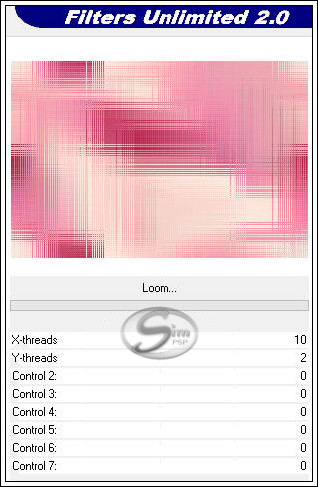
12- Effects > Plugins > I.C.NET Software > Filters Unlimited 2.0 > Funhouse > Loom: Default
13- Effects > Plugins > Simple > Left Right Wrap.
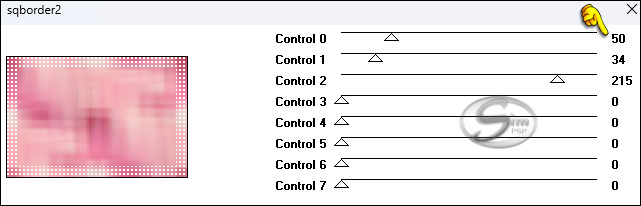
14- Effects > Plugins > Simple > Quick Tile:
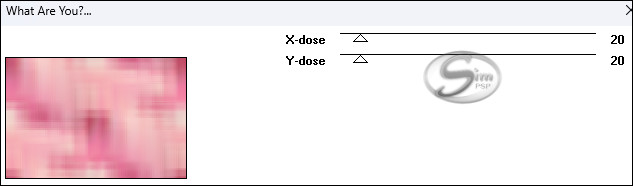
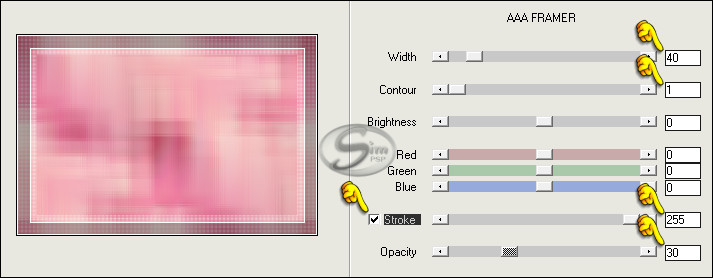
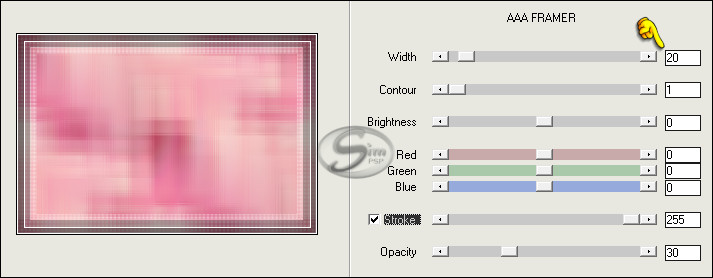
15- Effects > Plugins > Toadies > What are you?: Default
16- Adjust > Sharpness > Sharpen.
17- Activate and open the visibility of Layer "Promoted Selection".
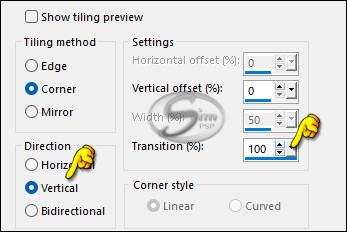
18- Effects > Image Effects > Seamless Tiling:
19- Effects > Plugins > Toadies > What are you?: Default
Note: Do not forget that you should have the color (2) #F6AEB3 in the background.
20- Effects > Distortion Effects > Wave:
21- Effects > Texture Effects > Texture. Colors: (5) #664345 - (1) #e8ded5
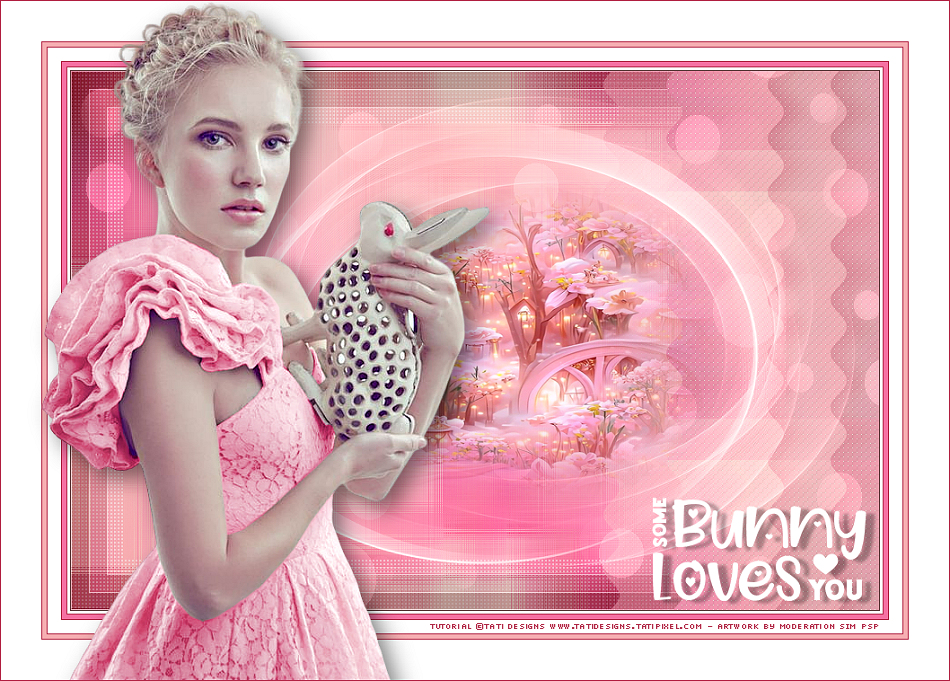
22- Layers > New Raster Layer. Fill in the color (white) #ffffff
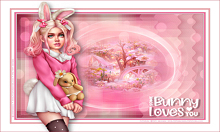
23- Layers > New Mask Layer > From image: "TD_MaskTuto_Bunny_Love"
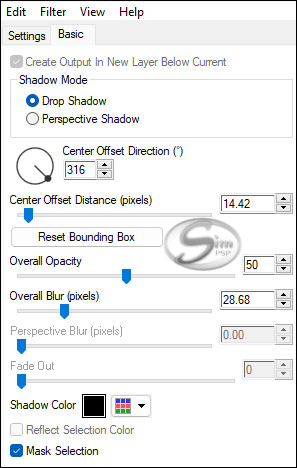
Adjust > Sharpness > Sharpen. Layers > Merge > Merge Group.
24- Effects > 3D Effects > Drop Shadow: 0 / 0 / 50 / 20 / Color: #ffffff
25- Layers > Properties > General > Blend Mode: Luminance (Legacy)
26- Layers > New Raster Layer.
27- Selections > Load/Save Selections > Load Selection from Alpha Channel: "TD_Bunny_Love_Sel2"
28- Open the tube "TD_MistedTuto_Bunny_Love". Edit > Copy. Activate the working image. Edit > Paste Into Selection.
29- Adjust > Sharpness > Sharpen.
30- Selections > Select None.
31- Activate the layer Raster 1.
32- Layers > Duplicate.
33- Effects > Plugins > [AFS Import] > sqborder2:
34- Effects > Plugins > AAA Filters > AAA Framer:
35- Effects > Plugins > AAA Filters > AAA Framer:
36- Layers > Properties > General > Blend Mode: Multiply - Opacity: 35
37- Layers > Duplicate.
38- Layers > Properties > General > Blend Mode: Soft Light - Opacity: 100
39- Image > Add Borders > Symmetric: 1 px - color (5) #664345 Image > Add Borders > Symmetric: 3 px - color #ffffff (White) Image > Add Borders > Symmetric: 1 px - color (4) #b52848 Image > Add Borders > Symmetric: 5 px - color (3) #f471a1 Image > Add Borders > Symmetric: 1 px - color (4) #b52848 Image > Add Borders > Symmetric: 15 px - color #ffffff (White) Image > Add Borders > Symmetric: 1 px - color (4) #b52848 Image > Add Borders > Symmetric: 5 px - color (2) #f6aeb3 Image > Add Borders > Symmetric: 1 px - color (4) #b52848 Image > Add Borders > Symmetric: 45 px - color #ffffff (White)
40- Open the tube "TD_WordArt_Tuto_Bunny_Love" Edit > Copy. Activate the working image. Edit > Paste as New Layer.
41- Effects > 3D Effects > Drop Shadow: 3 / 10 / 30 / 5 / Color:000000 (black)
42- Place in the lower right part (see the example) or wherever you want.
43- Open the character tube you have chosen. Edit > Copy. Activate the working image. Edit > Paste as New Layer. Image > Resize if necessary.
Adjust > Sharpness > Sharpen.
44- Effects > Plugins > Eye Candy5: Impact > Perspective Shadow:
45- Image > Add Borders > Symmetric: 1 px - color (4) #b52848
46- Edit > Copy the "©Tutorial_TatiDesigns" *If you need to change the color, you can use the "Color Changer" tool Position of your choice. Add tube © if necessary.
47 - Apply your watermark or signature. File > Export > JPEG Optimizer.
CREDITS:
Versão by Márcinha - Owner SIM PSP
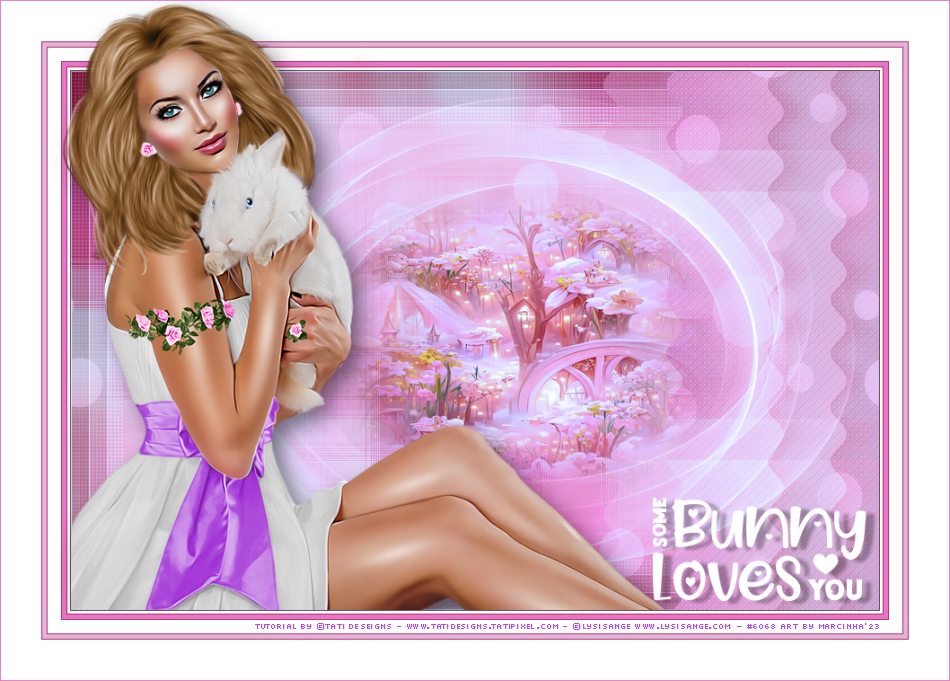
CREDITS: Tutorial Bunny Love by Tati Designs - Art by Márcinha - Main Tube: Tubed by ©Lysisange #6068
Feel free to send your versions.
|