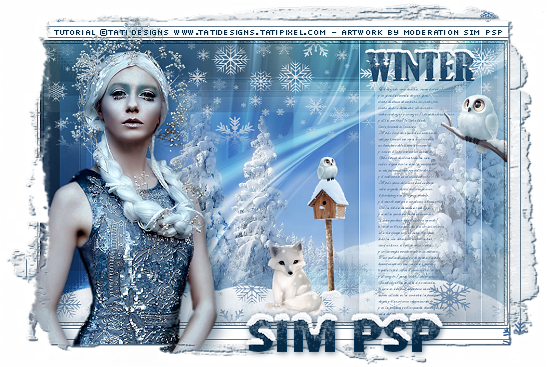
|
Tutorial by
Tati Designs
Author's Note: "Files with initials "TD" (Tati
Designs) are material created by me exclusively for my
tutorials.
MATERIAL: Download the material used here:
PLUGINS
Effects > Plugin > Factory Gallery G > Bevel 1.5
IMPORTANT
PREPARATION:
*
Duplicate the tubes. Close the originals.
Colors
If using other colors, you should change the Blend Mode and the Opacity of the layers.
TUTORIAL
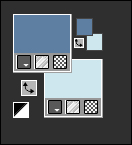
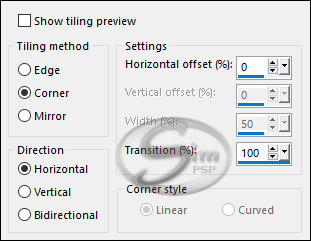
01- In your Materials palette: Foreground color (2) #5e7fa1 Background color color (1) #cee6ed
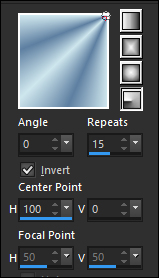
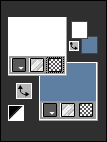
02- In your material palette (foreground), form a Radial Gradient with the colors:
03- Open a new 900 x 550 pixel transparent image.
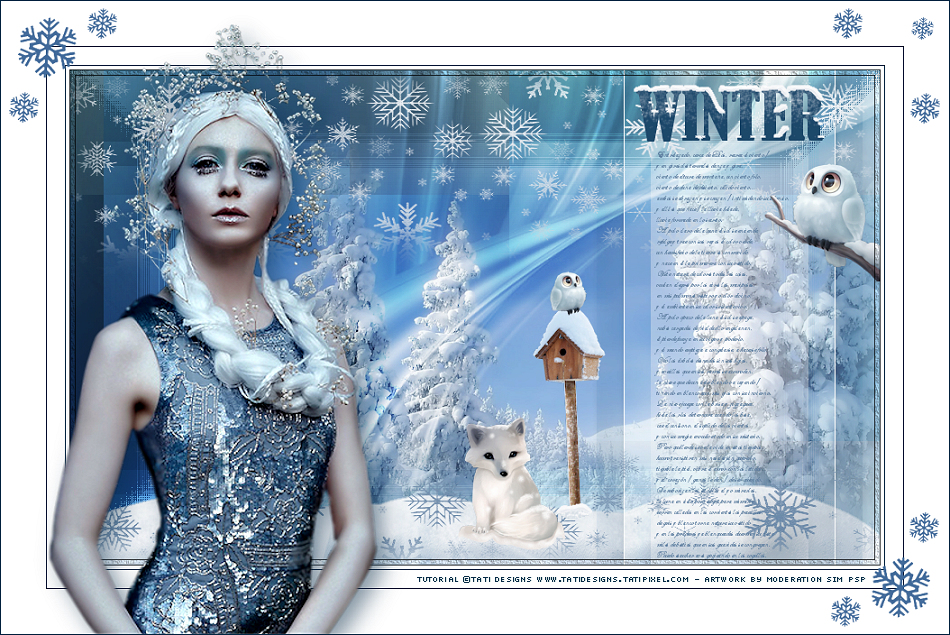
04- Fill the transparent image with the Gradient.
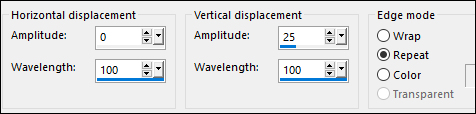
05- Effects > Distortion Effects > Wave:
06- Adjust > Blur > Gaussian Blur: 35
07- Layers > Duplicate.
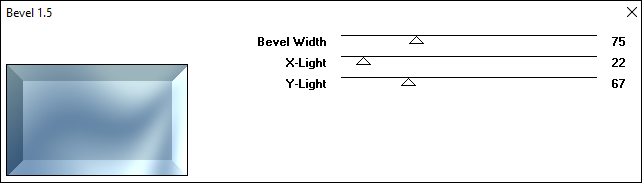
08- Effects > Plugin > Factory Gallery G > Bevel 1.5: Default
09- Effects > Plugin > Factory Gallery G > Bevel 1.5:
10- Layers > Duplicate.
11- Close the visibility of the layer (Copy (2) of Raster 1) and activate the layer Copy of Raster 1
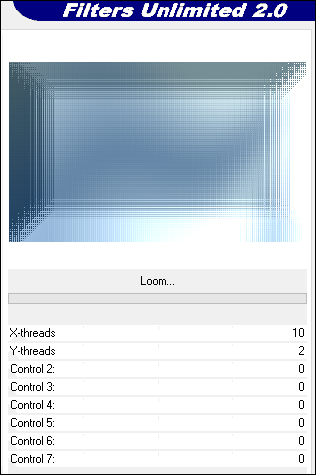
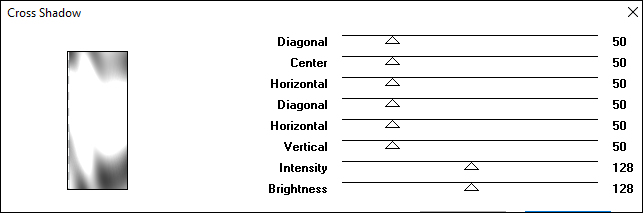
12- Effects > Plugins > I.C.NET Software > Filters Unlimited 2.0 > FunHouse > Loom: Default
13- Layers > Properties > General > Blend Mode: Multiply
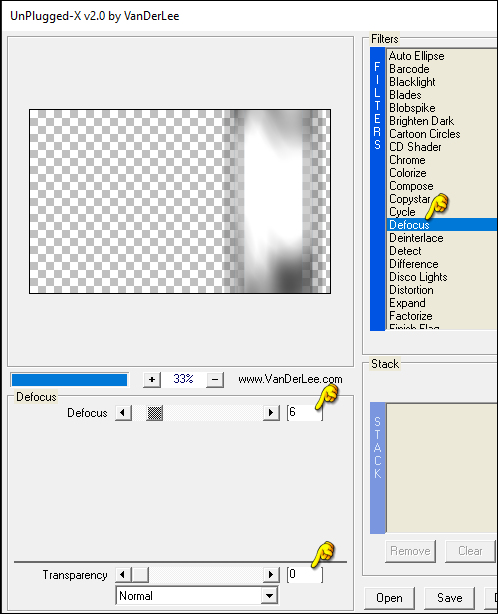
14- Activate and open the visibility of the layer Copy (2) of Raster 1.
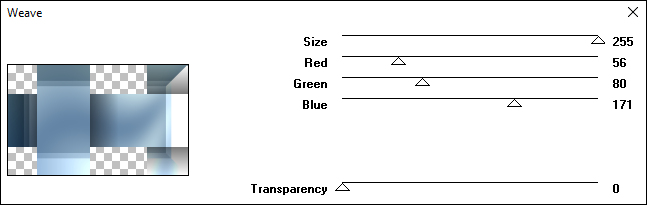
15- Effects > Plugin > Factory Gallery A > Weave:
16- Effects > Image Effects > Seamless Tiling:
17- Image > Mirror > Mirror Horizontal.
18- Layers > Properties > General > Blend Mode: Overlay
19- Open the tube "TD_Misted_Winter". Edit > Copy. Activate the working image. Edit > Paste as New Layer.
20- Activate the "Pick" Tool (K) and modify the positions of X (38.00) and Y (34.00)
Press "M" KEY to disable Pick Tool.
21- Layers > New Raster Layer.
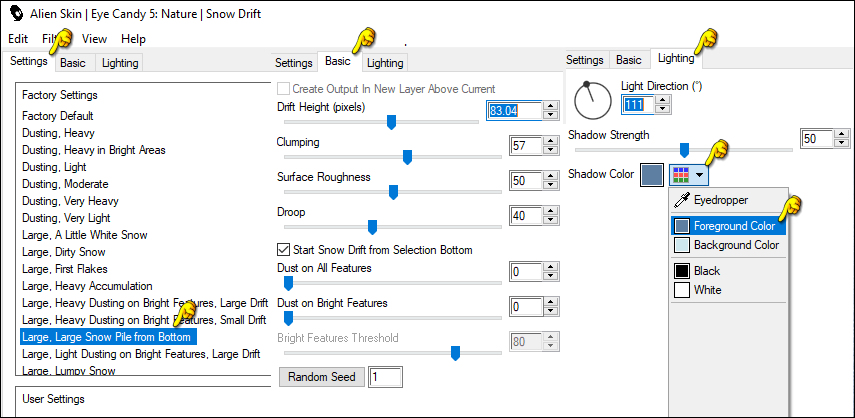
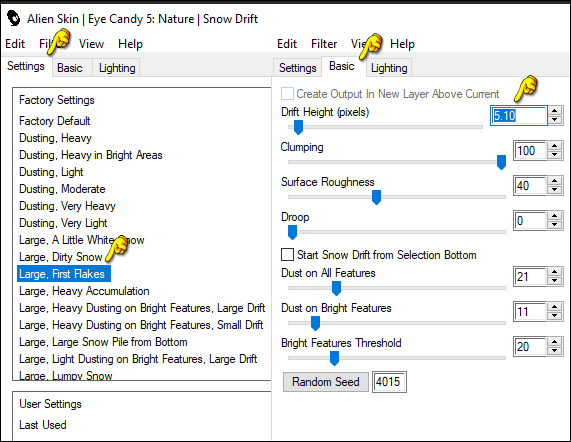
22- Effects > Plugin > Alien Skin Eye Candy 5: Nature > Snow Drift: Settings: Large, Large Pile from Bottom Lighting: Shadow Color (2) #5e7fa1
23- In your Materials palette: Foreground color #ffffff (White) Background color color (3) #062945
24- Layers > New Raster Layer.
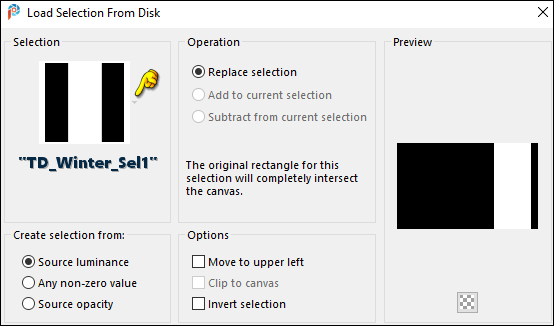
25- Selections > Load/Save Selections > Load Selection From Disk: "TD_Winter_Sel1"
26- Fill the Selection with the color #ffffff (White)
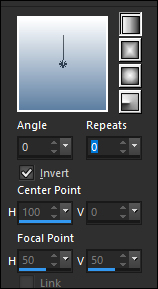
27- Effects > Plugin > Graphics Plus > Cross Shadow: Default
28- Selections > Select None.
29- Effects > Plugin > VanDerLee > Unplugged-X: Defocus
30- Effects > Edge effects > Enhance.
31- Layers > Properties > General > Blend Mode: Hard Light - Opacity: 40%
32- Effects > 3D Effects > Drop Shadow: 0 / 0 / 50 / 10 / Color: #000000 (Black)
33- Layers > New Raster Layer.
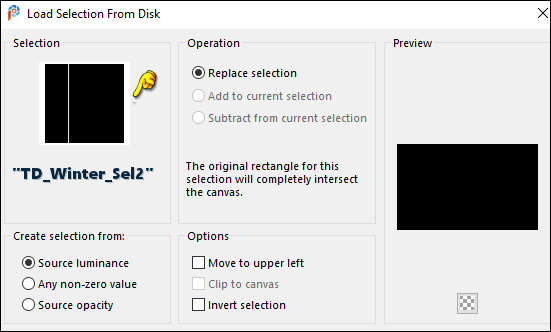
34- Selections > Load/Save Selections > Load Selection From Disk: "TD_Winter_Sel2"
35- Fill the Selection with the color #ffffff (White)
36- Selections > Select None.
37- Layers > New Raster Layer and fill with the color #ffffff (White)
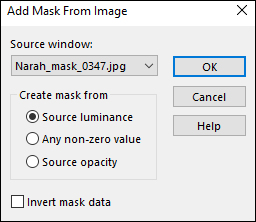
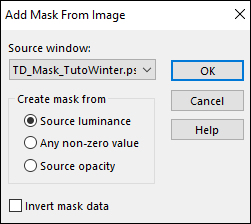
38- Layers > New Mask Layer > From image: "Narah_mask_0347"
Layers > Merge > Merge Group.
39- Image > Mirror > Mirror Vertical.
40- Effects > 3D Effects > Drop Shadow: 10 / 10 / 60 / 20 / Color: (3) #062945
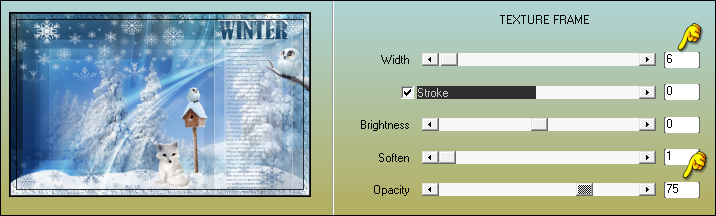
41- Layers > Properties > General > Blend Mode: Overlay
42- n your Materials palette: Foreground color #ffffff (White) Background color color (2) #5e7fa1
43- In your material palette (foreground), form a Linear Gradient with the colors:
44- Layers > New Raster Layer and fill with gradient.
45- Layers > New Mask Layer > From image: "TD_Mask_TutoWinter"
Layers > Merge > Merge Group.
46- Open the tube "TD_TutoWinter_Texto". Edit > Copy. Activate the working image. Edit > Paste as New Layer.
47- Activate the "Pick" Tool (K) and modify the positions of X (649.00) and Y (90.00)
Press "M" KEY to disable Pick Tool.
48- Open the tube "TD_TutoWinter_Titulo". Edit > Copy. Activate the working image. Edit > Paste as New Layer.
49- Activate the "Pick" Tool (K) and modify the positions of X (629.00) and Y (22.00)
Press "M" KEY to disable Pick Tool.
50- Effects > Plugin > Alien Skin Eye Candy 5: Nature > Snow Drift: Settings: Large, First Flakes
51- Open the tube "TD_TutoWinter_Buhos". Activate the layer "TD - Tube Buho 1". Edit > Copy. Activate the working image. Edit > Paste as New Layer.
52- Activate the "Pick" Tool (K) and modify the positions of X (771,00) and Y (104,00)
Press "M" KEY to disable Pick Tool.
53- Open the tube "TD_TutoWinter_Buhos". Activate the layer "TD - Tube Buho 2". Edit > Copy. Activate the working image. Edit > Paste as New Layer.
54- Activate the "Pick" Tool (K) and modify the positions of X (514,00) and Y (224,00)
Press "M" KEY to disable Pick Tool.
55- Open the tube "TD_TutoWinter_Zorro_Artico". Edit > Copy. Activate the working image. Edit > Paste as New Layer.
56- Activate the "Pick" Tool (K) and modify the positions of X (424,00) and Y (385,00)
Press "M" KEY to disable Pick Tool.
57- Layers > Merge > Merge All.
58- Effects > Plugin > AAA Frames > Texture Frame:
59- Image > Add Borders > Symmetric: 4 px - color #ffffff (White) Image > Add Borders > Symmetric: 1 px - color (3) #062945 Image > Add Borders > Symmetric: 20 px - color #ffffff (White) Image > Add Borders > Symmetric: 1 px - color (3) #062945 Image > Add Borders > Symmetric: 50 px - color #ffffff (White)
60- Open the tube "TD_TutoWinter_Deco". Edit > Copy. Activate the working image. Edit > Paste as New Layer.
61- Open the tube "tube danimage alissa 2021". Erase the watermark. Edit > Copy. Activate the working image. Edit > Paste as New Layer.
62- Image > Mirror > Mirror Horizontal.
63- Image > Resize: 127% - all layers unchecked.
64- Activate the "Pick" Tool (K) and modify the positions of X (52,00) and Y (24,00)
65- Adjust > Sharpness > Unsharp Mask:
Note: This step is for this specific tube, maybe your tube doesn't need it.
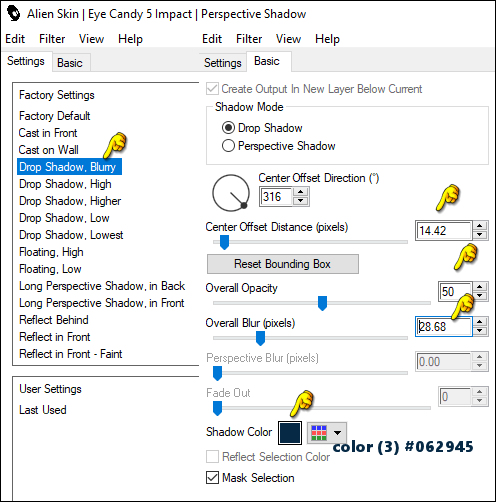
66- Effects > Plugins > Alien Skin Eye Candy 5: Impact > Perspective Shadow:
Settings: "Drop Shadow, Blurry" - Basic: Color: (3) #062945
64- Image > Add Borders > Symmetric: 1 px - color (3) #062945
65- Edit > Copy the "©Tutorial_TatiDesigns" *If you need to change the color, you can use the "Color Changer" tool Position of your choice. Add tube © if necessary.
66 - Apply your watermark or signature. File > Export > JPEG Optimizer.
CREDITS: Other Materials: by: by Tati Designs 1 Mask: by Narak
Versão by Márcinha - Owner SIM PSP
CREDITS: Tutorial Winter by Tati Designs - Art by Márcinha - Main Tube: by © Krissy's Imaging
Feel free to send your versions.
|