|
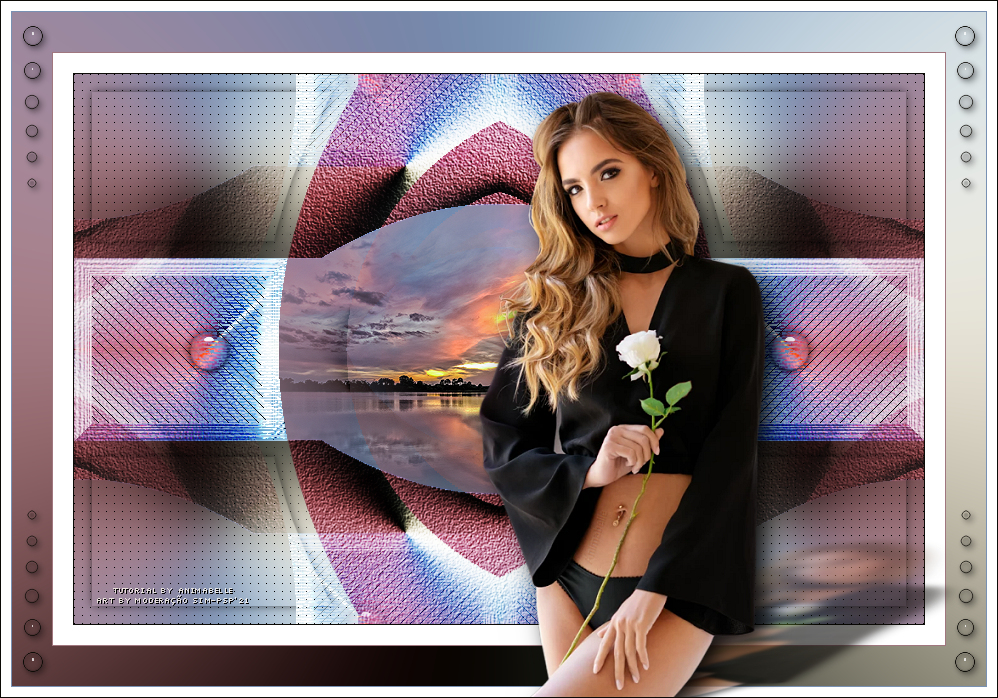
Tutorial by Animabelle Traduzido para o Português pela Moderação do SIM PSP Tutorial Original:
MATERIAL 1 Tube Principal 1 Misted Paisagem Calque_Alpha_Soizic_Animabelle Sel4_Soizic_Animabelle (Salvar na pasta Seleções do PSP)
PLUGINS Mehdi Filters Unlimited 2.0 Artistic Bordure Mania (nvr) AP [Lines] Alien Skin Eye Candy 5: Impact Simple Texture
A tradução desse tutorial foi feita na versão do PSP2020, podendo, ser realizado esse tutorial em outras versões do PSP.
TUTORIAL
01- Abrir o material no PSP, duplicar e fechar o original. Lembre-se de salvar seu trabalho com frequência. Sinta-se à vontade para alterar o Blend Mode e o Opacity da layer, se necessário.
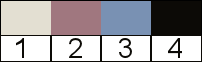
02- Escolher quatro cores para trabalhar. Cor 1 #e3dfd2 Cor 2 #a0777f Cor 3 #7991b3 Cor 4 #0c0a06
03- Abra o arquivo Calque_Alpha_Soizic_Animabelle. Configure o Foreground com a cor 2 e o Background com a cor 1.
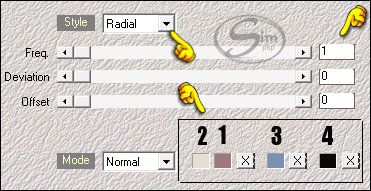
04- Effects > Plugin Mehdi > Wavy Lab 1.1 > seguindo a ordem das cores:
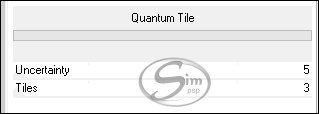
Effects > Plugins > Filters Unlimited 2.0 > &<BKg Designer sf10 II> - Quantum Tile
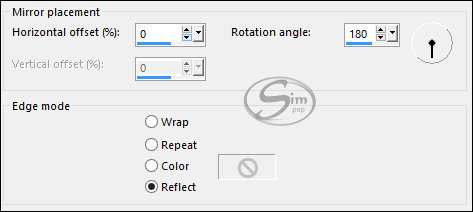
05- Effects > Reflection Effects > Rotating Mirror:
Image > Rotate Left Effects > Reflection Effects > Rotating Mirror mesma configuração anterior. Image > Rotate Right
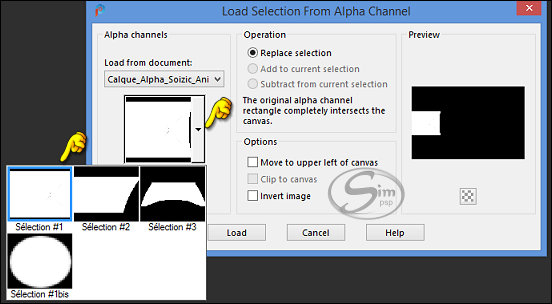
06- Selections > Load/Save Selections > Load Selection from Alpha Channel: selection #1
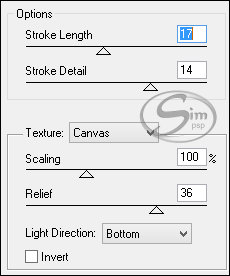
Selections > Promote Selection to Layer. Effects > Plugins > Artistic > Rough Pastels
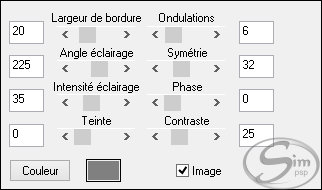
07- Effects > Plugins > Bordure Mania (nvr) > Ondulation:
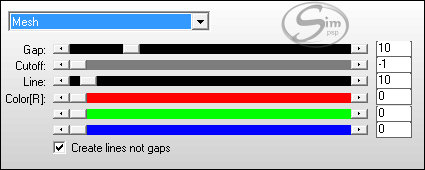
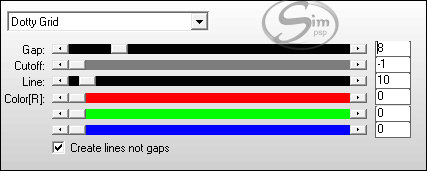
Selections > Modify > Contract > 18 px Effects > Plugins > AP [Lines] > Lines - SilverLining:
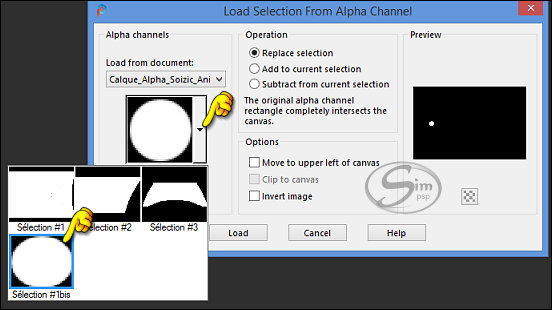
08- Selections > Load/Save Selections > Load Selection from Alpha Channel: selection #1bis
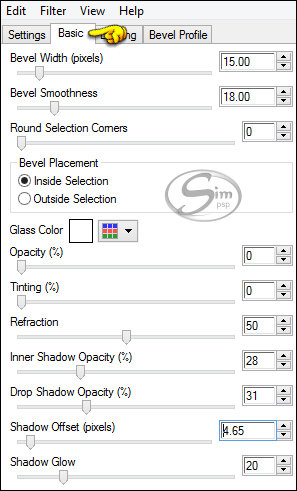
Effects > Plugins > Alien Skin Eye Candy 5 Impact: Glass Settings: Clear
Effects > 3D Effects > Drop Shadow: 0, 0, 60, 15, color #000000. Selections > Select None.
09- Effects > Reflection Effects > Rotating Mirror:
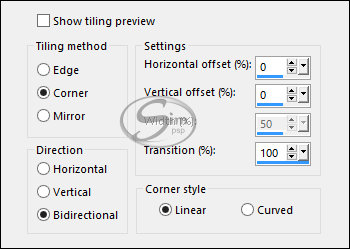
Layers > Duplicate. Effects > Image Effects > Seamless Tiling:
Layers > Properties > General > Blend Mode: Overlay
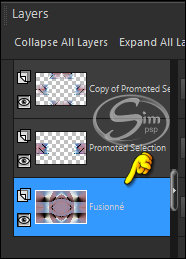
10- Ativar a útima Layer (Fusionné)
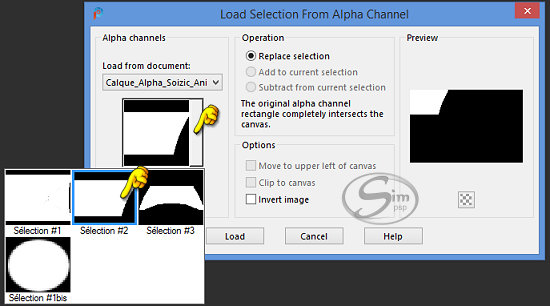
Selections > Load/Save Selections > Load Selection from Alpha Channel: selection #2
Selections > Promote Selection to Layer. Adjust > Blur > Gaussian Blur: 30. Effects > Plugins > AP [Lines] > Lines - SilverLining:
11- Selections > Modify > Contract > 18 px Effects > 3D Effects > Drop Shadow: 0, 0, 60, 15, color #000000. Selections > Select None. Effects > Plugins > Simple > Top Left Mirror
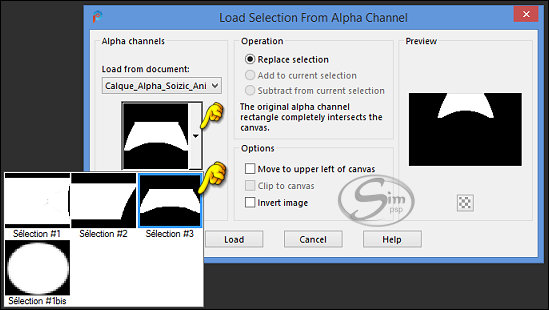
12- Ativar novamente a útima Layer (Fusionné) Selections > Load/Save Selections > Load Selection from Alpha Channel: selection #3
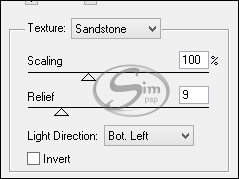
Selections > Promote Selection to Layer. Effects > Plugins > Texture > Texturizer
Layers > Properties > General > Blend Mode: Overlay - Opacity: 46% Selections > Select None.
13- Layers > Duplicate. Layers > Merge > Merge Down. Layers > Duplicate. Effects > Image Effects > Seamless Tiling:
Layers > Arrange > Bring to Top.
14- Ativar novamente a útima Layer (Fusionné)
Edit > Copy no Misted paisagem. Image> Resize: à sua escolha (ou 70% se optar pelo misted do material) com all layers desmarcado. Posicione bem ao centro. Adjust > Sharpness > Sharpen. Layers > Merge > Merge Visibile.
15- Image > Add Bordes > 1px - simmetric - Cor 4 #0c0a06 Image > Add Bordes > 20px - simmetric - Cor #FFFFFF (Branco) Image > Add Bordes > 1px - simmetric - Cor 2 #a0777f
16- Selections > Select All. Image > Add Bordes > 40px - simmetric - Cor #FFFFFF (Branco) Selections > Invert. Effects > Plugin Mehdi > Wavy Lab 1.1 > seguindo a ordem das cores:
Selections > Select None.
17- Image > Add Bordes > 1px - simmetric - Cor 3 #7991b3 Image > Add Bordes > 10px - simmetric - Cor #FFFFFF (Branco) Selections > Load/Save Selections > Load Selection From Disk: Sel4_Soizic_Animabelle
Layers > New Raster Layer. Pintar com a Cor 4 #0c0a06 ou #00000 (preto) Selections > Modify > Contract: 1 Pressione a tecla "Delete" no teclado
18- Ativar a layer debaixo. Selections > Promote Selection to layer. Effects > Plugins > Alien Skin Eye Candy 5 Impact: Glass Settings: Clear
Ativar a layer do topo. Layers > Merge > Merge Down. Selections > Select None. Effects > 3D Effects > Drop Shadow: 3, 3, 40, 10, cor #000000 (preto) Layers > Merge > Merge Visibile.
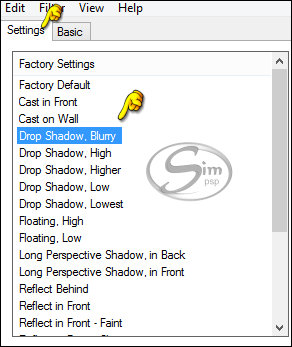
19- Edit > Copy no tube principal Se for necessário > Image> Resize: com all layers desmarcado. Posicione no canto inferior direito como indica o trabalho da autora. Adjust > Sharpness > Sharpen. Effects > Plugin > Alien Skin Eye Candy 5 Impact > Perspective Shadow: Drop Shadow, Blurry
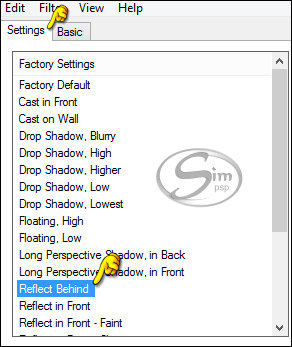
20- Effects > Plugin > Alien Skin Eye Candy 5 Impact > Perspective Shadow: Reflect Behind
Image > Add Bordes > 1px - simmetric - Cor 4 #0c0a06
21- Aplicar sua marca d'água ou assinatura. File > Export > JPEG Optimizer.
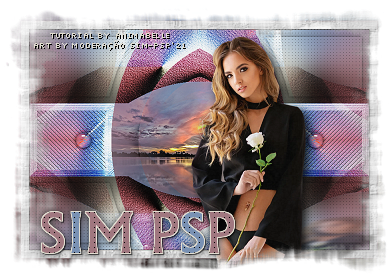
CREDITOS Tutorial Soizic by Animabelle Tradução, Formatação e Art Final by Moderação SIM PSP Tube e Misted Paisagem: Tubed by Animabelle
Versão by Márcinha - Owner SIM PSP
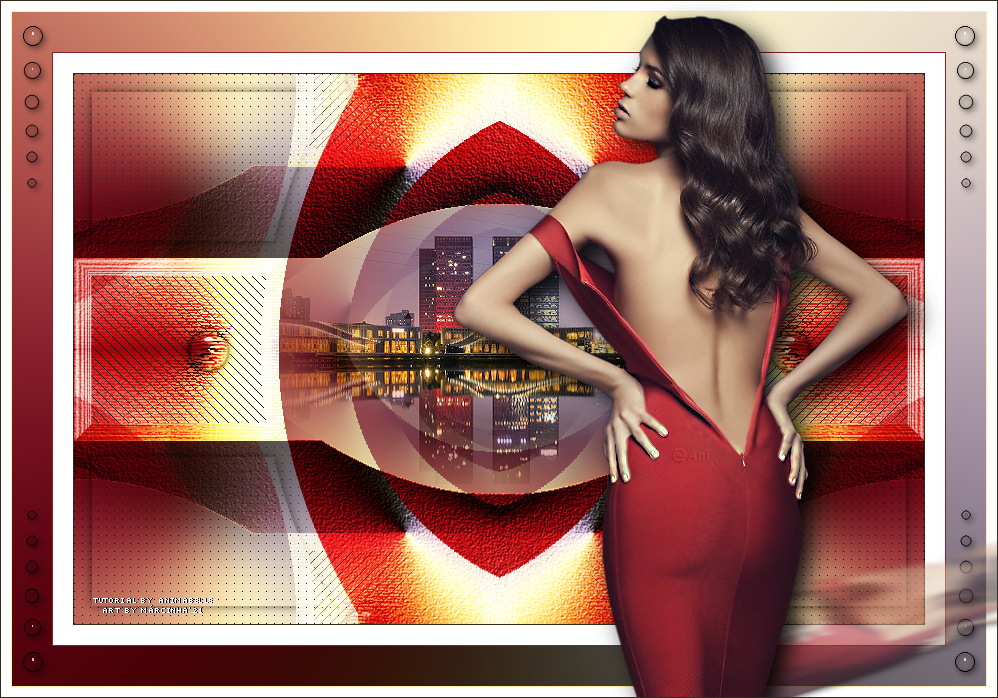
CREDITOS : Versão by Marcinha Tutorial Soizic by Animabelle Tradução by Moderação SIM PSP Tube e Misted Paisagem: Tubed by Animabelle
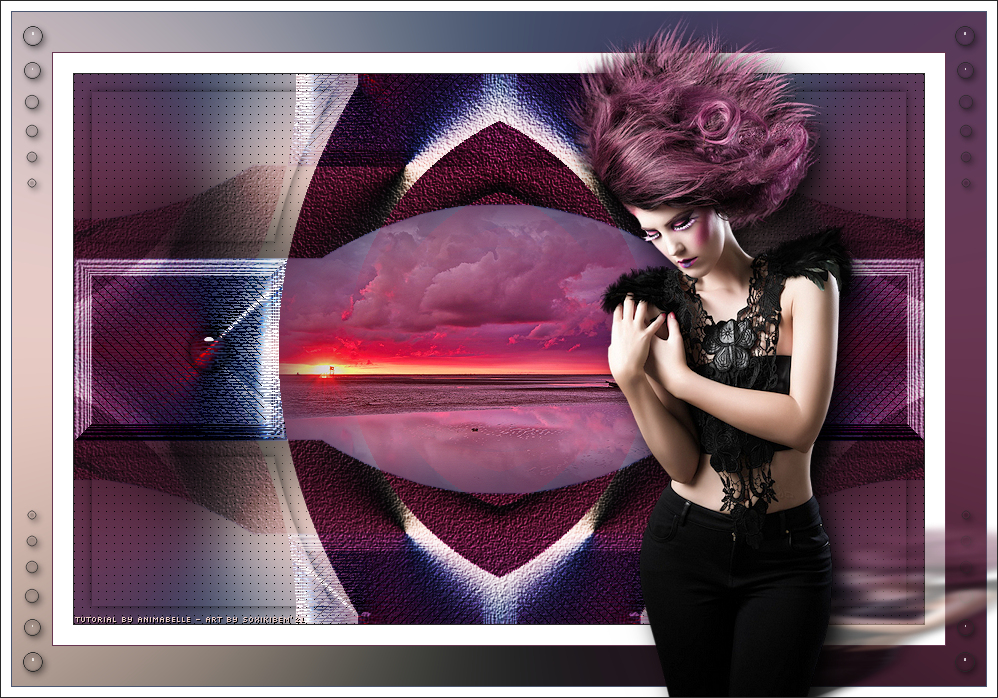
Versão by Soxikibem - Owner SIM PSP
CREDITOS: Versão by Soxikibem Tutorial Soizic by Animabelle Tradução by Moderação SIM PSP - Art by Soxikibem Tube e Misted Paisagem: Tubed by Animabelle
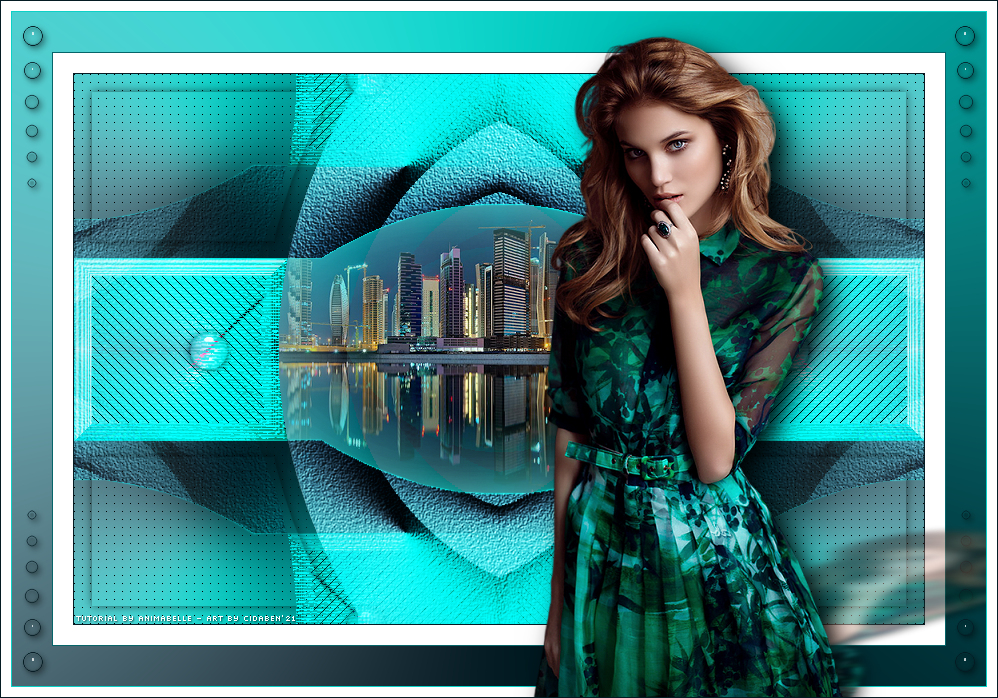
Versão by CidaBen - Moderadora do SIM PSP
CREDITOS: Versão by CidaBen Tutorial Soizic by Animabelle Tradução by Moderação SIM PSP - Art by CidabenTube e Misted Paisagem: Tubed by Animabelle
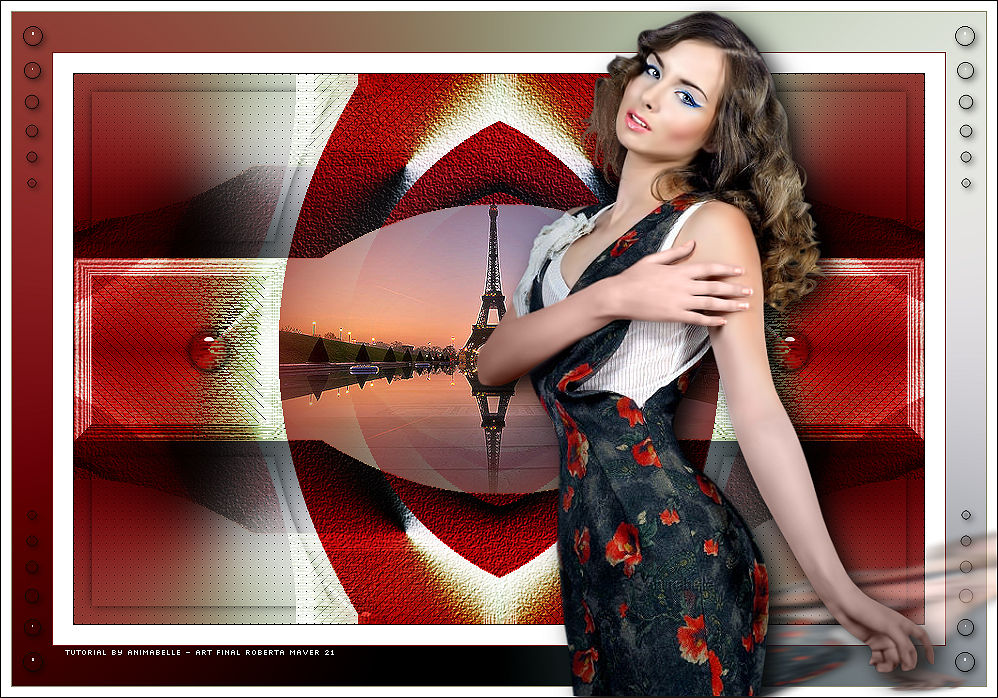
Versão by Roberta Maver - Moderadora do SIM PSP
CREDITOS : Versão by RobertaMaverTutorial Soizic by Animabelle Tradução by Moderação SIM PSP Tube e Misted Paisagem: Tubed by Animabelle
|