|
Este Tutorial foi escrito
por AnaMariaC, qualquer semelhança é mera coincidência.
Tutorial testado por
Soxikibem e revisado por Márcinha.
Tutorial elaborado no PSP X19
O meu agradecimento as Tubeiras pelos Tubes e Masks.
Sem eles não seria possível escrever o tutorial.
Portanto, ao compartilhar ou usá-los, mantenha os tubes intactos e
não retirem o crédito.
TRADUÇÕES:


Obrigada aos nossos
Tradutores
MATERIAL
1 Tube principal à sua escolha.
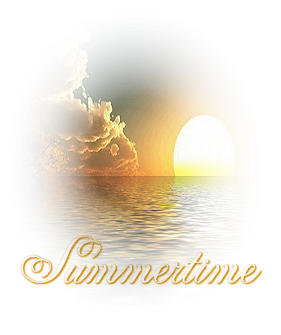
1 Misted paisagem à sua escolha
1 Texture > winni.texture 11
3
Seleções_Summertime_byAnaMariaC
1 WorArt_byAnaMariaC
PLUGINS
Plugin Effect > Flaming Pear > Flood.
Plugin Effect > Flaming Pear > Flexify.
Plugins > Graphics Plus > Cross Shadow.
Plugin Mehdi > Sorting Tiles.
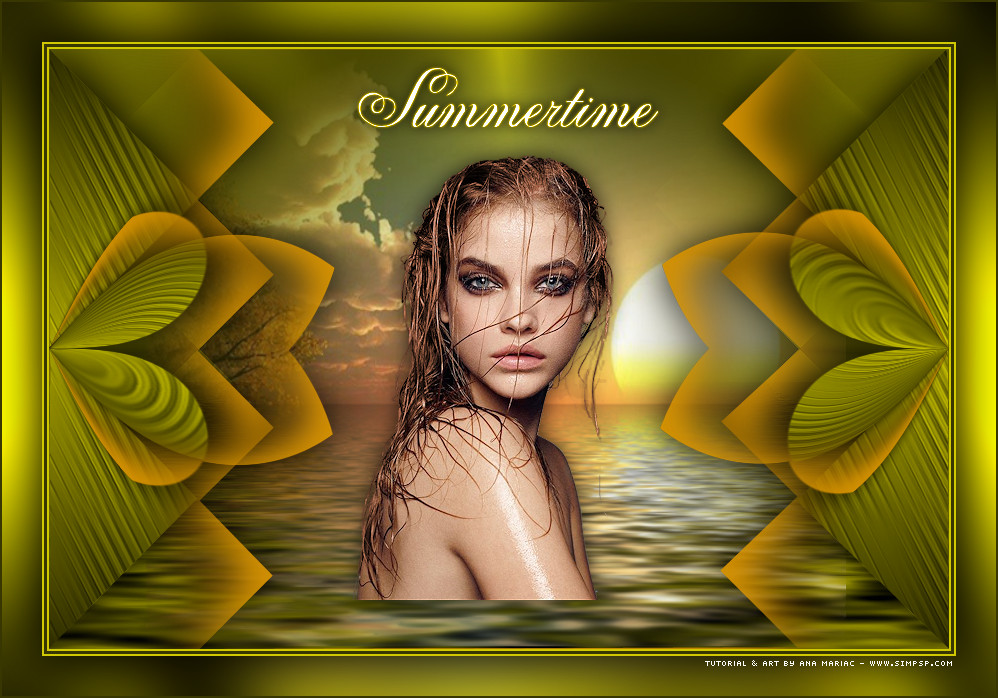
TUTORIAL
01- Abrir o material no PSP, duplique e feche o original.
Salve as seleções_summertime na pasta selections do PSP.
Salve a Textura_winni.texture.11 na pasta texture do PSP.
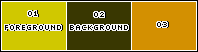
02- Escolha as cores para trabalhar:
Foreground: #d0c800 / Background: #393701 / cor extra: #d39001
03- Abra uma imagem transparente de 900x600px.
04- Pinte a imagem transparente com um gradiente > Radial
formado pelas cores 1 e 2.
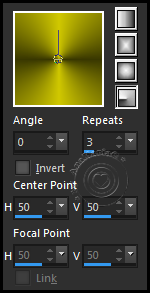
05- Effects > Image Effect > Seamless tiling > Default.
06- Adjust > Blur > Radial Blur.
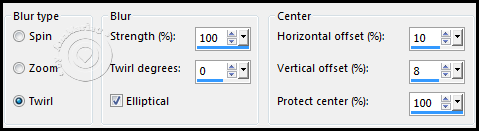
Layers > Duplicate.
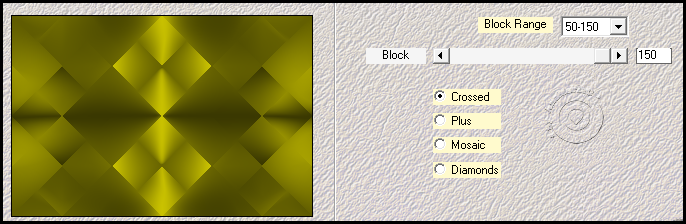
07- Effects > Plugin Mehdi > Sorting Tiles.
08- Selections > Load/Save Selections > Load Selection From
Disk: summertime1_byAnaMariaC
Aperte a tecla Delete do teclado.
Selections > Select None.
Layers > Merge > Merge Down.
09- Layers > New Raster Layer.
Selections > Load/Save Selections > Load Selection From Disk:
summertime2_byAnaMariaC
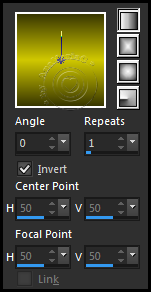
Pintar com o gradiente > Linear formado pelas cores 1 e 2.
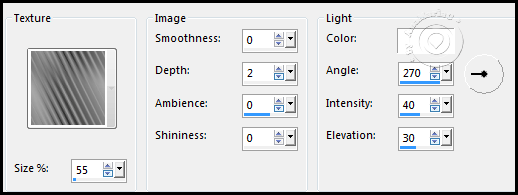
10- Effects > Texture Effects >Texture > winni.texture 11
Effects > 3D Effects > Drop Shadow: 0 / 0 / 100 / 60 / Cor: #000000
(preta).
Selections > Select None.
11- New Raster Layer.
Selections > Load/Save Selections > Load Selection From Disk:
summertime3_byAnaMariaC
Effects > 3D Effects > Drop Shadow: 0 / 0 / 100 / 100 / cor: #d39001
Selections > Select None.
12- Layers > Duplicate.
Edit > Repeat Duplicate layer.
Layers > Merge > Merge Down.
Edit > Repeat Layer Merge Down, 2 vezes.
Effects > 3D Effects > Drop Shadow: 0 / 0 / 100 / 60 / Cor: #000000
13- Layers > Duplicate.
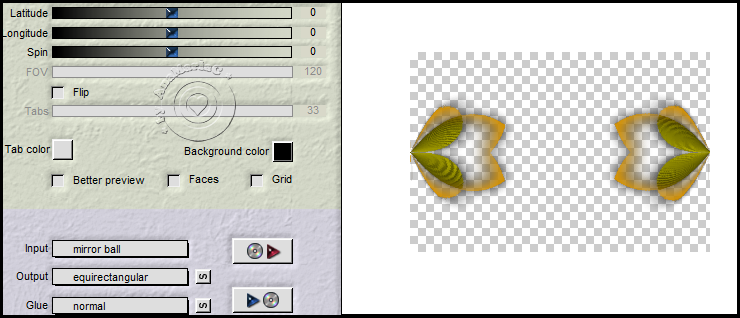
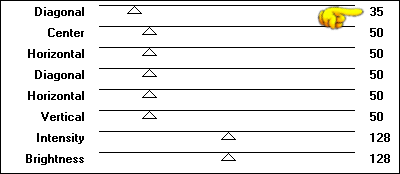
Effects > Plugin > Flaming Pear > Flexify.
Layers > Merge > Merge Down.
14- Ativar o Misted_NAISEM_02.
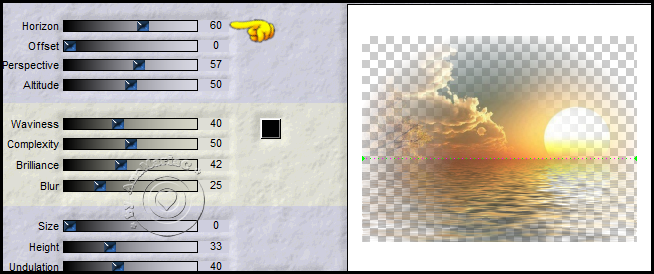
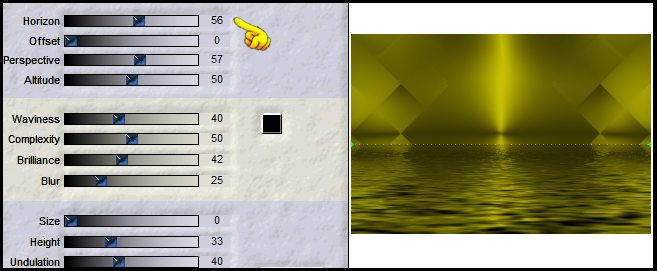
Effects > Plugin > Flaming Pear > Flood.
15- Edit > Copy no Misted_NAISEM-02.
Edit > Paste As New Layer no trabalho.
Image > Resize: 110% - all layers unchecked.
Adjust > Sharpness > Sharpen.
16- Ativar a Pick tool nessas configurações:

Sua imagem deverá ficar como no print abaixo:
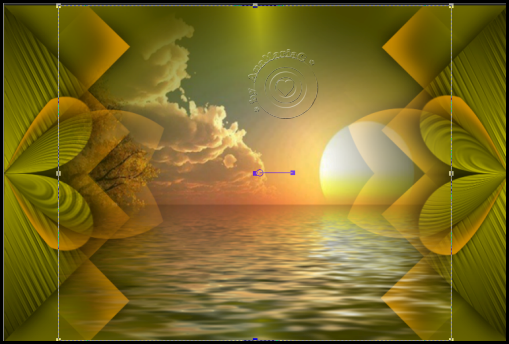
Nota: As configurações da Pick Tool , poderá variar conforme
o misted que você utilizar.
Layer > Arrange Move Down.
Ativar a Layer do topo (Raster 2).
Layer Merged > Merged Down.
17- Ativar a Layer Raster 1.
Effects > Plugin Effect > Flaming Pear > Flood.
Adjust > Sharpness > Sharpen.
18- Ativar a Layer do topo (Raster 3).
Edit > Copy no tube principal_NAISEM_MULHERES_562
Edit > Paste As New Layer.
Image > Resize: 60% - all layers unchecked.
Image > Mirror > Mirror Horizontal.
Adjust > Sharpness > Sharpen.
Posição a seu gosto.
Effects > 3D Effects > Drop Shadow: 0 / 0 / 70 / 30 / Cor: #000000 -
ou a seu gosto.
19- Edit > Copy no WorArt_Summertime_byAnaMariaC.
Edit > Paste As New Layer.
Posição e colorize a seu gosto.
Effects > 3D Effects > Drop Shadow: 0 / 0 / 70 / 20 / Cor: #000000 -
ou a seu gosto.
20- Image > Add Borders > Symmetric:
2 px cor: #80d800 (Foreground).
3 px cor: #393701 (Background).
2 px cor: #80d800 (Foreground).
Edit > Copy.
21- Selections > Select All.
Image > Add Borders > Symmetric: 40 px qualquer cor.
Selections > Invert.
Edit > Paste Into Selection.
Adjust > Blur > Gaussian Blur > Radius: 30
22- Effects > Plugins > Graphics Plus > Cross Shadow.
Selections > Invert.
Effects > 3D Effects > Drop Shadow: 0 / 0 / 100 / 80 / Cor: #000000
Selections > Select None.
23- Finalizar
Image > Add Borders > Symmetric: 2 px qualquer cor: #393701
(Background).
24- Se você desejar, redimensione seu trabalho.
Aplicar sua marca d'água ou assinatura.
File > Export > JPEG Optimizer.
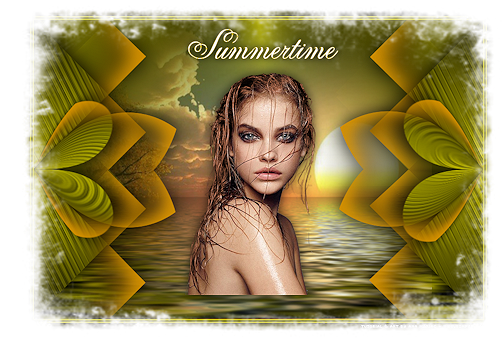
VERSÃO
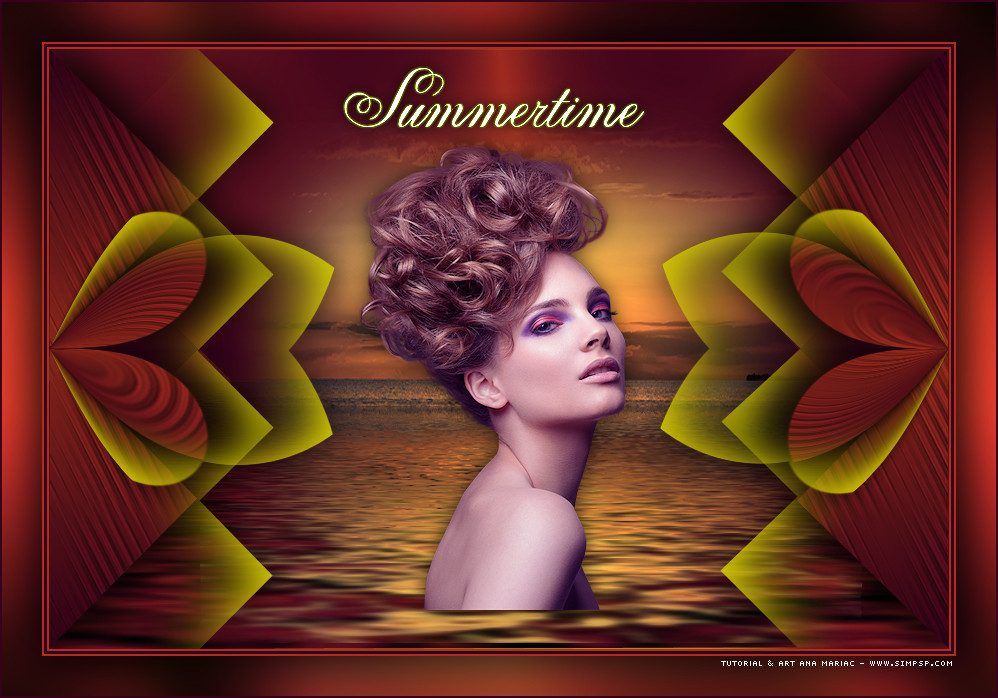
Créditos:
Tutorial
Formatação e Arte Final by AnaMariaC
Tube
Principal e Misted Paisagem: by
Naise M
Versão
Tube
Principal e Misted Paisagem: by
Colibrix
Font: Anglia Script – Rezi:72
Brasil, 07/10/2022
Sinta-se à vontade para enviar suas versões.
Terei todo o prazer em publicá-las em nosso site.


|
Tutorial criado por
AnaMariaC
em Outubro/2022 revisado em Maio/2023
para
SIM-PSP.
Não poderá ser copiado, retirado de seu lugar, traduzido
ou utilizado
em listas de aprendizados ou grupos
sem o consentimento prévio da autora |
|