|


Tutorial By
AnaMariaC
English Translation by SIM-PSP
moderation
Original Tutorial

MATERIAL
1 Main Tube of your choice
1 Tube Decorative of your choice
1 Misted Landscape of your choice
título_Leni_Diniz
Masck_Nikita

PLUGINS
Carolainne and Sensiblility
MuRa's Seamless
Penta Com
Simple
TUTORIAL
01- Open the material on the
PSP, duplicate and close the original.
02-
Choose two colors to work with:
Foreground: #55355f
Background: #e2d3e6

03- Open a transparent image of 900x600px.
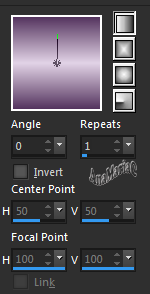
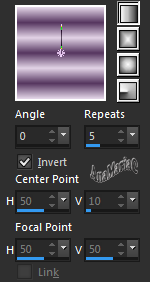
04- Fill the transparency with a Linear gradient, formed by
the chosen colors:

05- Layers > Duplicate.
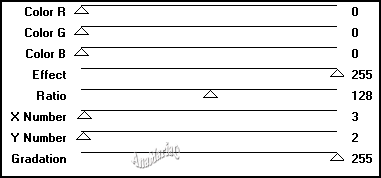
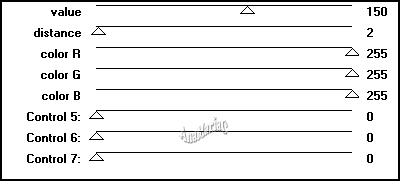
Effects > Plugins >
MuRa's Seamless > Checks With Gradation:

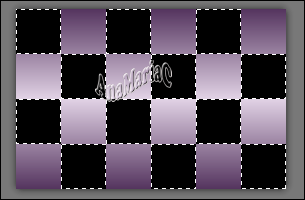
06- With the Magic Wand Tool: Mode: Add (shift) -
Tolerance e Feather: 0,
select the black squares:

Press the keyboard's
Delete key.
Selections > Select None.
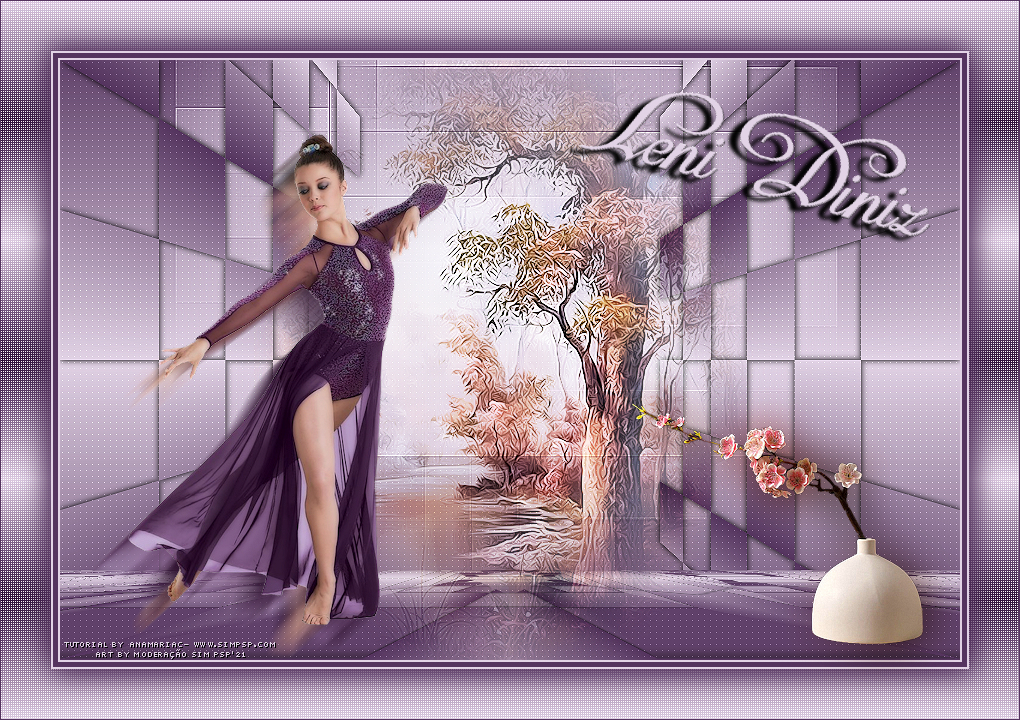
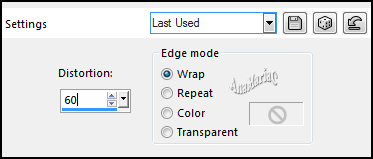
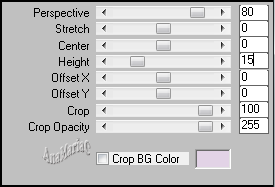
07- Effects > Geometric Effects > Perspective Horizontal:

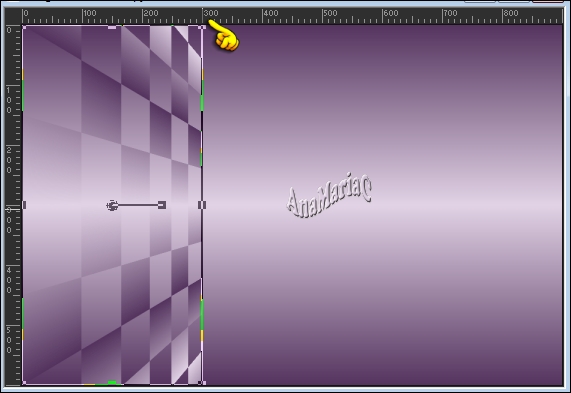
08- Activate the ruler in View > Rulers.
Activate the Pick Tool >
Mode: Scale tool and pull to width 300:

09- Layers > Duplicate.
Image > Mirror > Mirror Horizontal.
Layers > Merge > Merge Down.
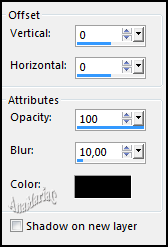
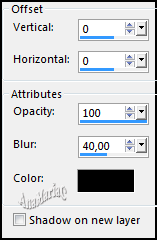
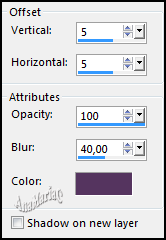
10- Effects > 3D Effects > Drop Shadow > Cor: #000000

11- Activate the layer Raster 1.
Layers > New Raster Layer.
12- Fill with color: #e2d3e6 (Background).
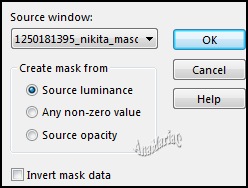
13- Layers > New Mask Layer > From image: 1250181395_nikita_masques

14- Layers > Merge > Merge Group.
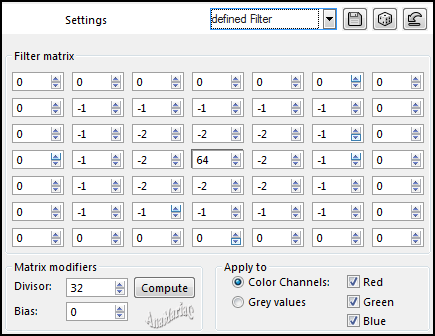
15- Effects > User Defined Filter > Defined Filter:

16- Layers > Merge > Merge Down.
17- Edit > Copy the misted landscape.
Edit > Paste as New Layer.
Image > Resize if
necessary.
Adjust > Sharpness > Sharpen.
18- Layers > Properties > General > Blend Mode: Hard Light.
Note: Or another Blend Mode that matches the chosen colors.
19- Layers > Arrange > Move Up.
20- Ativar > Layer > Copy of Raster 1.
Layers > Merge > Merge Down.
Layers > Duplicate.
21- Effects > Plugins > Simple > Pizza Slice Mirror.
22- Effects > Plugins > Simple > Top Left Mirror.
23- Effects > Plugins > MuRa’s Meister > Perpective Tilling:

24- Effects > 3D Effects > Drop Shadow:

25- Layers > Merge > Merge Down.
26- Effects > Plugins > Carolainne and Sensiblility > SC -
LDots:

Adjust > Sharpness > Sharpen.
28- Image > Add Borders > Symmetric:
2 px > color: #e2d3e6 (Background)
5 px > color: #55355f (Foreground)
2 px > color: #e2d3e6 (Background)
29- Selections > Select All.
Image >Add Borders > Symmetric: 50 px > any color.
Selections > Invert.
30- Fill with Linear Gradient:

31- Effects > Plugins > Penta Com > Color Dots:

32- Effects > User Defined Filter > Defined Filter: Default

Adjust > Sharpness > Sharpen More.
Selections > Invert.
33- Effects > 3D Effects > Drop Shadow > #55355f (Foreground).

Repeat> 3D Effects > Drop Shadow > (V -5) (H -5).
Selections > None.
34- Edit > Copy the Main tube.
Edit > Paste As New Layer.
Image > Resize if
necessary.
Adjust > Sharpness > Sharpen.
Position of your choice.
Effects > 3D Effects > Drop Shadow: your choice.
35- Layers > Duplicate.
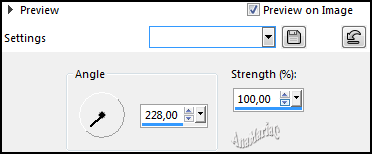
Adjust > Blur > Motion Blur.

Layers > Arrange > Move
Down.
Layers > Merge > Merge All.
36- Edit > Copy no WordArt_Título_Leni_Diniz.
Edit > Paste As New Layer.
Position of your choice.
Apply effects of your choice.
Effects > 3D Effects > Drop Shadow: your choice.
37- Edit > Copy Decorative Tube.
Edit > Paste As New Layer.
Image > Resize if
necessary.
Adjust > Sharpness > Sharpen.
Position of your choice.
Effects > 3D Effects > Drop Shadow: your choice.
38- Image > Add Borders > Symmetric: 1 px cor: #55355f
(Foreground).
39-
If you wish,
resize your work.
Apply your watermark or signature.
File > Export > JPEG Optimizer.

Feel free to send your versions.
I will be happy to publish them on our website.


|
Tutorial created by AnaMariaC, in
November/2021. Translated into English in
November/21, by the
Moderation of SIM-PSP. It cannot be copied,
removed from its place, translated or used in learning
lists or groups without the author's prior consent. |
|
