TRADUÇÕES:


Obrigada aos nossos tradutores!
MATERIAL
1 Misted paisagem
à sua
escolha
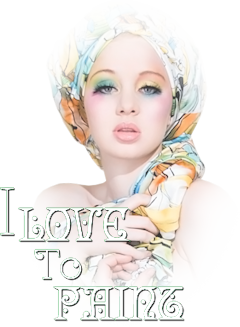
1 Tube principal à sua escolha
WordArt
by AnaMariaC
Narah
_masck_1234
decor_split
Landscape nights.PspGradient (Salvar na pasta Gradient do seu PSP)
PLUGINS
Unlimited > Buttons & Frames > 3D Glass Frame 1.
Carolaine and Sensible > CS-LDots.
Efeitos do PSP
TUTORIAL
1- Abrir o material no PSP, duplique e feche o original.
Escolher duas cores para trabalhar.
Foreground > #8e627c
Background > #f6dced
Cores extras:
#b18cff
#FFFFFF #000000

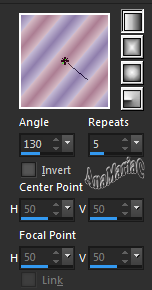
2- Configure o Foreground com o Gradiente Landscape nights.
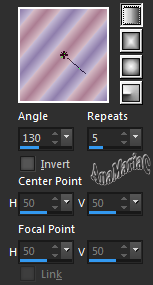
3-
Abrir uma transparência 900x600.
Pintar
essa transparência o Gradiente que foi criado.
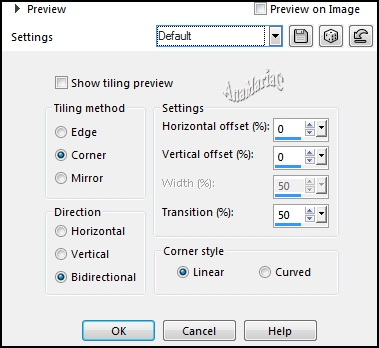
4- Effects > Image Effect > Seamless Tiling > Default:
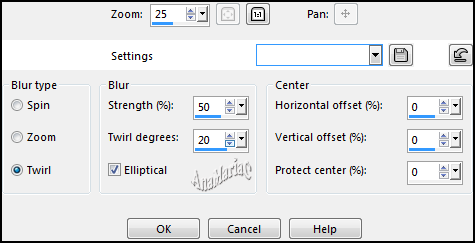
5- Adjust > Blur > Radial Blur:
6- Layers > Duplicate.
Image > Mirror > Mirror Vertical.
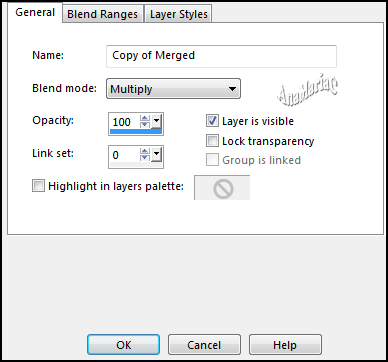
7- Layers > Properties > General > Blend Mode: Multiply.
8- Layers > Merge > Merge down.
9- Effects > Edge Effect > Enhance More.
10- Layers > Duplicate.
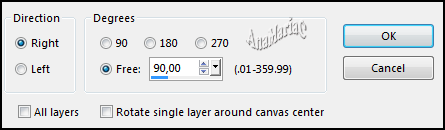
11- Image > Free Rotate:
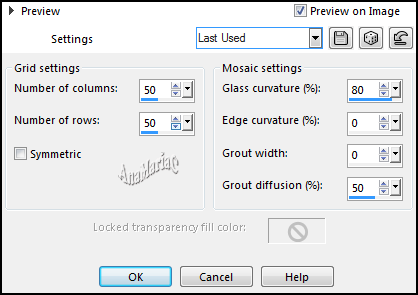
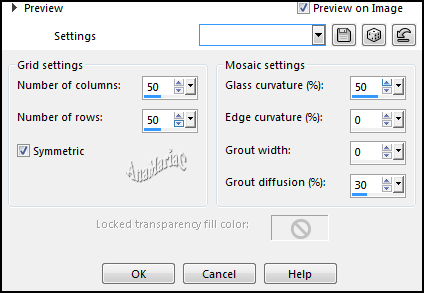
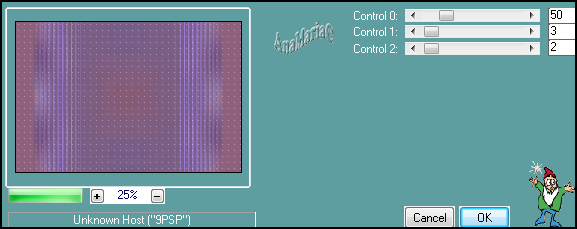
12- Effects > Texture Effects > Mosaic Glass:
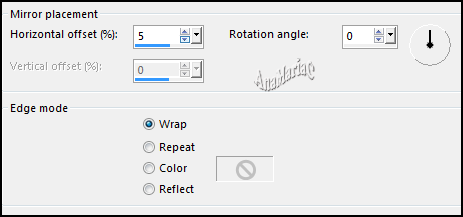
13- Effects > Reflection Effect > Rotating mirror.
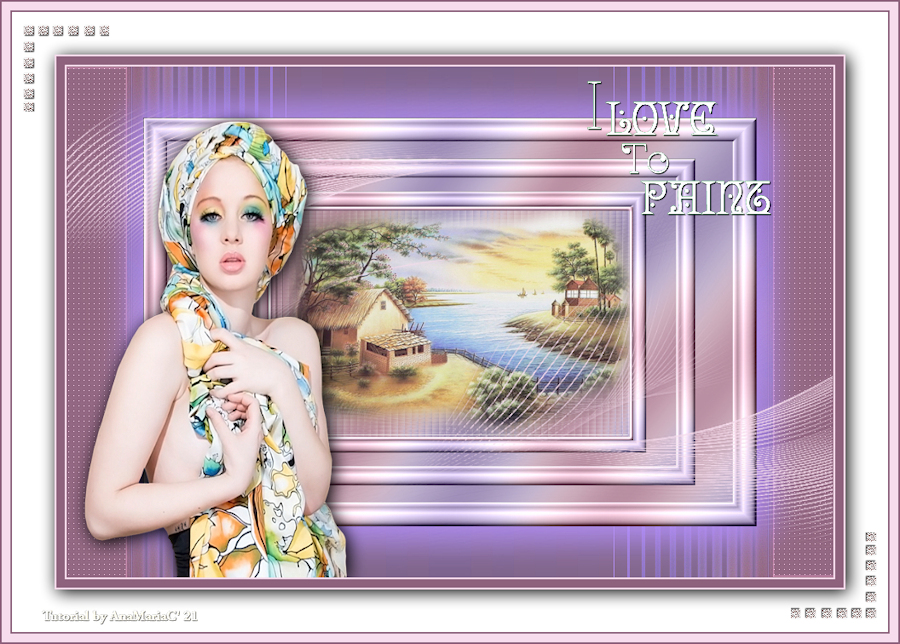
14- Objetcs > Align > Center In Canvas.
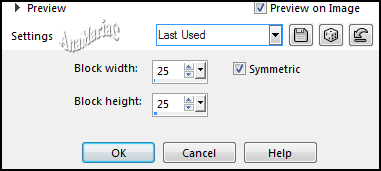
15- Effects > Distortions Effect > Pixelate:
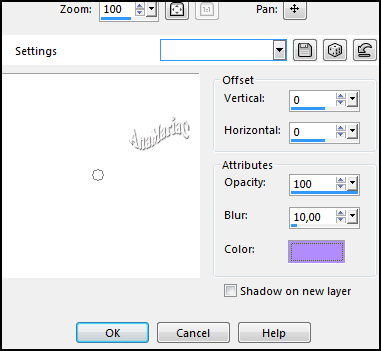
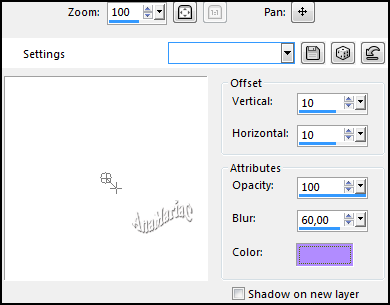
16- Effects > 3 D Effects > Drop Shadow: Color 3
17- Adjust > Sharpness > Sharpen.
Layers > Merge > Merge Visible.
18- Layers > New Raster Layer.
19- Preencher > gradiente > Linear.
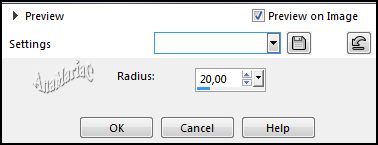
20- Adjust > Blur > Gaussian Blur:
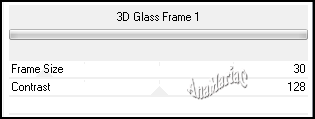
21- Effects > Plugin > Unlimited > Buttons & Frames > 3D Glass Frame
1.
22- Layers > Duplicate.
23- Image > Resize > 80% > Resize all layer desmarcado.
24- Layers > Duplicate.
Image > Resize > 80% > Resize all layer desmarcado.
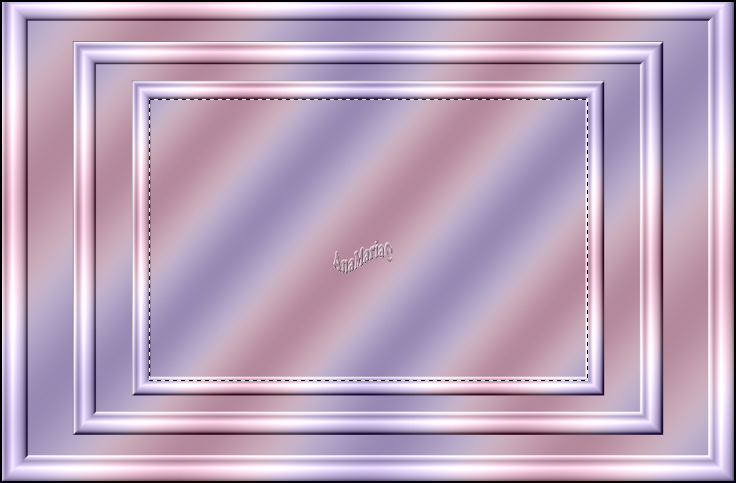
25- Ativar a ferramenta Selection Tool: Feather e Tolerance
em 0, selecionar como no exemplo:
26- Effects > Texture Effects > Mosaic - Glass:
27- Edit > Copy no Misted Paisagem.
Edit > Paste Into Selection.
Adjust > Shapness > Sharpen.
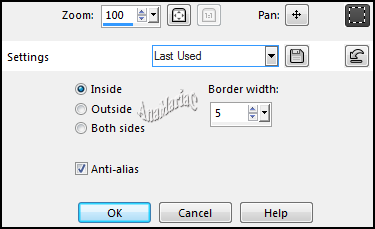
28- Selections > Modify > Select Selections Borders.
Preencher > cor: #8e627c (Foregraund).
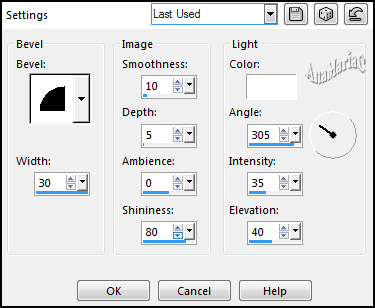
29- Effects > 3 D Effects > Inner Bevel.
Selections > Select None.
30- Layers > Merge Down.
Edit > Repeat layer Merge Down.
31- Fechar a visibilidade > Layer > Raster 1.
32- Ativar > Layer > Merged.
33- Selecionar como no indicado:
34- Layers > New Raster Layer.
Preencher > cor: #8e627c
35- Effects > Plugins > Carolaine and Sensible > CS-LDots.
36- Adjust > Sharpness > Sharpen More.
Selections > Select None.
Layers > Merge > Merge Down.
37- Ativar e abrir a visibilidade da Layer Raster 1.
Image > Resize > 80%.
38- Effects > 3D Effects > Drop Shadow > cor: #b18cff.
Repetir
o Drop Shadow > (V -10) > (H -10).
39- Layers New Raster Layer.
Preencher > cor: #f6dced (background)
40- Layers > New Mask Layer > From Image: Narah_Mask_1234.
Layers > Merge > Merge Group.
Adjust > Shapness > Sharpen.
Layers > Merge > Merge Down.
41- Edit > Copy no tube principal.
Edit > Paste As New Layer.
Adjust > Shapness > Sharpen.
Image >
Resize se for necessário.
Effects
> 3D Effects > Drop Shadow: á sua escolha.
Layers > Merge > Merge All (Flatten).
42- Image > Add Bordes > Simmetric:
2 px > color: #f6dced background
10 px > color: #8e627c foreground
2 px > color: #f6dced background
Selections > Select All.
Image > Add Bordes > Simmetric:
50 px - color: #ffffff
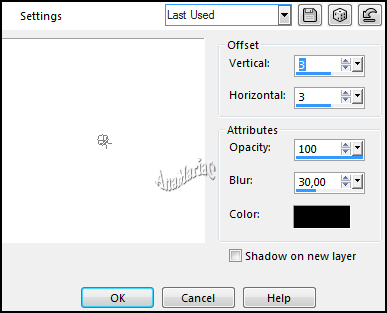
43- Effects > 3 D Effects > Drop Shadow > cor: #000000.
Selections > Select None.
44- Image > Add Bordes > Simmetric:
2 px > color: #8e627c foreground
10 px > color: #f6dced background
2 px > color: #8e627c foreground
45- Edit > Copy no decor_split.
Edit > Paste as New Layer.
46 - Edit > Copy no WordArt
by AnaMariaC.
Edit > Paste a New
Layer.
Posicionar como desejar.
Layers > Merge > Merge Visible.
47 -
Se você desejar, redimensione seu trabalho.
Aplicar sua marca d'água ou assinatura.
File > Export > JPEG Optimizer.
Segunda Versão
Créditos
Materiais Tutorial:
Misted Paisagem By Nena
Decor desconheço autor (a).
Tube Principal by CibiBijoux
WordArt By AnaMariaC
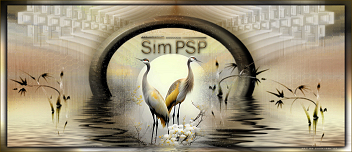
Segundo Top Versão:
Tube Principal by AnaRizid
Misted Paisagem By Nena
Misted Paisagem By Nena
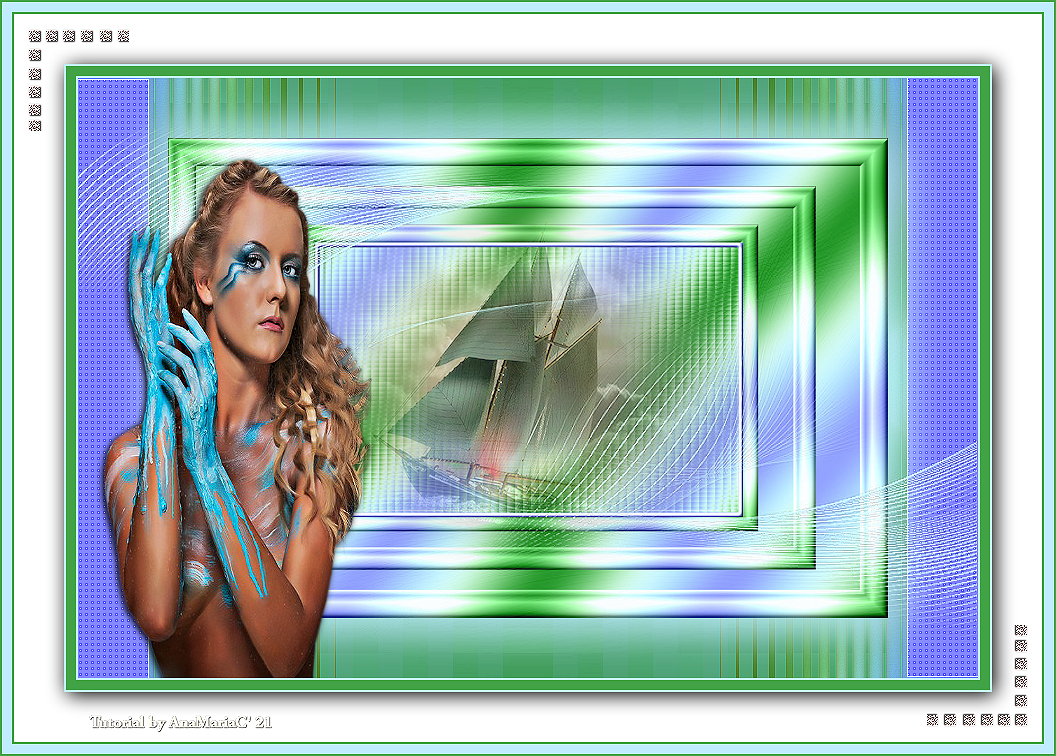
ArtFinal by AnaMariaC
Brasil - 09/08/2021
Sinta-se à vontade para enviar suas versões.
Terei todo o prazer em publicá-las em nosso site.
|
Tutorial criado por
AnaMariaC, em Julho/2021
para
SIM-PSP. Não
poderá ser copiado, retirado de seu lugar,
traduzido ou utilizado
em listas de
aprendizados ou grupos sem o
consentimento prévio da autora. |
|