|
Tem balão no céu do PSP e confete nas layers! Estamos em clima de comemoração, porque o Sim PSP acaba de soprar 6 velinhas cheias de criatividade! Para marcar essa data querida, criamos um tutorial especial feito a seis mãos,
com três
A escolha do título para esse trabalho foi inspirado pela força do nosso grupo (união), depois pela essência do trabalho (arte), e termina com o nosso sentimento (amizade), transmitindo bem o nosso espírito colaborativo e carinhoso para esse projeto que começou a 6 anos. Feliz 6 Anos SIM PSP!
TRADUÇÕES:
Obrigada aos nossos Tradutores
MATERIAL: 1 Tube Principal ou Personagem à sua escolha Emboss_7 (Salvar na pasta Presets do PSP) Preset_BallsAndBubbles_BB_6Niver (Salvar na pasta Presets do PSP) Selections 6Niver_1 e 6Niver_2 (Salvar na pasta Selections do PSP) Outros Materiais by Owners
Plugins: Carolaine and Sensibility > cs_texture Mura's Seamless > Duplicate Mura's Seamless > Shift at Zigzag Toadies > What Are You? Toadies > Sucking Toad Bevel III VanDerLee > UnPlugged-X Unlimited 2.0 > Bkg Designer sf10 I > Cruncher Unlimited 2.0 > AFS IMPORT > edgefade (download)
Este Tutorial foi escrito por Soxikibem, Inácia Neves e Márcinha. Qualquer semelhança é mera coincidência.
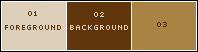
1 - Abrir o material no PSP, duplique e feche os originais. Cor 3: #a98345
2 - Abra uma imagem
transparente de 800x550px. pelas cores do Foreground e Background:
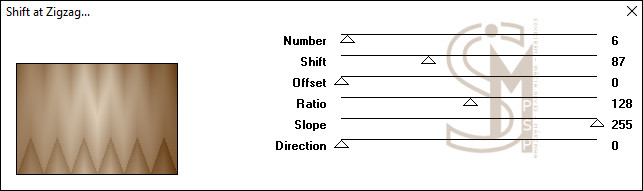
3 - Effects > Plugins > Mura's Seamless > Shift at Zigzag:
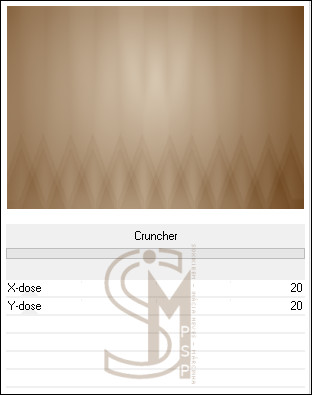
4 - Filters Unlimited 2.0 > Bkg Designer sf10 I > Cruncher:
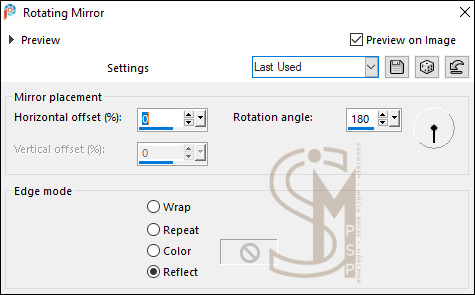
5 - Effects > Edge Effects > Enhance. Effects > Reflection Effects > Rotating Mirror:
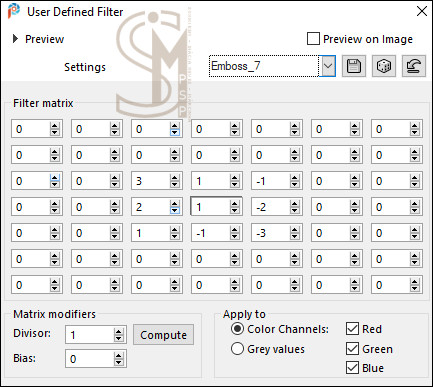
6 - Effects > User Defined Filter: Emboss_7
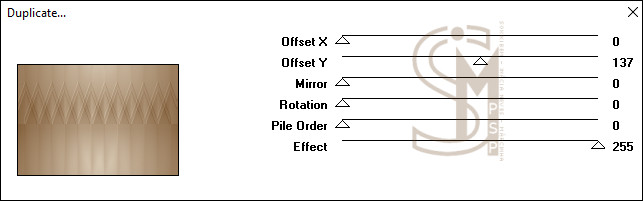
7 - Effects > Plugins > Mura's Seamless > Duplicate.
8 - Layers > Duplicate. Image > Mirror > Mirror Vertical. Layers > Properties > General > Blend Mode: Overlay - Opacity: 100% Layers > Merge > Merge Down.
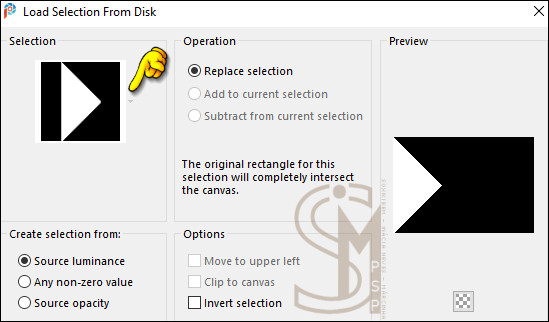
9 - Selections > Load/Save Selections > Load Selection From Disk: 6Niver_1.
Selections > Promote Selection to Layer. Adjust > Blur > Gaussian Blur: 30. Mantenha a seleção...
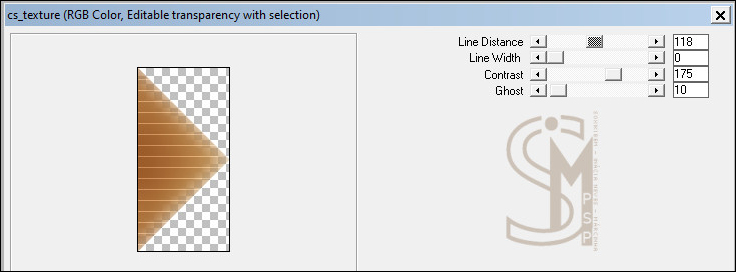
10 - Effects > Plugins > Carolaine and Sensibility > cs_texture:
11 - Effects > User Defined Filter: Emboss_7
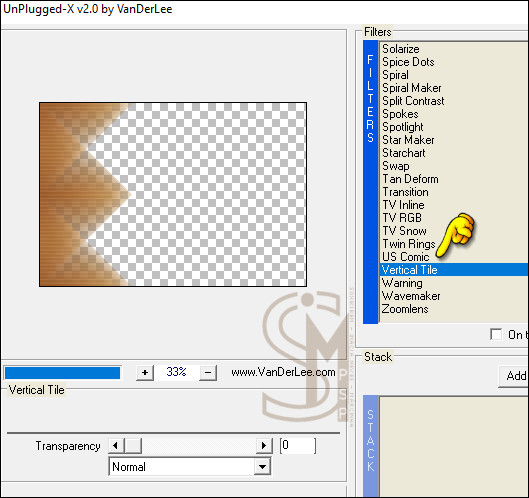
12 - Selections > Select None. Effects > Plugins > VanDerLee > UnPlugged-X:
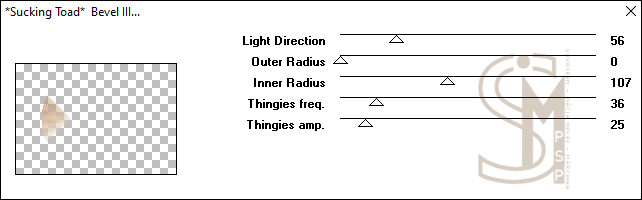
13 - Layers > Duplicate. Effects > Plugins > Toadies > Sucking Toad Bevel III:
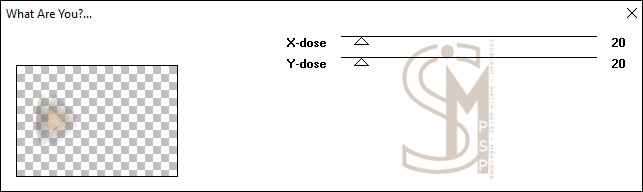
14 - Effects > Plugins > Toadies > What Are You?.
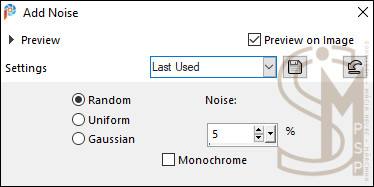
15 - Ativar a Layer Raster 1. Layers > Duplicate. Adjust > Add/Remove Noise > Add Noise:
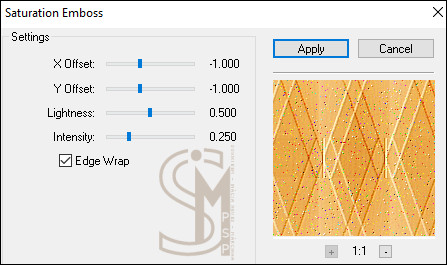
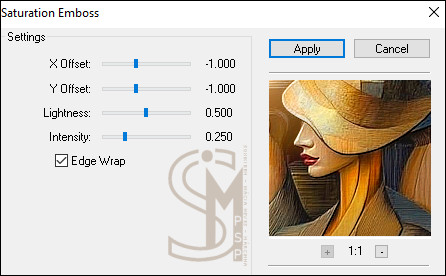
16 - Effects > Effects > Plugins > > FM Tile Tools > Saturation Emboss: Default
Layers > Properties > General > Blend Mode: Multiply > Opacity: 100%. Layers > New Raster Layer.
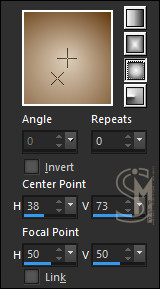
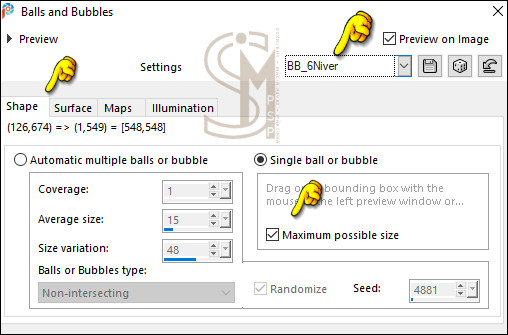
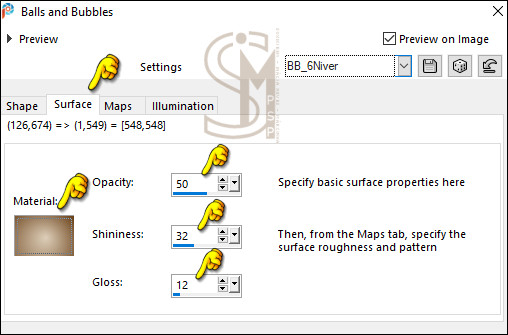
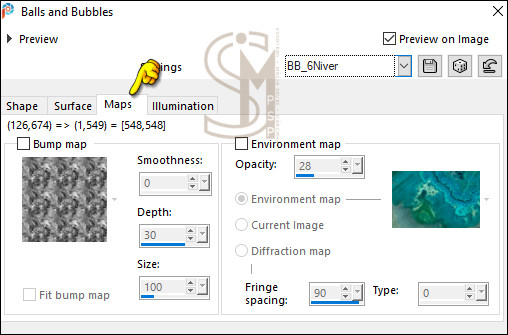
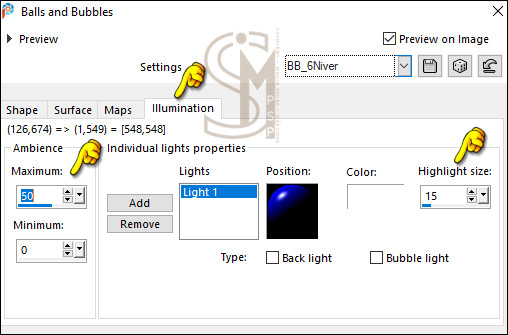
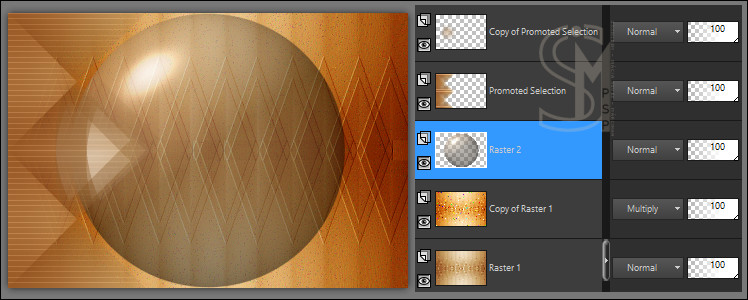
17 - Effects > Artistic Effects > Balls and Bubbles > Preset BB_6Niver: (Na aba Surface, em Material, colocar o Gradiente de Uso).
Teremos esse resultado:
18 - Com a layer Raster 2 ativada... Image > Resize: 70% > All Layers desmarcado. Selections > Select All. Selections > Float. Selections > Defloat.
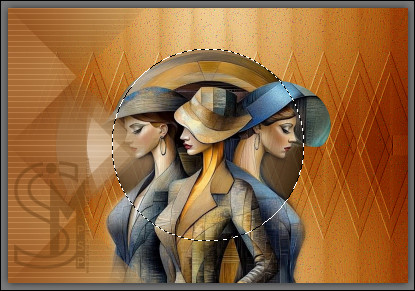
19 - Ativar o tube escolhido. Edit > Copy. De volta ao trabalho... Edit > Paste as New Layer. Reduzir, se necessário, no tube do material apliquei Resize de 50%, all layers desmarcado. Posicionar ao seu gosto parte do tube dentro da seleção:
Selections > Invert. Pressione a tecla Delete no teclado. Selections > Select None.
20 - Adjust > Sharpness > Sharpen. Layers > Duplicate na layer do tube. Layers > Merge > Merge Down. Layers > Arrange > Move Down.
21 - Ativar a Layer Raster 2. Layers > Properties > General > Blend Mode: Hard Light > Opacity: 100%. Layers > Merge > Merge Down. Effects > Effects > Plugins > > FM Tile Tools > Saturation Emboss: Default.
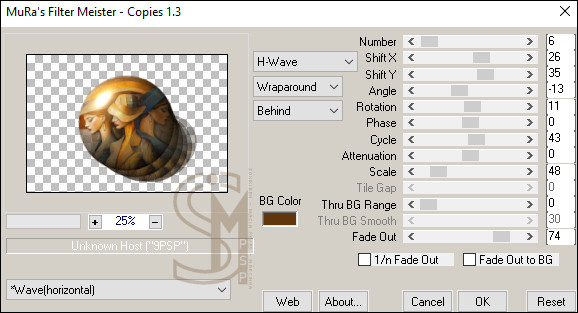
22 - Effects > Effects > Plugins > > Mura's Meister > Copies:
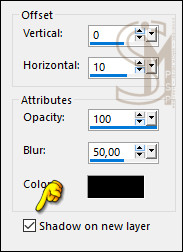
23 - Pick Tool > Position: Position X: 301 > Position Y: 65 Effects > 3D Effects > Drop Shadow: Shadow on new layer, marcado.
Layers > Properties > General > Blend Mode: Overlay > Opacity: 100%.
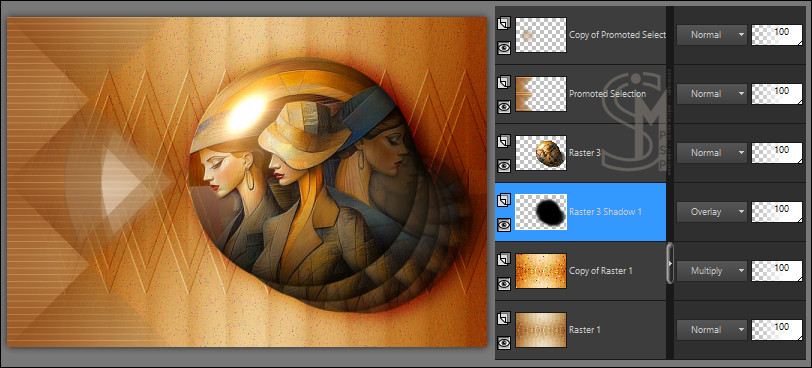
Teremos esse resultado com a posição das layers:
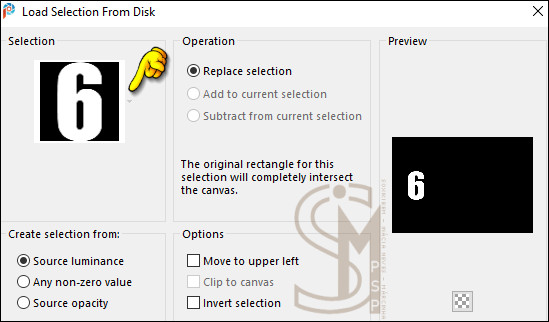
24 - Ativar a layer Promoted Selection. Selections > Load/Save Selections > Load Selection From Disk: 6Niver_2
Selections > Promote Selection to Layer.
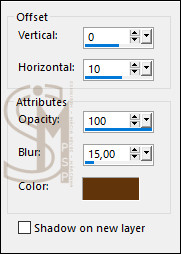
25 - Layers > Arrange > Bring to Top. Effects > 3D Effects > Drop Shadow: cor do Background
Selections > Select None.
26 - Ativar a cópia do titulo01_6Niver. Edit > Copy. De volta ao trabalho... Edit > Paste as New Layer.
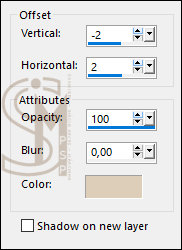
27 - Pick Tool > Position: Position X: 273 - Position Y: 24 Effects > 3D Effects > Drop Shadow: cor do Foreground
Adjust > Sharpness > Sharpen.
28 - Ativar a cópia do titulo02_6Niver. Edit > Copy. De volta ao trabalho... Edit > Paste as New Layer.
29 - Pick Tool > Position: Position X: 271 - Position Y: 488 Layers > Properties > General > Blend Mode: Screen > Opacity: 100%. Layers > Duplicate.
30 - Image > Add Borders > Symmetric: 2px com a cor do Background. 4px com a cor do Foreground. 2px com a cor do Background. Edit > Copy. Selections > Select All.
31 - Image > Add Borders > Symmetric: 30px com qualquer cor. Selections > Invert. Edit > Paste Into Selection. Effects > Reflection Effects > Rotating Mirror.
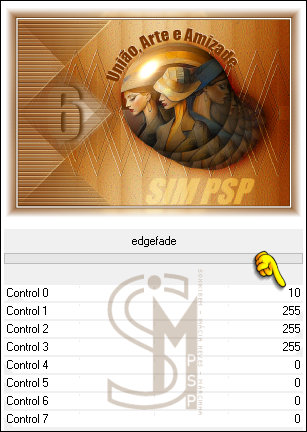
32 - Adjust > Blur > Gaussian Blur: 5 Effects > Plugins > Unlimited 2.0 > AFS IMPORT > edgefade:
33 - Selections > Promote Selection to layer. Effects > Edge effects > Enhance. Layers > Properties > General > Blend Mode: Multiply* > Opacity: 100%. *Em nossa versão 2 o Blend Mode foi o Overlay. Selections > Select None.
34 - Image > Add Borders > Symmetric: 1px com a cor 3. Image > Add Borders > Symmetric: 1px com a cor do Background.
35 - Se você desejar
redimensione seu trabalho.
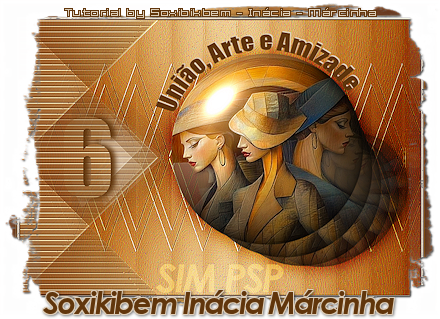
Créditos Tag Principal: Formatação, Arte Final e Tutorial by SIM PSP (Soxixibem - Inácia - Márcinha) Tube Principal: Tubed by Inácia Neves Outros Materiais: by SIM PSP
VERSÃO - SIM
Versão Soxikibem
Créditos: Tube Principal: Tubed by Pqna&Alice
Versão Inácia Neves???? Créditos: Tube Principal: Tubed by Inácia Neves
Versão Márcinha
Créditos: Tube Principal: Tubed by Inácia Neves Pqna&Alice
Sinta-se à vontade para enviar suas versões. Terei todo o prazer em publicá-las em nosso site.
|