|
Tutorial dedicated to SIM PSP for its 4th anniversary.
MATERIALS:
PLUGINS: penta.com > Jeans Medhi > Wavy Lab 1.1 AAA Frames > Foto Frame AAA Filters > Custom > Ladscape Carolaine and Sensibility > cs_texture It@lian Editors Effect > Effetto Fantasma
Tutorial created in
PSP 2020
TUTORIAL
2 - Open a
transparent image of 1000x700px.
3 - Layers > New Raster Layer. Selections > Select All.
4 - Edit > Copy the main tube. Edit > Paste Into Selection. Selections > Select None.
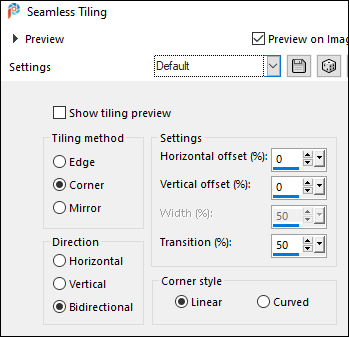
5 - Effects > Image Effects > Seamless Tiling: Default
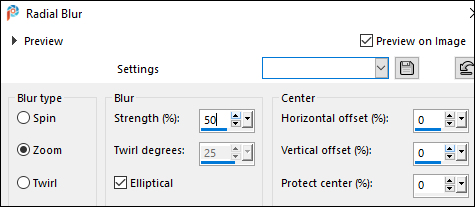
6 - Adjust > Blur > Radial Blur:
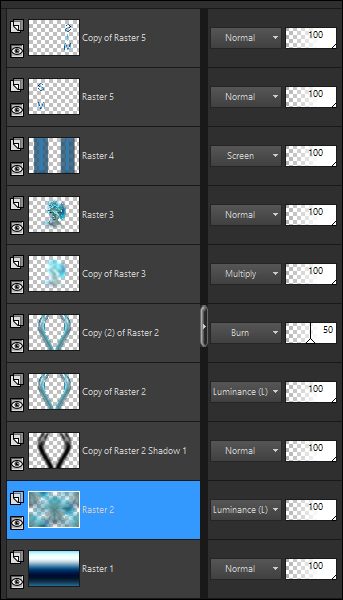
7 - Layers > Duplicate. Image > Mirror > Mirror Horizontal. Layers > Properties > General > Opacity: 50 Layers > Merge > Merge Down. Layers > Properties > General > Blend Mode: Luminance (L)
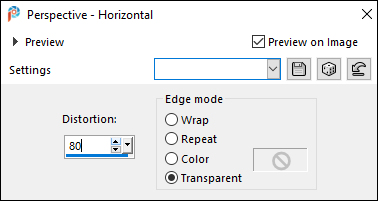
8 - Layers > Duplicate. Effects > Geometric Effects > Perspective horizontal:
9 - Image > Mirror > Mirror Horizontal. Effects > Geometric Effects > Perspective horizontal:
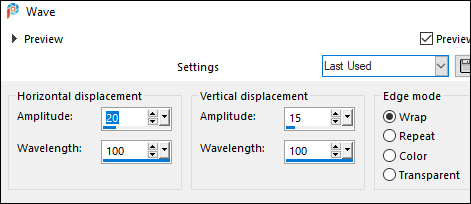
10 - Effects > Distortion Effects > Wave:
11 - Objects > Align > Bottom. Layers > Duplicate. Image > Mirror > Mirror Vertical. Layers > Merge > Merge Down.
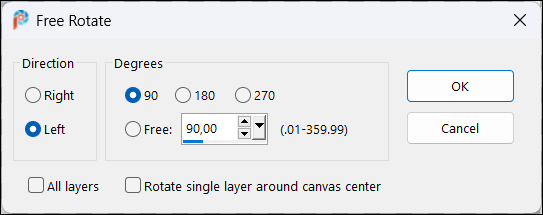
12 - Image > Free Rotate:
13 - Use the Pick Tool to position: Position X: 150 / Positon Y: -10 Effects > 3D Effects > Drop Shadow: Color: with color 4
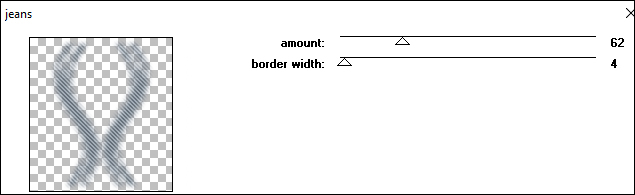
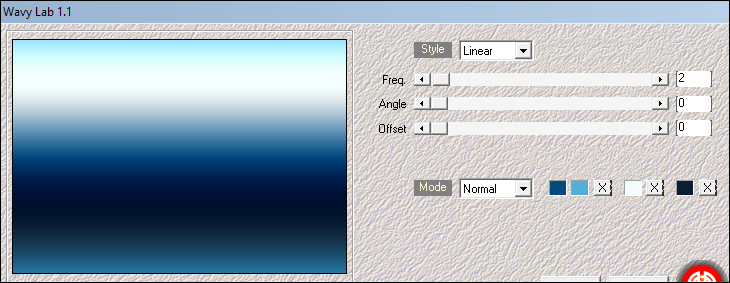
14 - With the layer "Copy of Raster 2 Shadow 1" active... Effects > Plugins > penta.com > Jeans:
15 - Effects > Edge effects > Enhance. Activate the "Copy of Raster 2" layer. Layers > Duplicate. Layers > Properties > General > Blend Mode: Burn - Opacity: 50
16 - Edit >
Copy the Main Tube. Position it in the center of the effect from the previous layer. Layers > Duplicate.
17 - Adjust > Blur > Gaussian Blur: 20 Layers > Properties > General > Blend Mode: Multiply Effects > Plugins > penta.com > Jeans: 62 / 4 Layers > Arrange > Move Down.
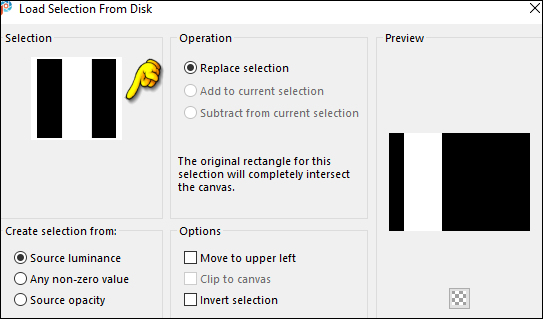
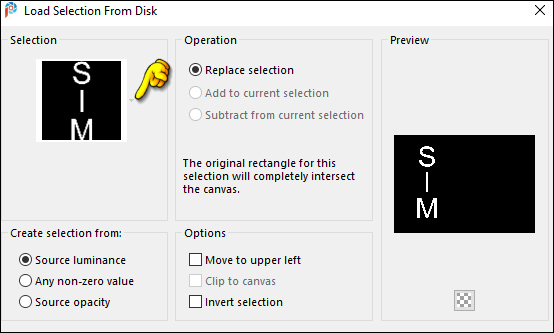
18 - Activate Raster 3 layer. (Top) Layers > New Raster Layer. Selections > Load/Save Selections > Load Selection From Disk: Sim01_byMarcinha
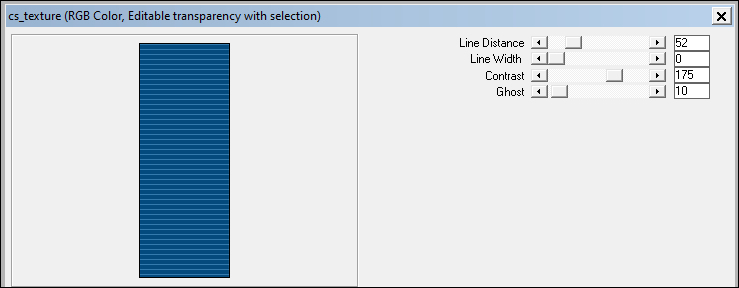
19 - Fill this selection with Color 1. Effects > Plugins > Carolaine and Sensibility > cs_texture:
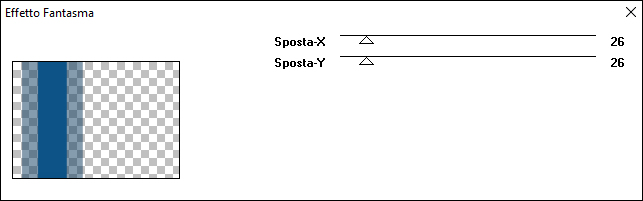
20 - Selections > Select None. Effects > Plugins > It@lian Editors Effect > Effetto Fantasma:
21 - Edit > Repeat Effetto Fantasma. Layers > Properties > General > Blend Mode: Screen
22 - Selections > Load/Save Selections > Load Selection From Disk: Sim01_byMarcinha
Selections > Invert. Press the Delete key on the keyboard. Selections > Select None.
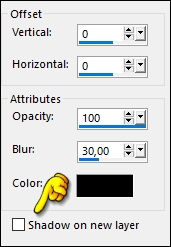
23 - Effects > 3D Effects > Drop Shadow: Color: #000000 (Black)
Layers > Duplicate. Image > Mirror > Mirror Horizontal. Layers > Merge > Merge Down.
24 - Layers > New Raster Layer. Selections > Load/Save Selections > Load Selection From Disk: Sim02_byMarcinha
25 - Edit > Copy Special > Copy Merged. Edit > Paste Into Selection.
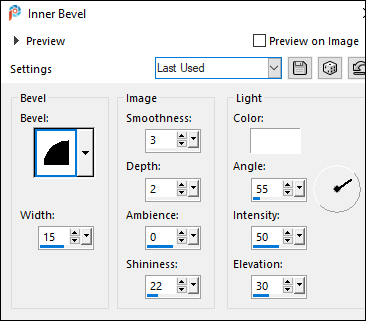
26 - Effects > 3D Effects > Inner Bevel:
27 - Layers > New Raster Layer. Fill the selection with color 4. Selections > Select None. Layers > Properties > General > Blend Mode: Soft Light Layers > Merge > Merge Down. Layers > Duplicate. Image > Mirror > Mirror Horizontal.
28 - Activate Raster 2 layer. Effects > Image Effects > Seamless Tiling: Default Layers Positions:
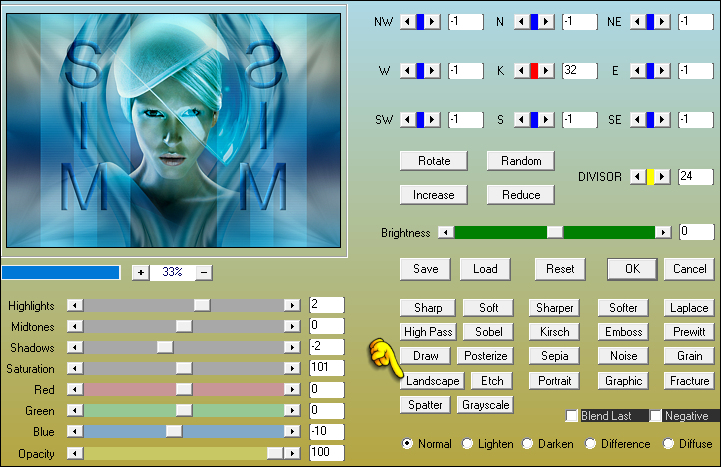
29 - Layers > Merge > Merge Visibile. Effects > Plugins > AAA Filters > Custom > Landscape: Default
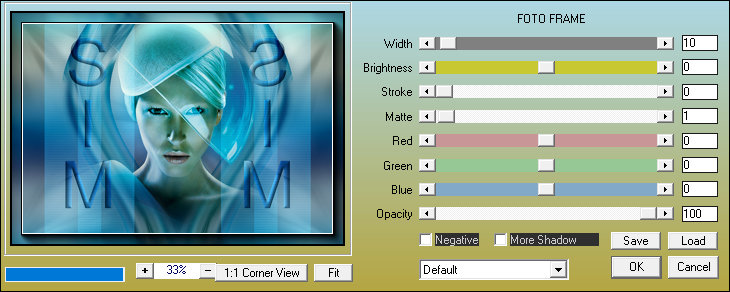
30 - Effects > Plugins > AAA Frames > Foto Frame:
31 - If you wish,
resize your work.
Version by Moderation SIM PSP.
Credits:
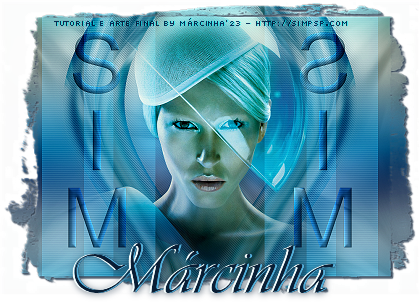
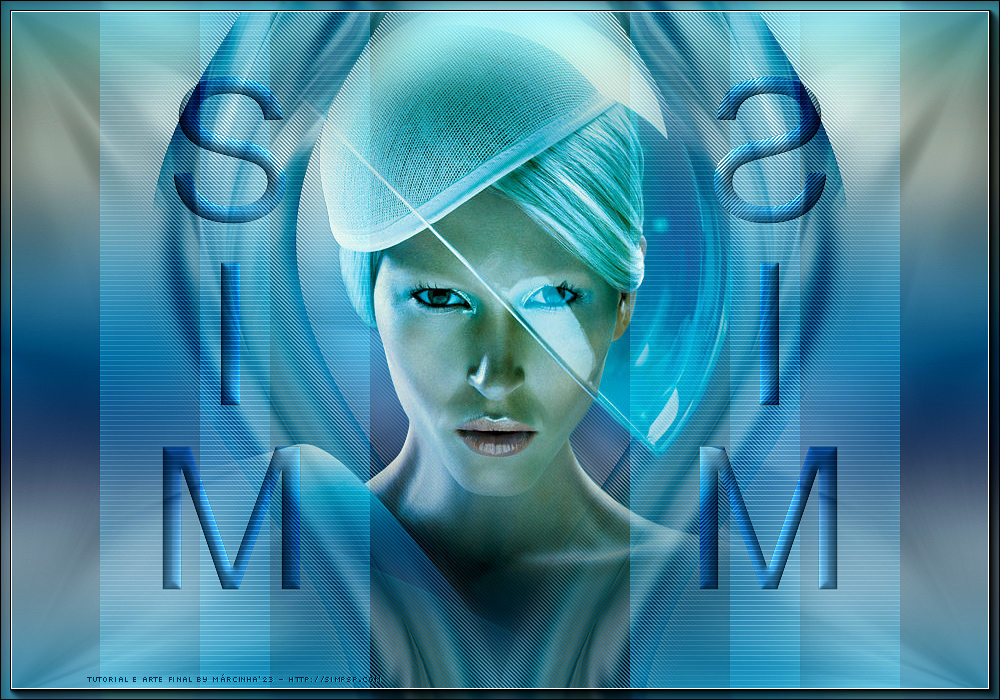
Formatting, Final Art, and Tutorial by
Márcinha Version Credits: Main Tubes: Tubed by Pqna&Alice
Feel free to send your versions.
|


 >
>