|
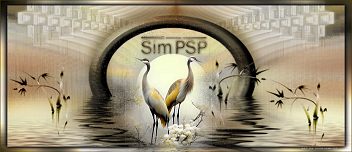
Tutorial by Inacia Neves English Translation by Moderation SIM-PSP Original Tutorial
Materials:
Landscape Mist Main Tube Selections: sim_01 and sim_02 (save in the selections folder of PSP) 
Plugins:
Mura's
Meister > Tone
FM Tile
Tools > Blend Emboss e Saturation Emboss
AAA
Frames > Foto Frame
Corel Paint Shop Pro 2022 Ultimate Effects
TUTORIAL
1- Choose 2 colors from the Landscape
Mist.
I chose the colors: Foreground: #b27829
Background: #fee377
2- Create a
gradient:
Style:
Linear > Angle: 0 > Repeats: 0.
 3-
Open a 1000 x 600 px transparency. Layers
> New Raster Layer.
Selections > Select All.
4-
Activate the chosen Landscape Mist.
Edit
> Copy.
Edit
> Paste > Into Selection, on the artwork.
Selections > Select None.
5- Effects > Image Effects > Seamless Tiling > Default.
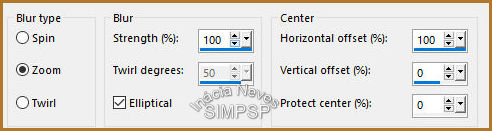
Adjust
> Blur > Radial Blur:
 6- Layers > Duplicate.
Hide the visibility of the "Copy of Raster 2" layer.
Activate the "Raster 2" layer.
Effects
> Plugins > Mura's Meister > Tone:
 Effects
> Plugins > FM Tile Tools > Blend Emboss: Default
Effects
< Edge Effects > Enhance More.
7-
Activate and unhide the visibility of the "Copy of Raster 2" layer.
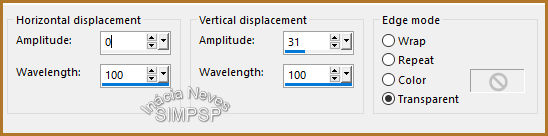
Effects
> Distortion Effects > Wave:
 Effects
> 3D > Drop Shadow > 0/0/100/50 > Color: Black.
8- Effects > Plugins > FM Tile Tools >
Saturation
Emboss: Default
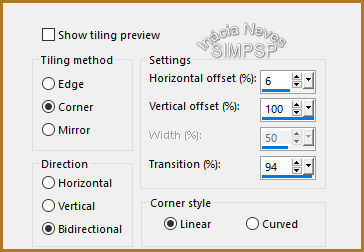
Effects
> Image Effects > Seamless Tiling > Side by Side:
 Effects
> 3D > Drop Shadow > 0/0/100/50 > Color: Black.
Effects
< Edge Effects > Enhance More.
9- Layers > New Raster Layer.
Selections > Load/Save Selection > Load
Selection From Disk > sim_01.
Paint with the current gradient.
10-
Layers > New Raster Layer.
Edit > Copy the Landscape Mist.
Edit > Paste > Into Selection on the artwork. Effects > Plugin > FM Tile Tools > Blend Emboss: Default Adjust > Sharpness > Sharpen More. Reduce the visibility of this layer to 50%. 11-
Keep the selection.
Layers
> New Raster Layer.
Selections > Modify > Select Selection
Borders:
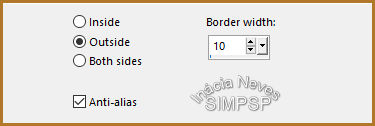 Paint with the dark color.
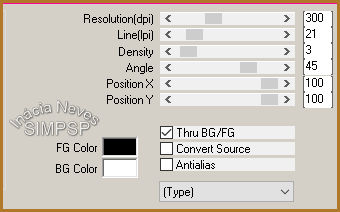
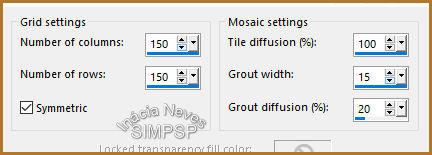
Effects
> Texture Effects > Mosaic - Antique:
Version:
PSP 2022
 Version: PSP 2020 or other versions

12- Selections > Select None. Effects
> 3D > Drop Shadow > 2/2/82/5 > Color: Black.
Adjust
> Sharpness > Sharpen More.
13- Layers > New Raster Layer
Selections > Load/Save Selection > Load
Selection From Disk > sim_02.
Paint with the dark color.
Effects
> 3D > Drop Shadow > 2/2/82/5 > Color: Black.
Selections > Invert.
Effects
> 3D > Drop Shadow > 2/2/82/5 > Color: Black.
Selections > Select None.
Optional: Effects > Edge Effects
> Enhance More.
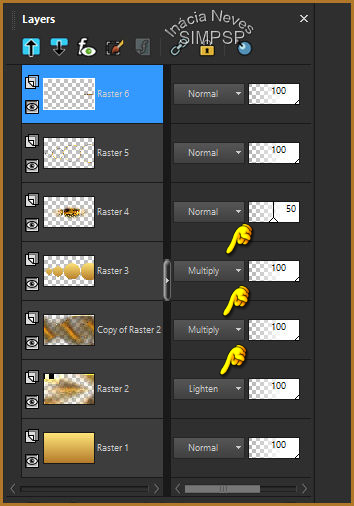
14-
Check the layers and change the Blend Mode to your
liking:
 Layers
> Merge > Merge All
15-
Create the Borders:
- Image
> Add Borders > 2 px - symmetric - color: #b27829 (dark
color).
- Image
> Add Borders > 2 px - symmetric - color: #fee377 (light
color).
- Image
> Add Borders > 2 px - symmetric - color: #b27829 (dark
color).
16-
Selections > Select All.
Edit
> Copy.
- Image
> Add Borders > 50 px - symmetric - color: any color.
Selections > Invert.
Edit
> Paste > Into Selection.
Selections > Invert.
Effects
> 3D Effects > Drop Shadow > 0/0/100/50 > color: Black
17-
Selections > Invert.
Adjust
> Blur > Gaussian Blur > Radius: 10.
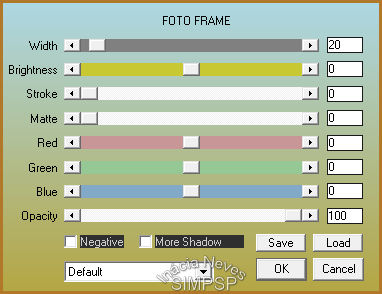
 Effects
> Plugin > AAA Frames > Foto Frame:
 Selections > Select None.
18-
Activate the main tube.
Edit
> Copy.
Edit
> Paste as New Layer on the artwork.
Resize, position, apply Drop
Shadow, and/or apply desired effects.
19-
Activate the WordArt wa_simpsp_inacia.
Edit
> Copy
Edit
> Paste as New Layer on the artwork.
Position and apply effects as desired.
Layers > Merge > Merge All.
20- If you wish,
resize your work.
Apply your watermark or signature. File > Export > JPEG Optimizer...
Credits: Tutorial by Inácia Neves Landscape Mist: K@rine Dreans Main Tube: Luz Cristina Selections and WA: Inácia Neves
Version: by
Márcinha

Version Credits::
Feel free to send your versions.
|