|
TRADUÇÕES:
Obrigada aos nossos Tradutores
MATERIAL: Tube e Word Art by Pqna&Alice Mask by Silvie
PLUGINS: Mehdi > Wavy Lab 1.1 Mirror Abstract > Strip Tile (download aqui) Eye Candy 5 Impact | Glass Carolaine and Sensibility > CS-LDots Carolaine and Sensibility > CS-Linear-H It@lian Editors Effect > Effetto Fantasma Filters Unlimited 2.0 > &Bkg Kaleidoscope> Swirl Away
Tutorial elaborado no PSP 2020
Este Tutorial foi elaborado por CidaBen e Márcinha, qualquer semelhança é mera coincidência. Tutorial testado e revisado por Inácia Neves.
O nosso agradecimento também a querida Inácia Neves por ter testado
e revisado.
TUTORIAL 3ª Cor: #cebfac 4ª Cor: #FFFFFF 5ª cor: #000000
Configure o Foreground e Brackground com as cores 1 e 2
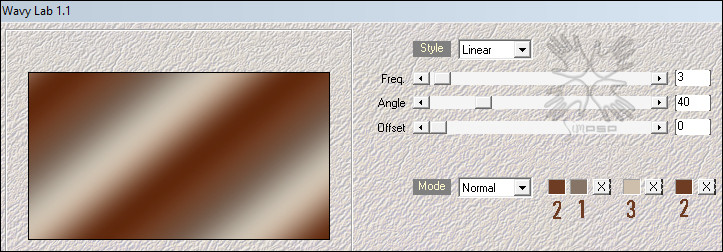
2 - Abra uma imagem transparente de 900x500px. Effects > Plugins > Mehdi > Wavy Lab 1.1
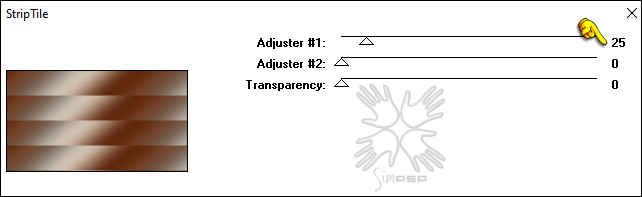
3 - Effects > Plugins > Mirror Abstract > Strip Tile.
4 - Adjust > Sharpness > Sharpen. Layer > Duplicate.
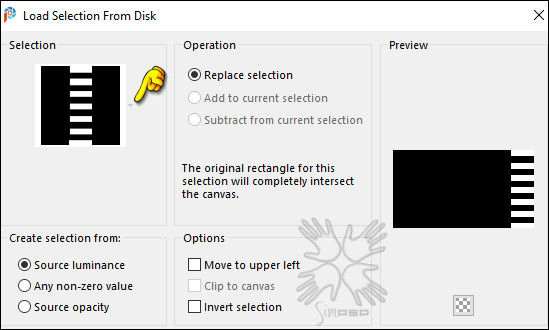
5 - Selections > Load/Save Selection > Load Selection From Disk > Selection_Mulher_1
Selections > Promote Selection Layer. Selections > Select None. Effects > 3D Effects > Drop Shadow : 1, 1, 70, 30 > Color (#000000)Preto.
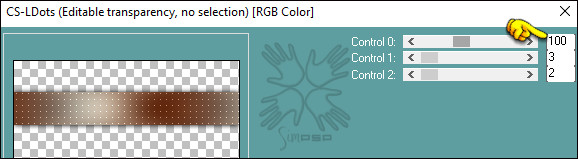
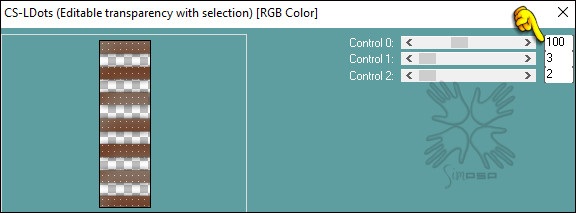
6 - Effects > Plugins > Carolaine and Sensibility > CS-LDots.
Adjust > Sharpness > Sharpen. Ativar a Layer Raster 1.
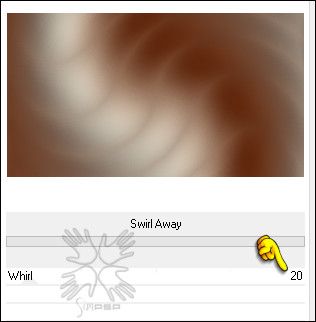
7 - Effects > Plugins > Filters Unlimited 2.0 > &Bkg Kaleidoscope> Swirl Away.
Adjust > Sharpness > Sharpen More.
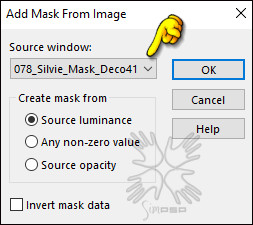
8 - Layers New Raster Layer. Pintar com a 3ª Cor: #cebfac. Layers > New Mask Layer > From Image: 078_Silvie_Mask_Deco41W .
Layers > Merge > Merge Group. Effects > Edge Effects > Enhance. Layers > Properties > General Opacity 40%.
9 - Ativar a Layer Promoted Selection. Image > Resize 70% > all layers desmarcado. Pick Tool > Position X: -2 > Position Y: 40.
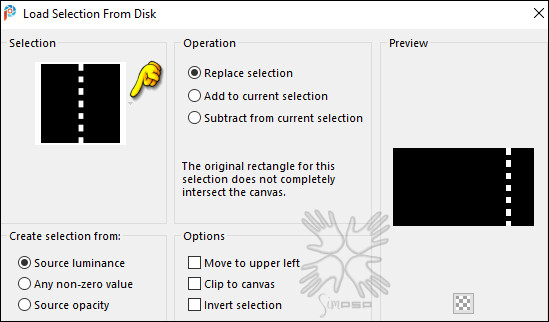
10 - Selections > Load/Save Selection > Load Selection From Disk > Selection_Mulher_2
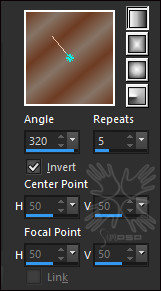
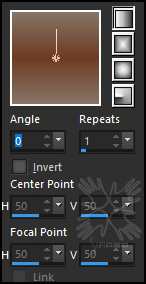
Selections > Promote Selection Layer. Pintar com um gradiente Linear formado pelas cores em uso do Foreground e Background:
Selections > Select None.
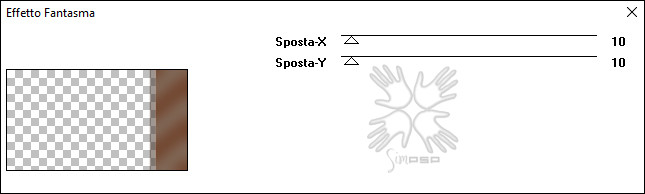
11 - Effects > Plugins > It@lian Editors Effect > Effetto Fantasma:
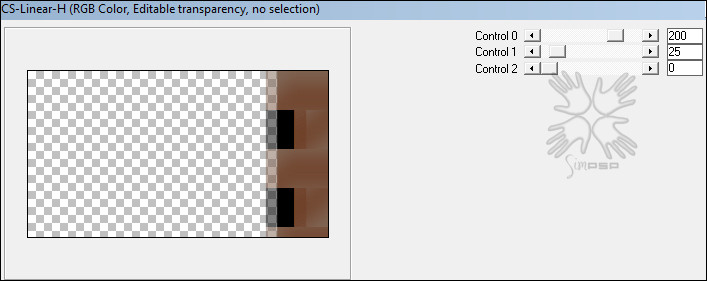
12 - Effects > Plugins > Carolaine and Sensibility > CS-Linear-H:
13 - Selections > Load/Save Selection > Load Selection From Disk > Selection_Mulher_3
Selections > Promote Selection Layer. Effects > 3D Effects > Drop Shadow : 1, 1, 70, 30 > Color (#000000)Preto.
14 - Effects > Plugins > Carolaine and Sensibility > CS-LDots.
Adjust > Sharpnes > Sharpen. Selections > Select None.
15 - Layers New Raster Layer. Selections > Load/Save Selection > Load Selection From Disk > Selection_Mulher_4
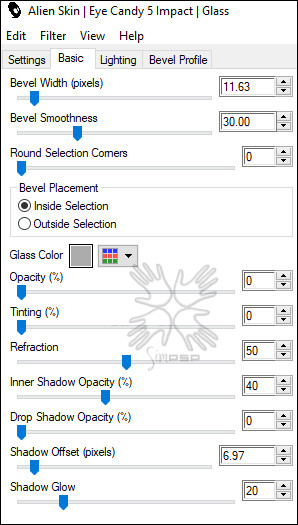
Pintar com a 2ª Cor: #6e3c23 Effects > Plugins > Eye Candy 5 Impact | Glass:
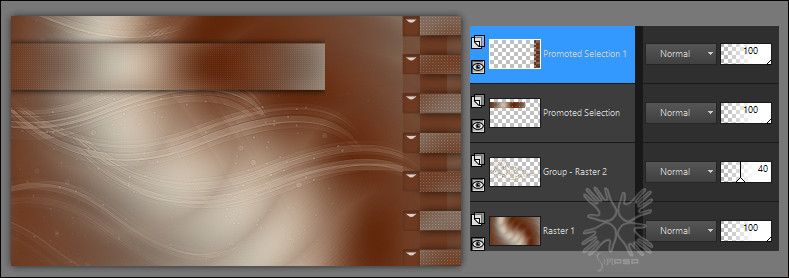
16 - Selections > Select None. Layers > Merge > Merge Down > Duas vezes. Com a Layer Promoted Selection 1 (Layer do Topo) > Ativada. Pick Tool > Position X: 783,00 > Position Y: 0,00.
17 - Temos esse resultado na posição das layers:
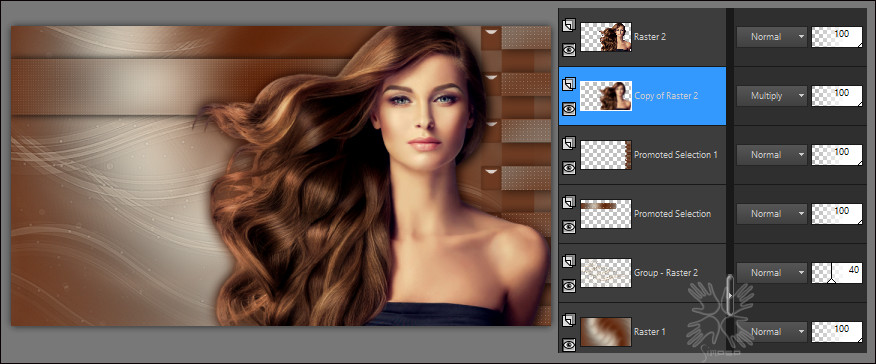
18- Ative o tube
1077MulherByPqnaAlice. Volte a imagem que estamos trabalhando... Edit > Paste as New Layer.
19- Layers > Duplicate. Teremos esse resultado:
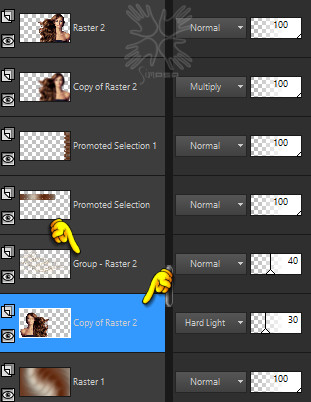
20- Ativar a layer Raster 2 (tube) Layers > Duplicate. Image > Mirror > Mirror Horizontal. Image> Resize: 86% - all layers não marcado. Objects > Align > Bottom. Mova a layer Copy of Raster 2 para que fique abaixo da layer Group - Raster 2 (Mask)
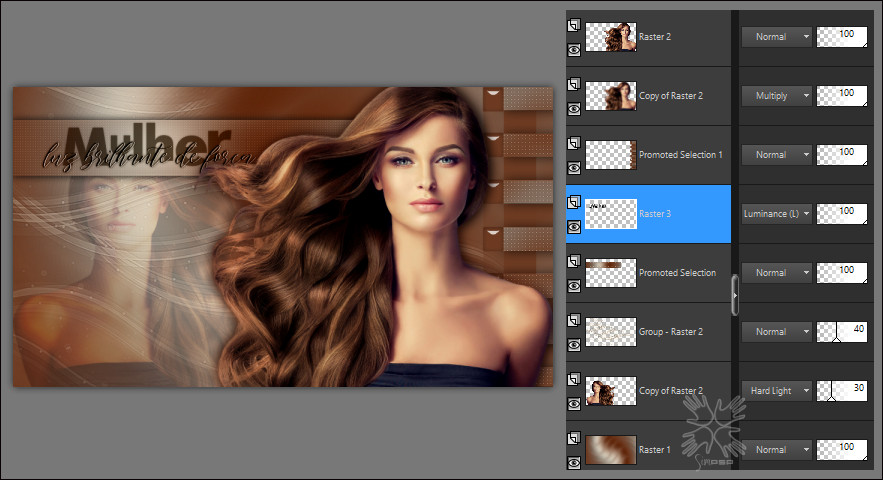
21- Ativar a layer Promoted Selection. Ative o 01_WordArt_MLBF_Pqna&Alice Volte a imagem que estamos trabalhando... Edit > Paste as New Layer. Pick Tool > Position X: 44,00 > Position Y: 53,00. Layers > Properties > General > Blend Mode: Luminance (L)
Nota: Você pode posicionar o título mais ao centro do efeito da layer Promoted Selection. Nossa posição foi para os cabelos do tube da Mulher não atrapalhar a leitura.
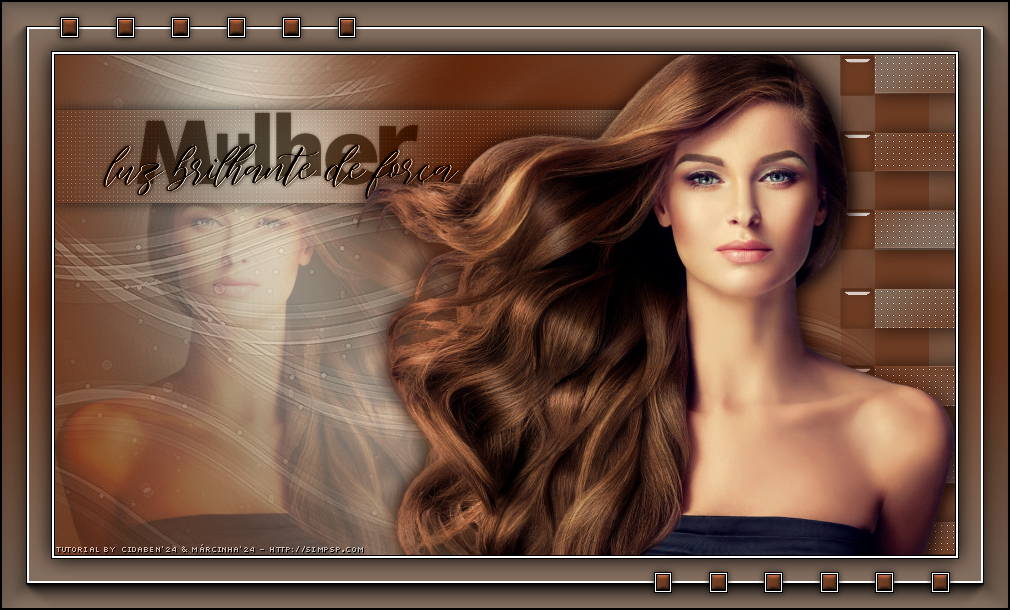
Teremos esse resultado:
22 - Image > Add Borders
> Symmetric:
23- Image > Add Borders
> Symmetric: 50px - com qualquer cor. Pintar com um gradiente Linear formado pelas cores 1 e 2 (Foreground e Background:
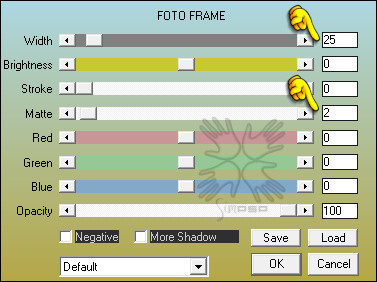
24- Effects > Plugins > AAA Frames > Foto Frame:
25- Selections > Promote Selection to layer. Selections > Select None. Image > Mirror > Mirror Horizontal. Layers > Properties > General > Opacity: 50% Layers > Merge > Merge Down.
26- Selections > Select All. Selections > Modify > Contract: 50 Effects > 3D Effects > Drop Shadow: 0 / 0 / 100 / 30, Color: #000000 Selections > Select None.
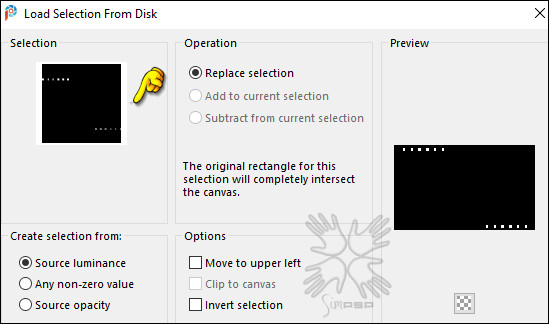
27- Layers New Raster Layer. Selections > Load/Save Selection > Load Selection From Disk > Selection_Mulher_5
28- Pintar essa seleção com a cor #000000 (Preto) Selections > Modify > Contract: 1
Pintar essa seleção com a cor #ffffff (Branco) Selections > Modify > Contract: 1
Pintar essa seleção com a cor #000000 (Preto) Selections > Modify > Contract: 1
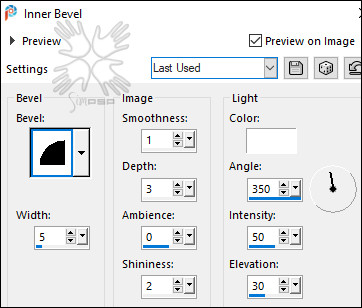
Pintar essa seleção com a cor 2 #6e3c23 (Background) Effects > 3D Effects > Inner Bevel:
Selections > Select None. Effects > 3D Effects > Drop Shadow: 0 / 0 / 70 / 10, Color: #000000
29 - Image > Add Borders > Symmetric: 1px - Color: #000000 (preto)
30 - Aplicar sua
marca d'água ou assinatura.
Créditos Versão Principal: Tutorial "Mulher" by CidaBen & Márcinha Formatação e Art Final by CidaBen & Márcinha Tube Principal e WordArt: Tubed by Pqna&Alice Mask by Silvie Brasil, Piracicaba(SP) - Içara (SC) - 01/03/2024
Versão 1 by CidaBen:
Créditos V1: Tube Principal: Tubed by CidaBen - WordArt: Tubed by Pqna&Alice - Mask by Silvie
Versão 2 by CidaBen:
Créditos V2: Tube Principal: Tubed by Luz Cristina - WordArt: Tubed by Pqna&Alice - Mask by Silvie
Versão by Márcinha:
Créditos: Tube Principal e WordArt: Tubed by Pqna&Alice - Mask by Silvie
Sinta-se à vontade para enviar suas versões. Terei todo o prazer em publicá-las em nosso site.
|