Tutorial By LeniDiniz English Translation by SIM-PSP moderation Original Tutorial
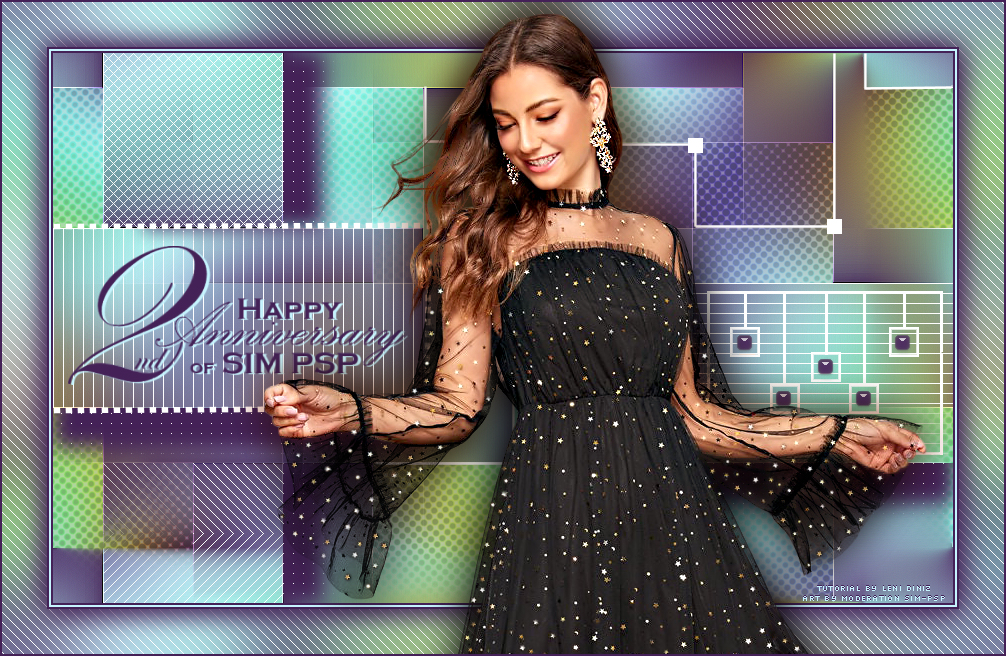
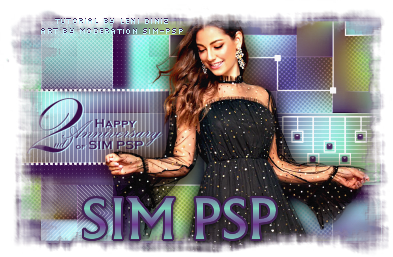
Tutorial created for SimPsp 06 Challenge. This challenge was proposed by Marcinha with the theme: Happy Anniversary 2nd of SIM PSP.
MATERIAL 1 Main Tube of your choice decor_sim_leni decor_sim_leni-2 WordArt_SIMPSP21
PLUGINS Mehdi > Lab 1. 1 AP [Lines] > Lines - SilverLining Alien Skin Eye Candy 5: Impact > Glass
TUTORIAL
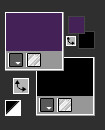
01 - Open the material on the PSP, duplicate and close the original. Choose 4 colors to work with. Color 1: #442257 Color
2: #c5f4fe
Color 3: #7ad4b8
Color 4:
#bab454
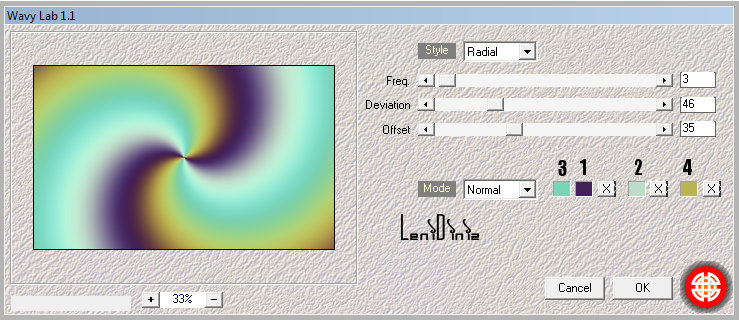
02 - Open the canal_alpha_chanel_sim_leni. Effects > Plugins Mehdi > Lab 1. 1
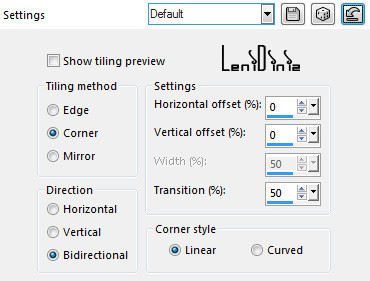
03 - Effects > image Effects > Seamless Tiling: Default
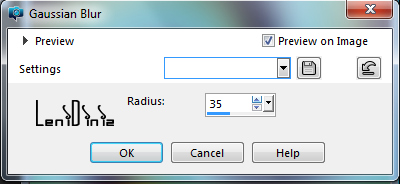
04 - Adjust > Blur > Gaussian Blur: 35
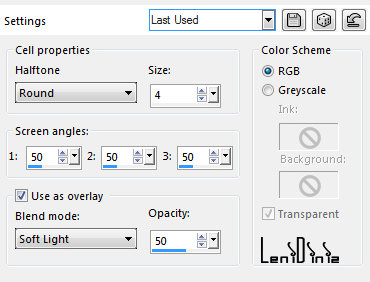
05 - Layers > Duplicate. Activate the Raster 1 layer. Effects > Artistic Effects > Halftone:
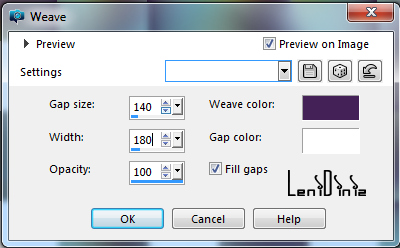
06 - Activate the Copy of Raster 1 layer. Effects > Texture Effects > Weave: Weave color: #442257 (darker color) Gap color: #FFFFFF (White)
07 - With the Magic Wand Tool: Mode: Add (Shift) - Tolerance and Feather at 0:
Select the white part: 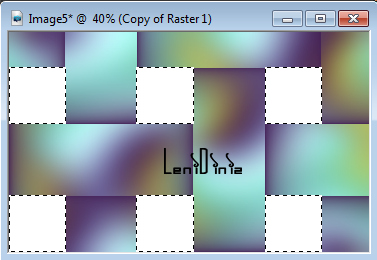 Press the keyboard's Delete key. Selections > Select None. Effects > Edge Effects > Enhance.
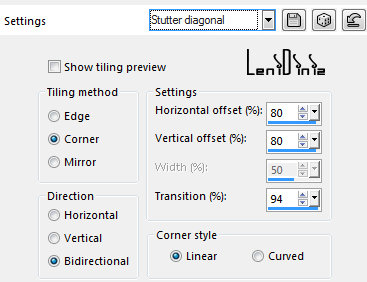
08 - Effects > image Effects > Seamless Tiling: Stutter diagonal
09 - Selections > Load/Save Selections > Load Selection from Alpha Channel > leni_sim_Selection #1 Selections > Promote Selection to layer.
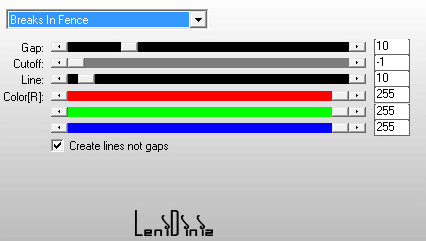
10 - Effects > Plugins AP [Lines] > Lines - SilverLining > Breaks In Fence:
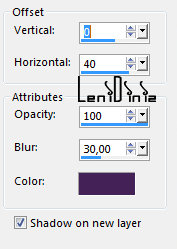
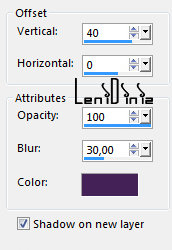
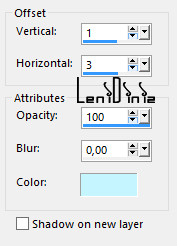
11 - Effects > 3D Effects > Drop Shadow: color 1: #442257 - Shadow on new marked layer:
Selections > Select None.
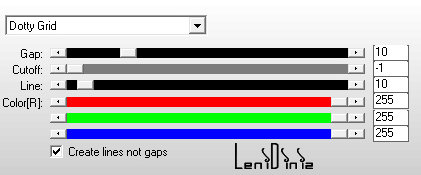
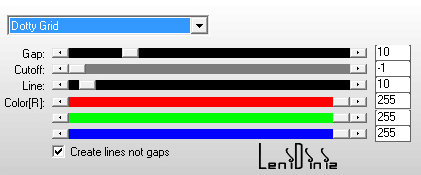
12 - Effects > Plugins AP [Lines] > Lines - SilverLining > Dotty Grid:
13 - Activate the Copy of Raster 1 layer. Selections > Load/Save Selections > Load Selection from Alpha Channel > leni_sim_Selection #2 Selections > Promote Selection to layer. 14 - Effects > Plugins AP [Lines] > Lines - SilverLining > Arrow:
15 - Effects > 3D Effects > Drop Shadow: color 1: #442257 - Shadow on new marked layer:
Selections > Select None.
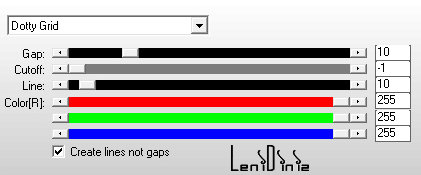
16 - Effects > Plugins AP [Lines] > Lines - SilverLining > Dotty Grid:
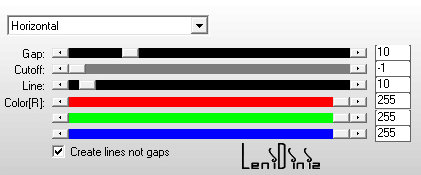
17 - Activate the Copy of Raster 1 layer. Selections > Load/Save Selections > Load Selection from Alpha Channel > leni_sim_Selection #3 Selections > Promote Selection to layer. 18 - Effects > Plugins AP [Lines] > Lines - SilverLining > Horizontal:
19 - Effects > 3D Effects > Drop Shadow: color 1: #442257 - Shadow on new marked layer:
Selections > Select None.
20 - Effects > Plugins AP [Lines] > Lines - SilverLining > Dotty Grid:
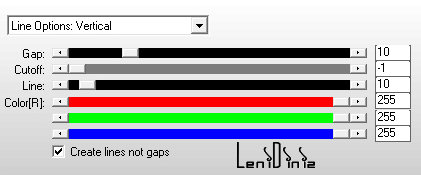
21 - Activate the Copy of Raster 1 layer. Selections > Load/Save Selections > Load Selection from Alpha Channel > leni_sim_Selection #4 Selections > Promote Selection to layer. 22 - Effects > Plugins AP [Lines] > Lines - SilverLining > Line Options: Vertical:
23 - Effects > 3D Effects > Drop Shadow: color 1: #442257 - Shadow on new marked layer:
Selections > Select None.
24 - Effects > Plugins AP [Lines] > Lines - SilverLining > Dotty Grid:
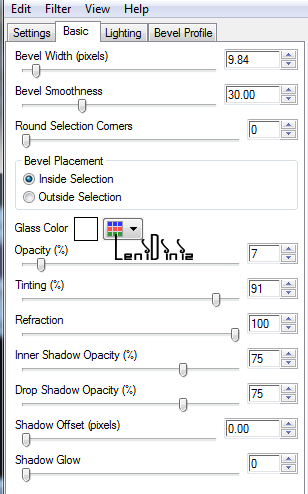
25 - Activate top layer (Promoted Selection). Edit > Copy no decor_sim_leni. Edit > Paste As New Layer. 26 - Edit > Copy no leni_sim_decor-2. Edit > Paste As New Layer. With the Pick Tool, position: Position X: 684 Position Y: 282 27 - Selections > Select All Selections > Float. Selections > Defloat. Paint with color 1: #442257 - or any other color you like. Selections > Select None. 28 - Effects > Plugin Alien Skin Eye Candy 5: Impact > Glass Settings: Clear
Layers > Merge > Merge Down.
29 - Edit > Copy no WordArt_SIMPSP21. Edit > Paste As New Layer.
30 - Image > Resize: 90% - all layers unchecked. With the Pick Tool, position: Position X: 15 Position Y: 193 Colorize WordArt: - Activate the WordArt layer - Set the Foreground with color 1: #442257 (or whatever color you want for WordArt) and the Background color: #000000 (the original WordArt color)
- Activate the Color Replacer Tool
Effects > 3D Effects > Drop Shadow: Color 2: #c5f4fe - uncheck Shadow on new layer.
31 - Edit > Copy Special > Copy Merged.
32 - Image > Add Borders > Symmetric: 2 px color 1: #442257 2 px color 2: #c5f4fe 2 px color 1: #442257 33 - Selections > Select All. Image > Add Borders > Symmetric: 45 px any color. Selections > Invert. 34 - Edit > Paste Into Selection.
35 - Adjust > Blur > Gaussian Blur > 35
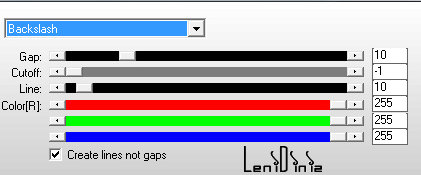
36 - Effects > Plugins AP [Lines] > Lines - SilverLining > Backslash:
37 - Selections > Invert. Effects > 3D Effects > Drop Shadow: 0 / 0 / 100 / 40, color 1: #442257 Edit > Repeat Drop Shadow. 38 - Edit > Copy the Main Tube Image > Resize if necessary. Adjust > Sharpness > Sharpen. Position of your choice. Effects > 3D Effects > Drop Shadow: as you prefer. 39 - Image > Add Border > Symmetric: 2 px - color 1: #442257
40 - Apply your watermark or signature. File > Export > JPEG Optimizer.
CREDITS: Tutorial by Leni diniz English Translation by Moderation SIM-PSP Main Tube: Tubed by Grisi WordArt: by SIM PSP
Feel free to send your versions. I will be happy to publish them on our website.
|