|
SIM
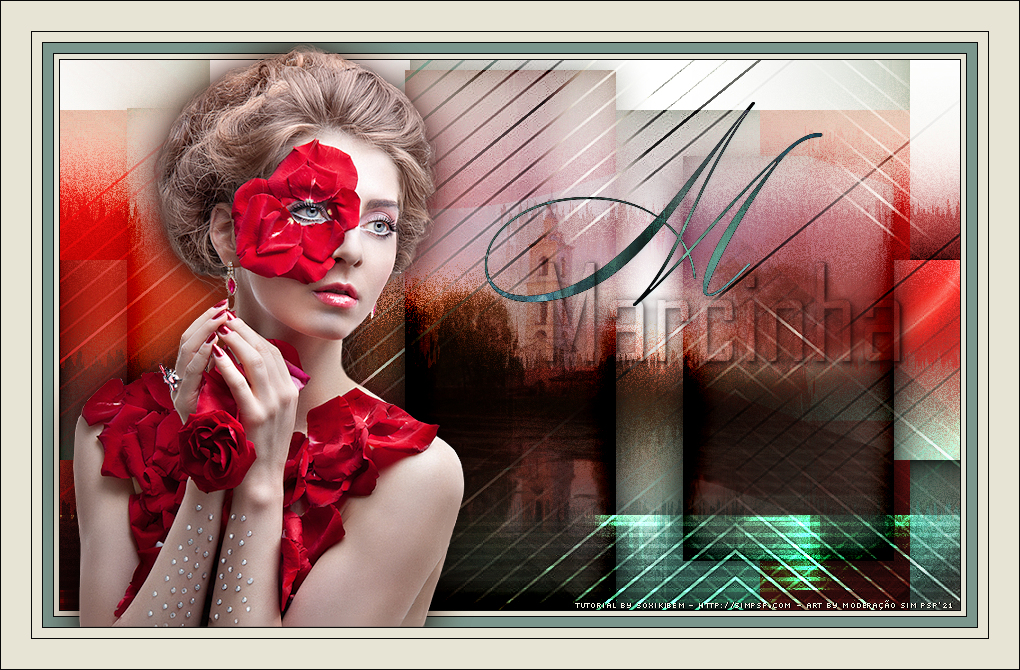
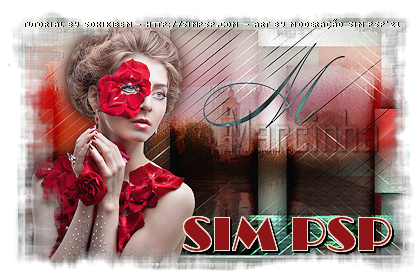
tutorial created to symbolize the third letter of SimPsp. Marcinha you are a great companion, friend and confidant. I have great respect and affection for you... Loviuuuuu
Tutorial by Soxikibem English Translation by Moderation SIM-PSP Original Tutorial
MATERIAL 1 Main Tube of your choice 1 Misted Landscape of your choice NarahsMasks_1637 m_bySoxikibem marcinhaBySoxikibem Selections: m_marcinhaXiki.PspSelection (Save in your PSP's Selection folder) Gradient: mqc XikiM.PspGradient (Save to Gradient folder on your PSP)
PLUGINS Carolaine and Sensibility Filters Unlimited 2.0 Italian Editors Effect Mehdi
TUTORIAL
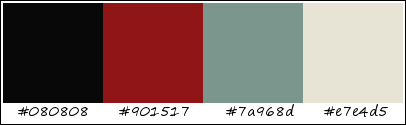
1 - Open the material on the PSP, duplicate and close the original. Choose four colors to work with: Color 1: Foreground #080808 Color 2: Background #901517 Color 3: #7a968d Color 4: #e7e4d5
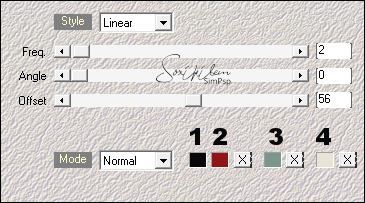
2 - Open a new transparent image of 900x550px. Effects > Plugins > Mehdi > Wavy Lab 1.1. With the colors in the sequence 1, 2, 3, 4.
3 - Selections > Select All. Edit > Copy the Misted Landscape. Edit > Paste Into Selection. Selections > Select None.
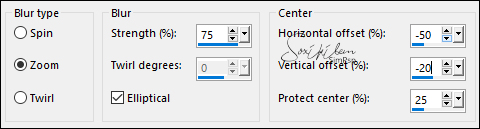
4 - Adjust > Blur > Radial Blur.
Effects > Edge Effects > Enhance.
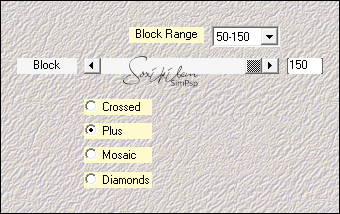
5 - Layers > Duplicate. Effects > Plugins > Mehdi > Sorting Tiles.
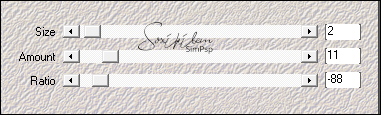
6 - Effects > Plugins > Mehdi > Melt.
Layers > Properties > General > Blend Mode: Soft Light.
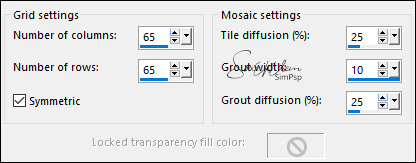
7 - Activate Layer Raster 1. Effects > Texture Effects > Mosaic - Antique.
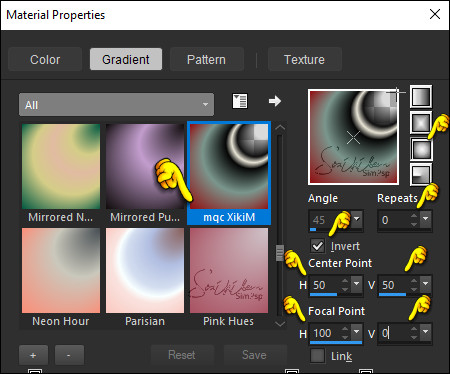
8 - Activate Layer Copy of Raster 1. Layers > New Raster Layer. Paint this layer with the gradient: Material Properties > Gradient: mqc XikiM5
9 - Layers > New Mask Layer > From Image: NarahsMasks_1637. Effects > Edge Effects > Enhance. Layers > Merge > Merge Group. Layers > Properties > General > Blend Mode: Hard Light.
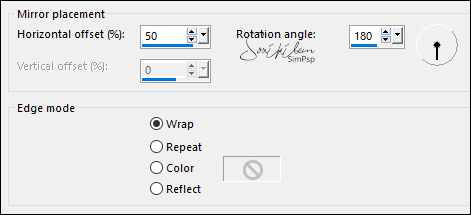
10 - Layers > Duplicate. Change Blend Mode from Layer to Screen. Effects > Reflection Effects > Rotating Mirror.
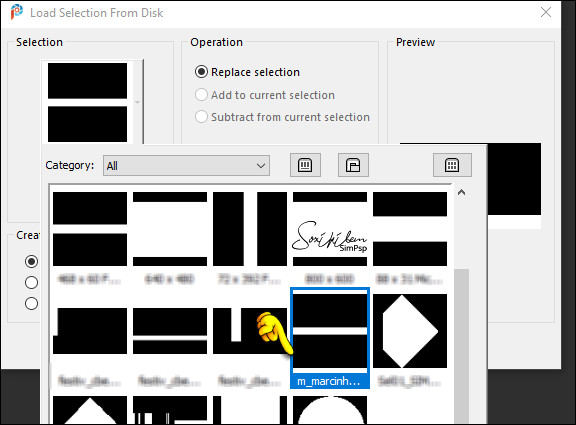
11 - Layers > New Raster Layer. Selections > Load/Save Selection > Load Selection From Disk: m_marcinhaXiki.
Edit > Copy Special > Copy Merged. Edit > Paste Into Selection.
12 - Effects > Plugins > Mehdi > Sorting Tiles.
Selections > Select None.
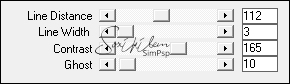
13 - Effects > Plugins > Carolaine and Sensibility > cs_texture.
Layers > Properties > General > Blend Mode: Dodge.
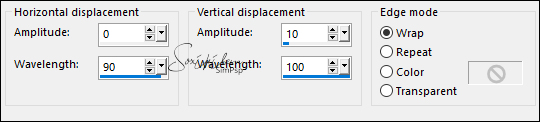
14 - Layers > Duplicate. Effects > Distortion Effects > Wave.
15 - Effects > Plugins > Italian Editors Effect > Effectto Fantasma.
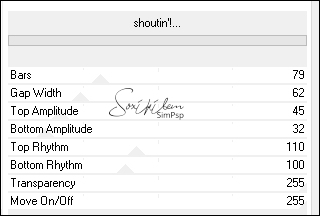
16 - Effects > Plugins > Filters Unlimited 2.0 > VM Extravaganza > shoutin'!.
Layers > Properties > General > Blend Mode: Overlay.
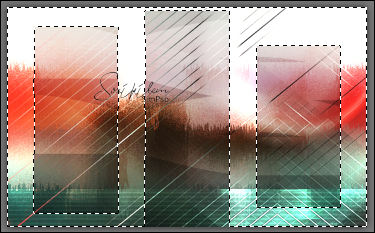
17 - With Magic Wand: Tolerance and Feather: 0, click on the white part of this effect:
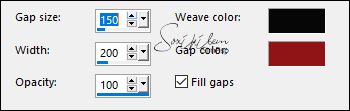
18 - Effects > Texture Effects > Weave. Colors: 1 and 2.
Selections > Invert.
18 - Layers > New Raster Layer. Edit > Copy the Misted Landscape. Edit > Paste Into Selection. Layers > Properties > General > Blend Mode: Soft Light.
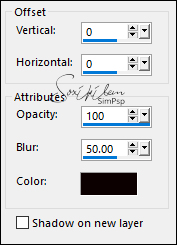
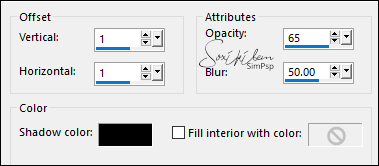
19 - Activate Layer Copy of Raster 2. Effects > 3D Effects > Drop Shadow.
20 - Activate the Top Layer (Raster 3). Layers > New Raster Layer. Effects > 3D Effects > Cutout.
Layers > Properties > General > Blend Mode: Burn. Selections > Select None.
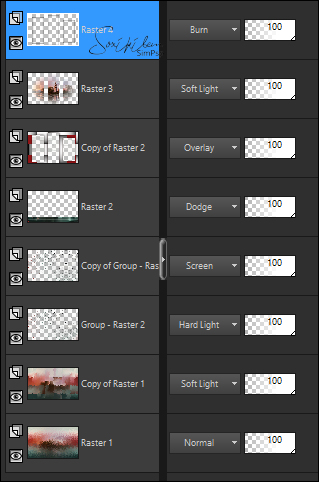
21 - Check the order of layers: If desired, modify the Blends to match the colors you are using.
22 - Image > Add Borders > Symmetric: 1px color 1 5px color 4 1px color 1 10px color 3 1px color 1
23 - Edit > Copy the Main Tube. Edit > Paste as New Layer. Position to the left. Effects > 3D Effects > Drop Shadow: as you prefer.
24 - Image > Add Borders > Symmetric: 10px color 4 1px color 1 30px color 4 1px color 1
25 - Edit > Copy the m_bySoxikibem. Edit > Paste as New Layer. With the Pick Tool tool, position: Position X 482, Position Y 99. Layers > Properties > General > Blend Mode: Difference.
26 - Edit > copy the marcinhaBySoxikibem. Edit > Paste as New Layer. With the Pick Tool tool, position: Position X 451, Position Y 253. Layers > Properties > General > Blend Mode: Multiply.
27 -
Apply your watermark or signature.
CREDITS: Tutorial by Soxikibem English Translation by Moderation SIM-PSP Main Tube: Tubed by Cibi-Bijoux Misted Landscape: by Ana Ridzi Mask by Narah WordArt: by Soxikibem
Feel free to send your versions. I will be happy to publish them on our website.
|