|

Tutorial by
Leni Diniz
English Translation by Moderation SIM-PSP
Original Tutorial

MATERIAL
1 Main Tube of your choice
decor_niver_leni
Narah_mask_0846
Narah_Mask_1158
Wordart
Layer Alpha Chanel

PLUGINS
Mehdi
Filter Unlimited
VM Toolbox
AP Line
Graphics Plus
Nota:
The AP Line plugin, you can configure the colors you want.
In the Line Option Vertical effect, the last 3 settings are for the
colors you want to use.
If you are using the primary colors: red, green and blue, just leave
the used color at 255 and the other two at 0.
But, if it's a color outside the primary colors, you'll have to take
the color codes and put them in RED, GREEN and BLUE, that way, you'll
get the color you want.
This goes for all plugins that have RED, GREEN and BLUE
configurations.
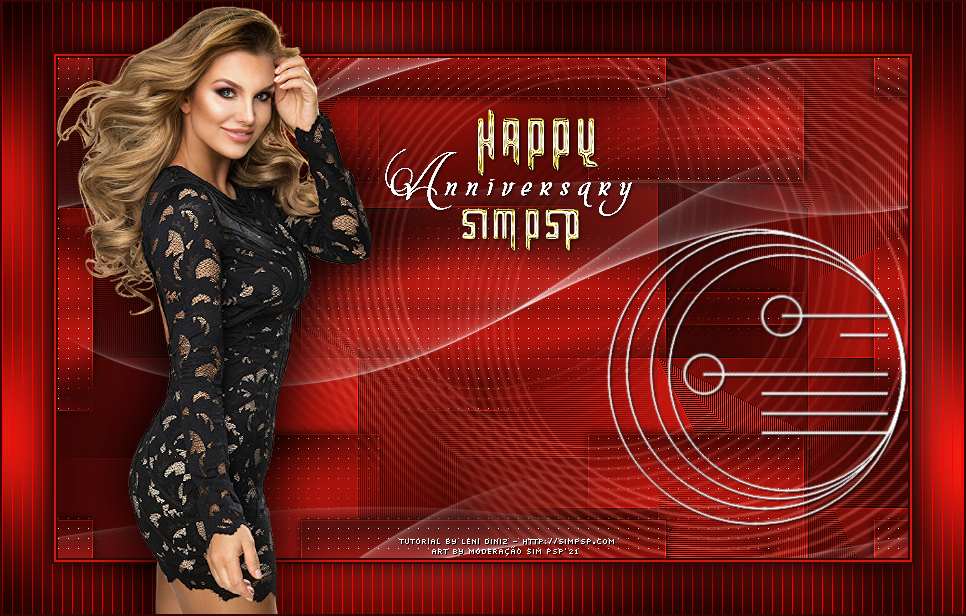
TUTORIAL
01-
Open the material on the PSP, duplicate and close the
original.
Choose two
colors to work with.
#360604 Foreground
#cf1911 Background

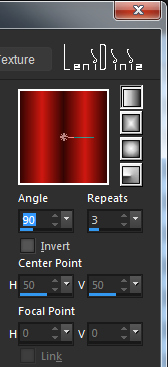
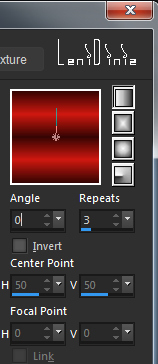
02- Form a Linear gradient: Angle: 90 - Repeats: 3, Invert:
uncheck
03- Open the Alpha Channel file.
Paint with the gradient.
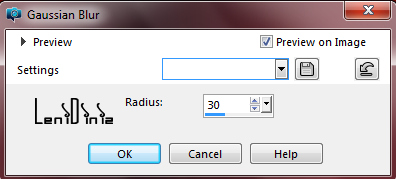
04- Adjust > Blur > Gaussiam Blur > 30:
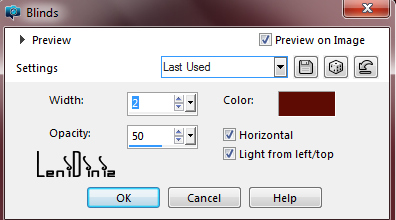
05- Effects > Texture Effects > Blinds:
Color: Foreground
06- Effects > Plugins Mehdi > Sorting Tiling: 150-300 > 300
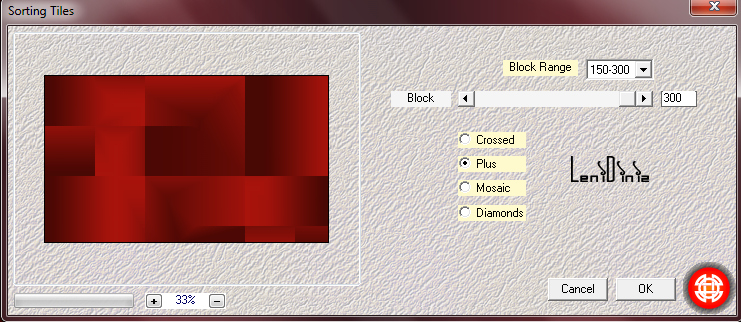
Effects > Edge > Enhance
07- Layers > New Raster Layer.
Paint with Linear Gradient: Angle: 0 - Repeats: 3,
Invert: uncheck:
08- Adjust > Blur > Gaussiam Blur > 30:
09- Selections > Load/Save Selection > Load Selection From
Alpha Chanel: leni_niver_sim
10- Selections > Invert.
Press the Delete key on your keyboard.
Selections > Select None.
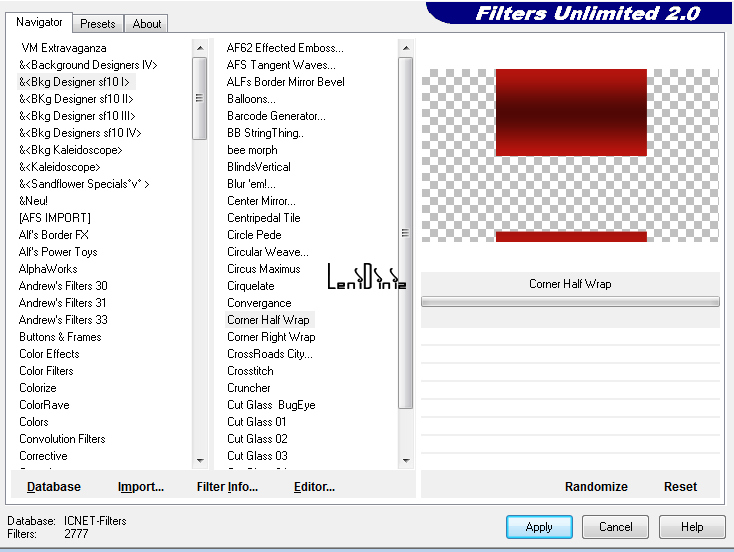
11- Effects > Plugins > Filter Unlimited > BKG Designer sf10
I > Corner Half Wrap:
12-
Effects > 3D Effects > Drop Shadow: 0 > 0 > 100 > 30,
color: #000000
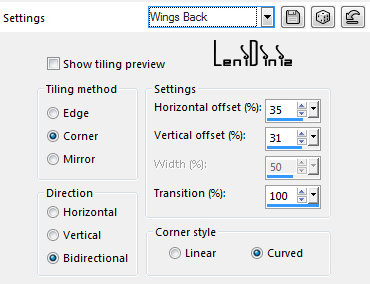
13- Effects > Image Effects > Seamless Tiling > Wings Back:
14- Effects > Plugin > VM Toolbox > Instant Tile: 224 > 116

Effects > Edge > Enhance
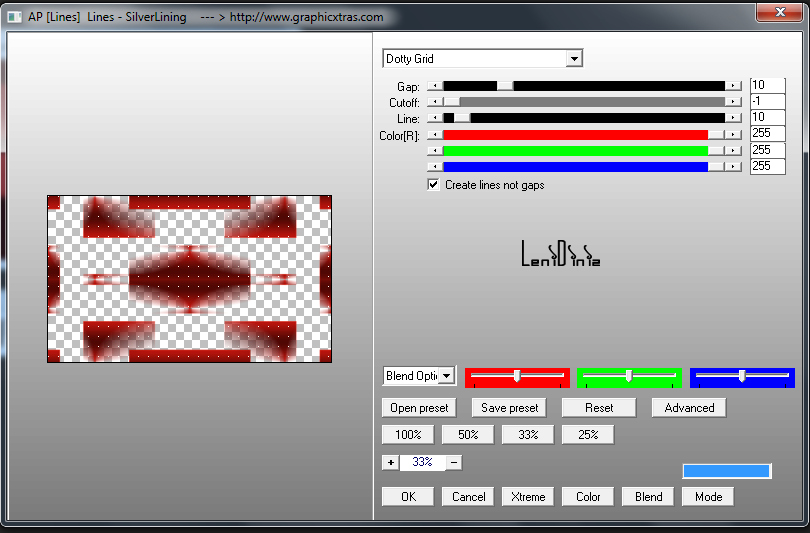
15- Effects > Plugin AP Line > Line - Silver Linening > Dotty
Grid:
16- Layers > New Raster Layer
Paint with the color #FFFFFF
(white)
Layers > New Mask Layer > From image: Narah_mask_0846
Layers > Merge > Merge Group
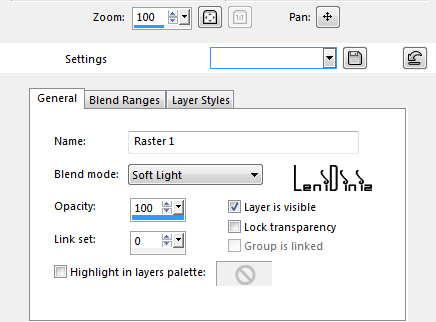
17- Layers > Propertier > General > Blend mode: Soft Light
18- Layers > New Raster Layer.
Paint with the color #FFFFFF (white)
Layers > New Mask Layer > From image: Narah_Mask_1158
Layers > Merge > Merge Group
Effects > Image Effects > Seamless Tiling > Wings Back:
19- Edit > Copy no
decor_niver_leni
Edit > Paste As New Layer.
With the Pick Tool Tool, position: Position X 548 Position Y
169
20- Effects > 3D Effects > Drop shadow: 1 > 1 > 100 > 2,
color: #000000
21- Image > Add Borders: Symmetric:
2 px color: foreground
2 px color: background
2 px color: foreground
22- Selections > Select All
23- Image > Add Borders > Symmetric: 50 px any color.
Selections > Invert.
24- Paint with Linear Gradient: Angle: 0 - Repeats: 3,
Invert: uncheck:
25- Adjust > Blur > Gaussian Blur > 30:
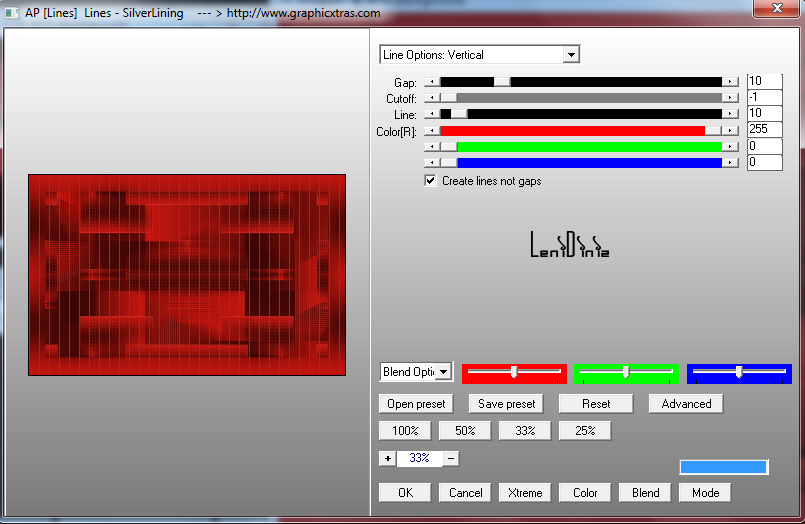
26- Effects > Plugin AP Line > Line - Silver Linening:
Line Option Vertical
*Read the note at the
beginning of the tutorial
27- Selections > Invert.
Effects > 3D Effects > Drop Shadow: 0 > 0 > 100 > 40, color: #000000
28- Selections > Invert.
29- Effects > Plugin > Graphics Plus > Cross Shadow:

30- Selections > Select None.
31- Edit > Copy the Main Tube.
Edit > Paste As New Layer
Image > Resize if necessary.
Position to the left.
Adjust > Sharpeness > Sharpen.
32- Edit > Copy no wordart.
Edit > Paste As New Layer.
With the Pick Tool Tool, position: Position X 383 Position Y 107
Effects > 3D Effects > Drop shadow: 1 > 1 > 80 > 4
33- Image > Add Border > Symmetric: 2 px color: foreground.
34-
Apply your watermark or signature.
File > Export > JPEG Optimizer...
 0, 0,
CREDITS:
Tutorial by
Leni diniz
English Translation by
Moderation SIM-PSP
Main Tube: Tubed by Marcinha
Decor & WordArt: by
Leni diniz
Masks: NarahMask
Feel free to send your versions.
I will be happy to publish them on our website.


|
Tutorial created by Soxikibem, in June
/ 2021. Translated into English in July / 21,
by the Moderation of SIM-PSP. It cannot be
copied, removed from its place, translated
or used in learning lists or groups without
the author's
prior consent. |
|